Using Tags and Metadata
Prerequisites
Tags let you label assets with people, objects, and locations so your team can find and filter content quickly. In this guide you will create a project tag, assign a keyboard shortcut, and manage your tag list.
What You'll Learn
- How to open the project tags page and review existing tags
- How to create a new tag with a type, value, and keyboard shortcut
- How to enable approval rights for person tags
- How to edit and delete tags from the tag list
- How to search and filter tags by type
Step 1: Open the Tags Page
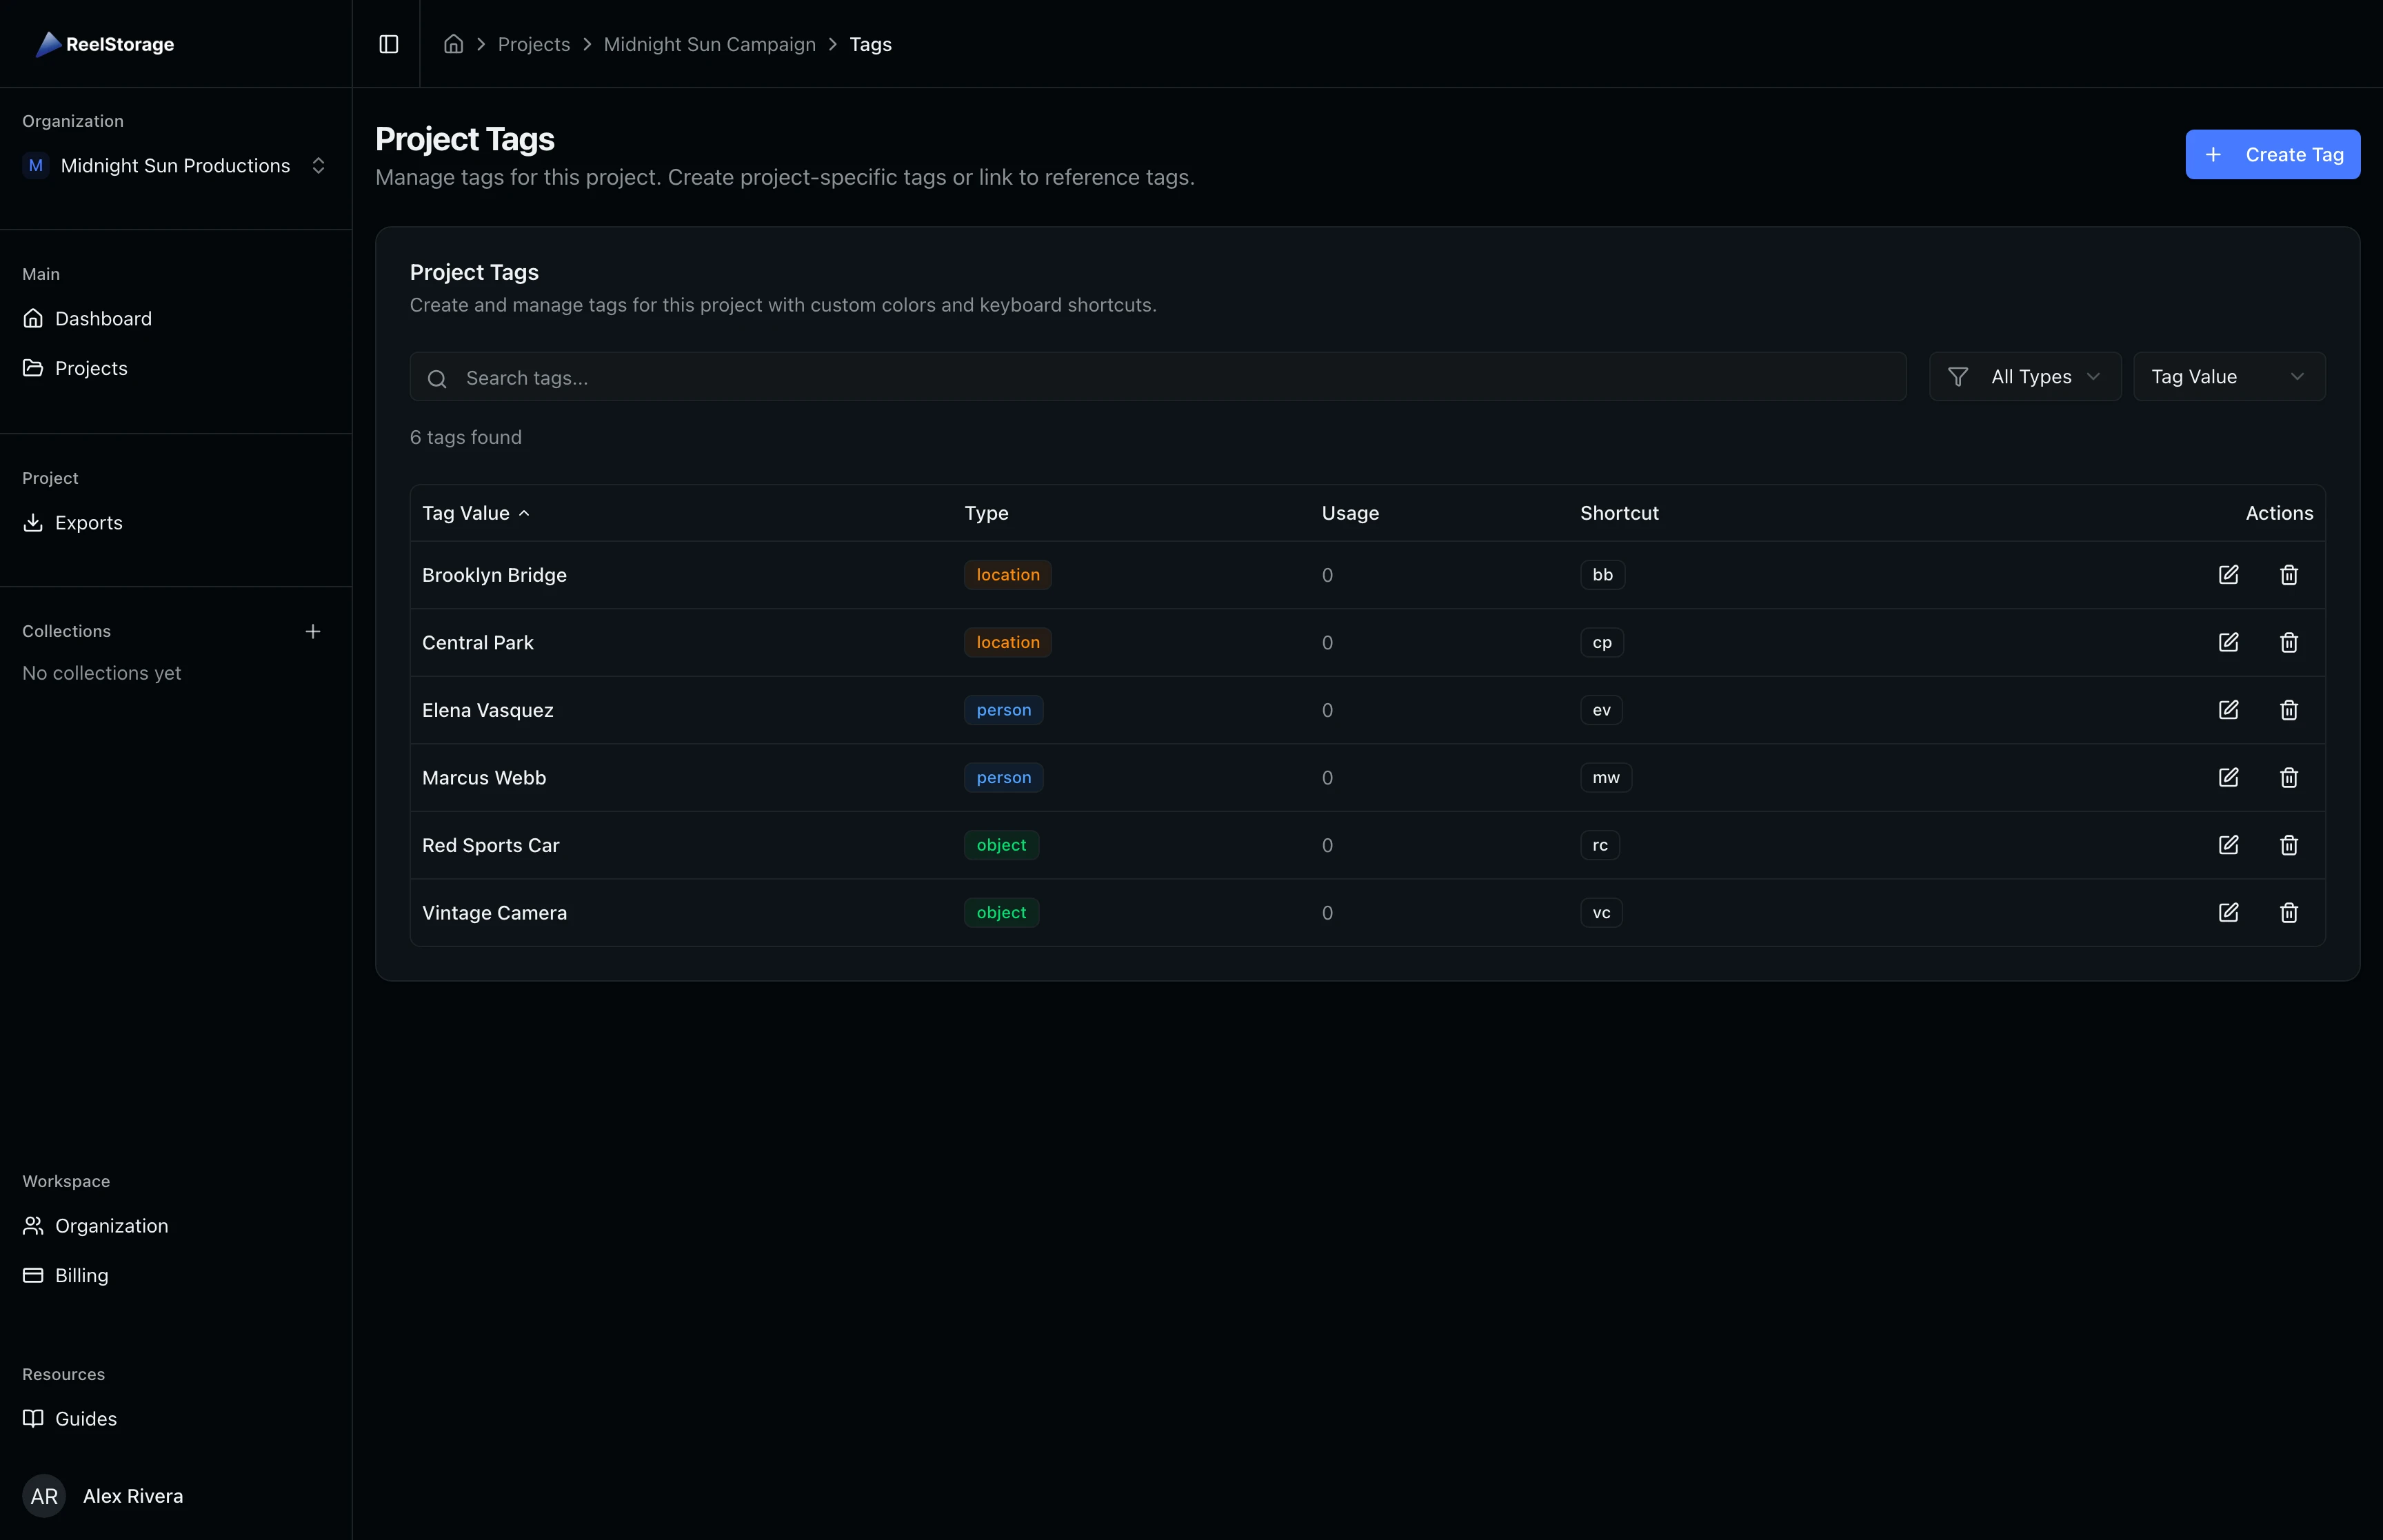
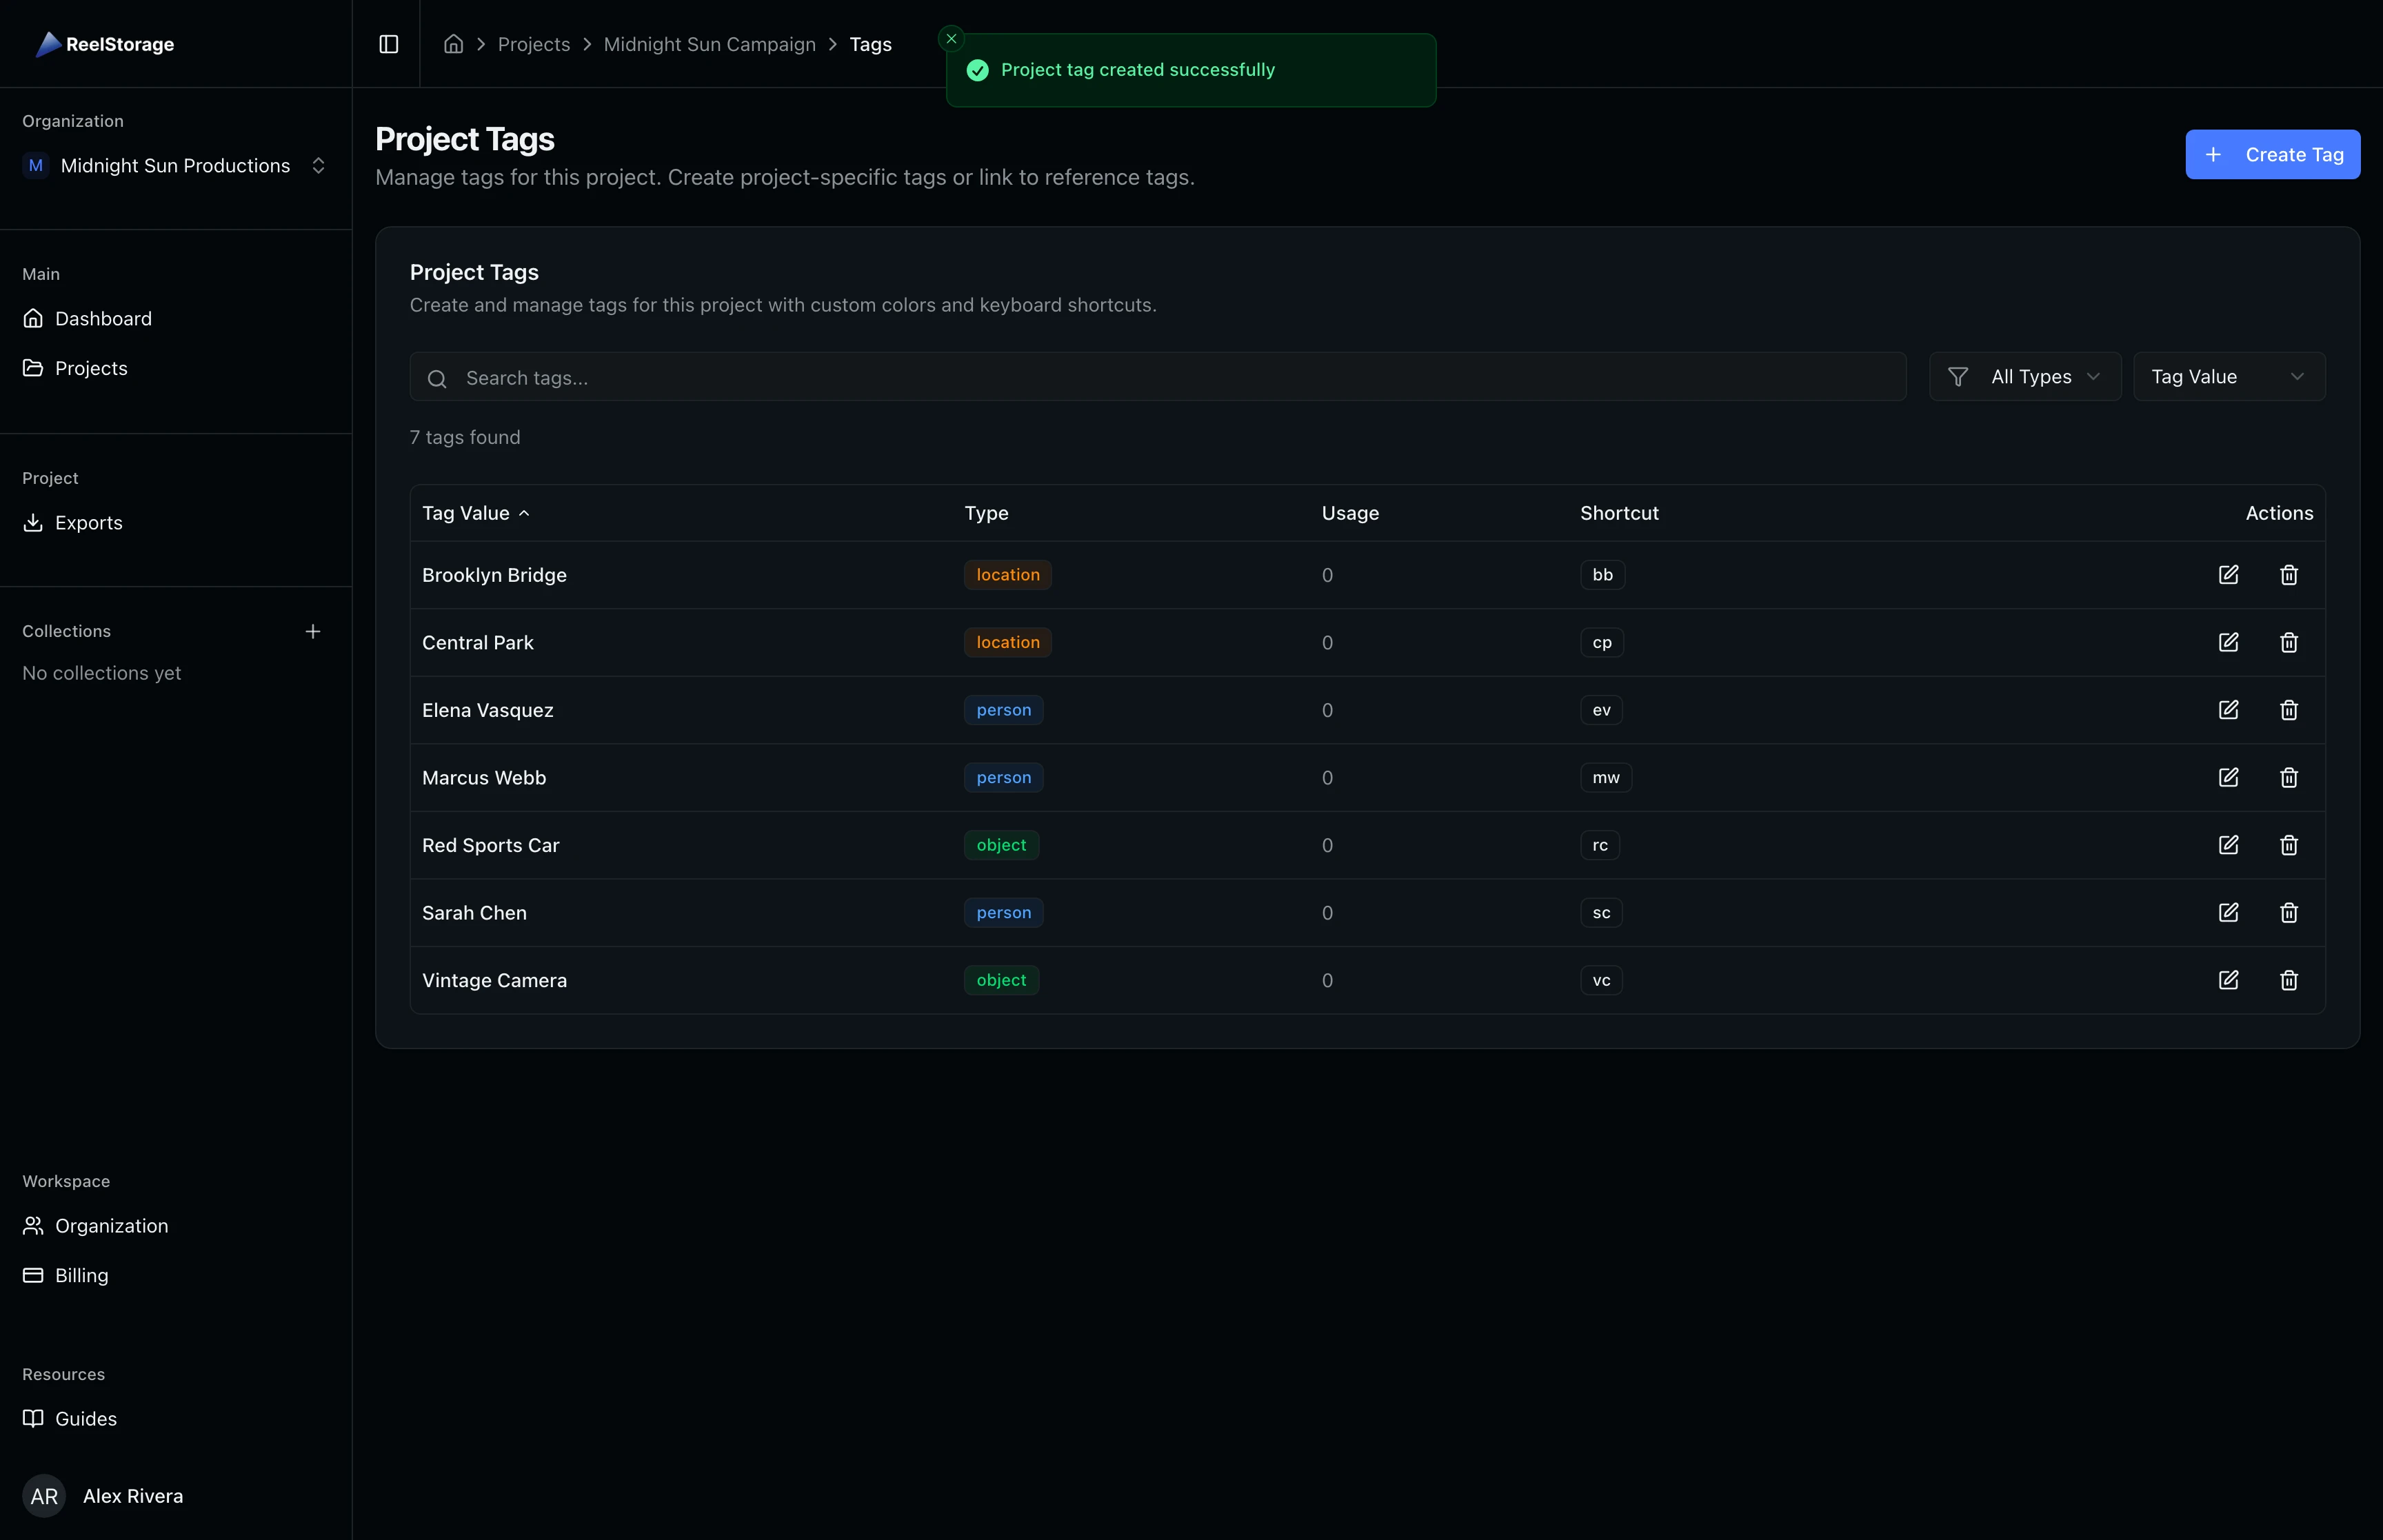
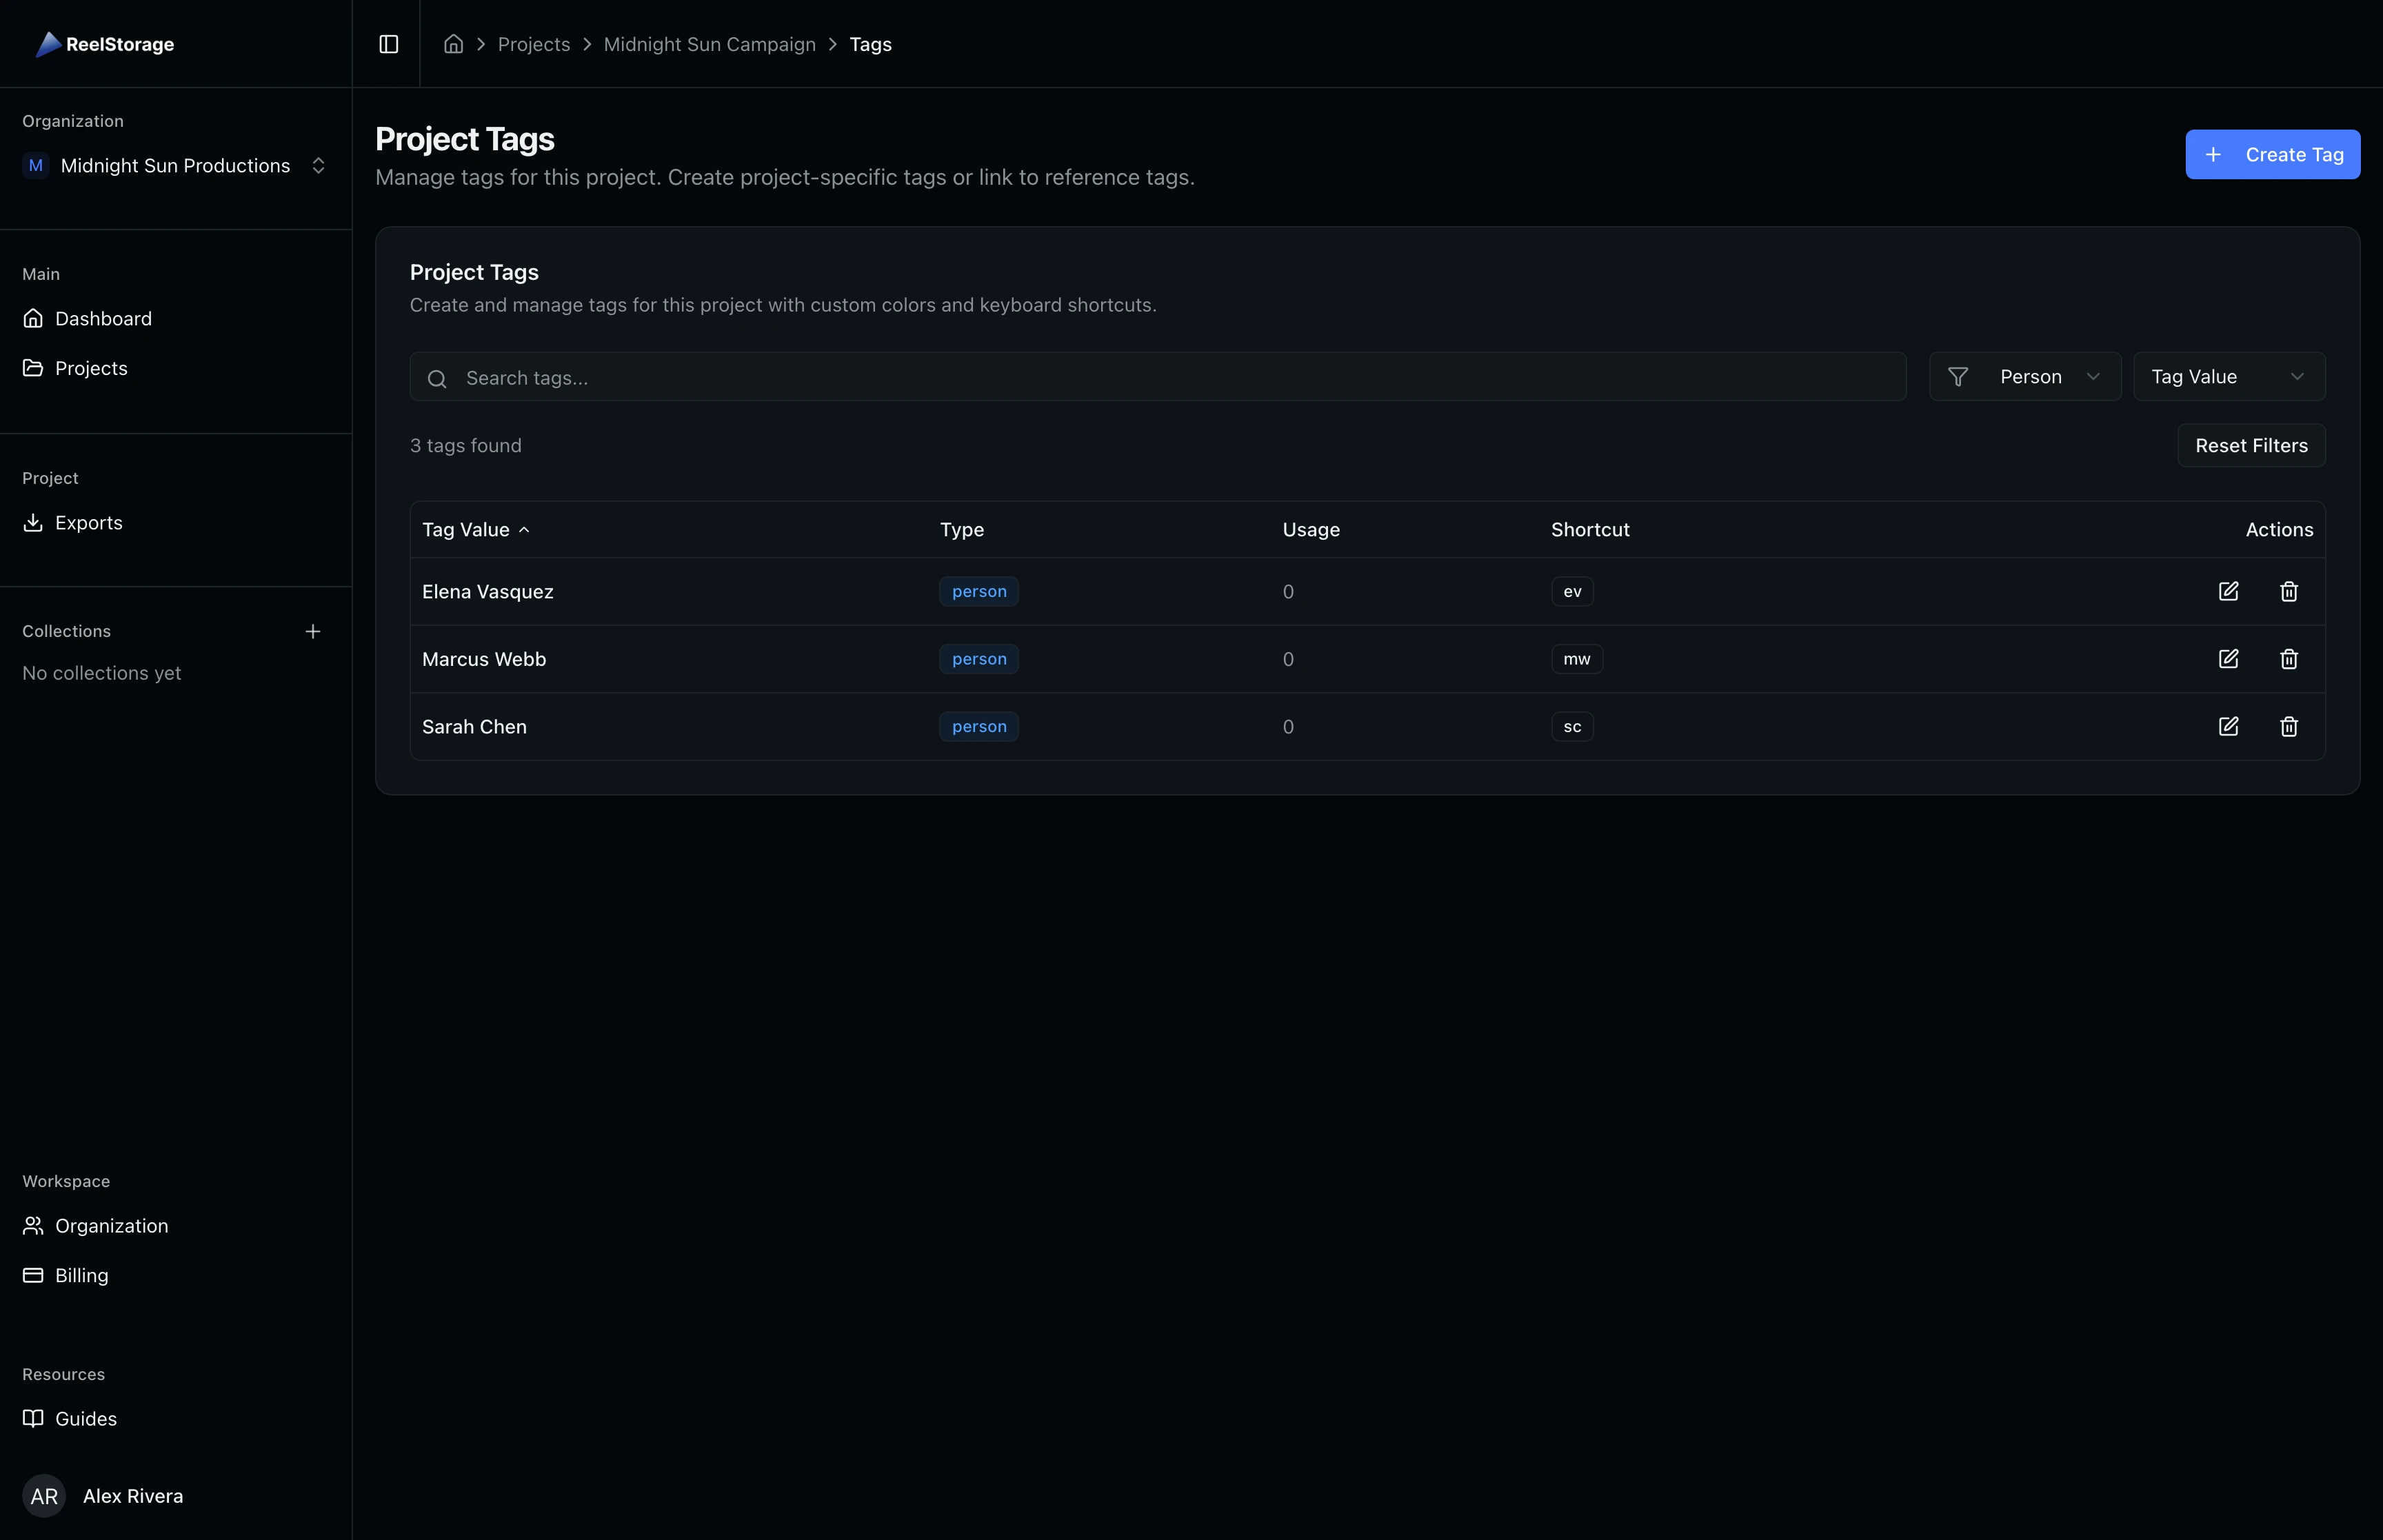
Navigate to your project and click Tags in the sidebar. The tags page displays all tags for this project in a searchable table. Each row shows the tag value, type badge (Person, Object, or Location), usage count, keyboard shortcut, and action buttons. The count at the top reflects how many tags exist in the project.
Step 2: Click Create Tag
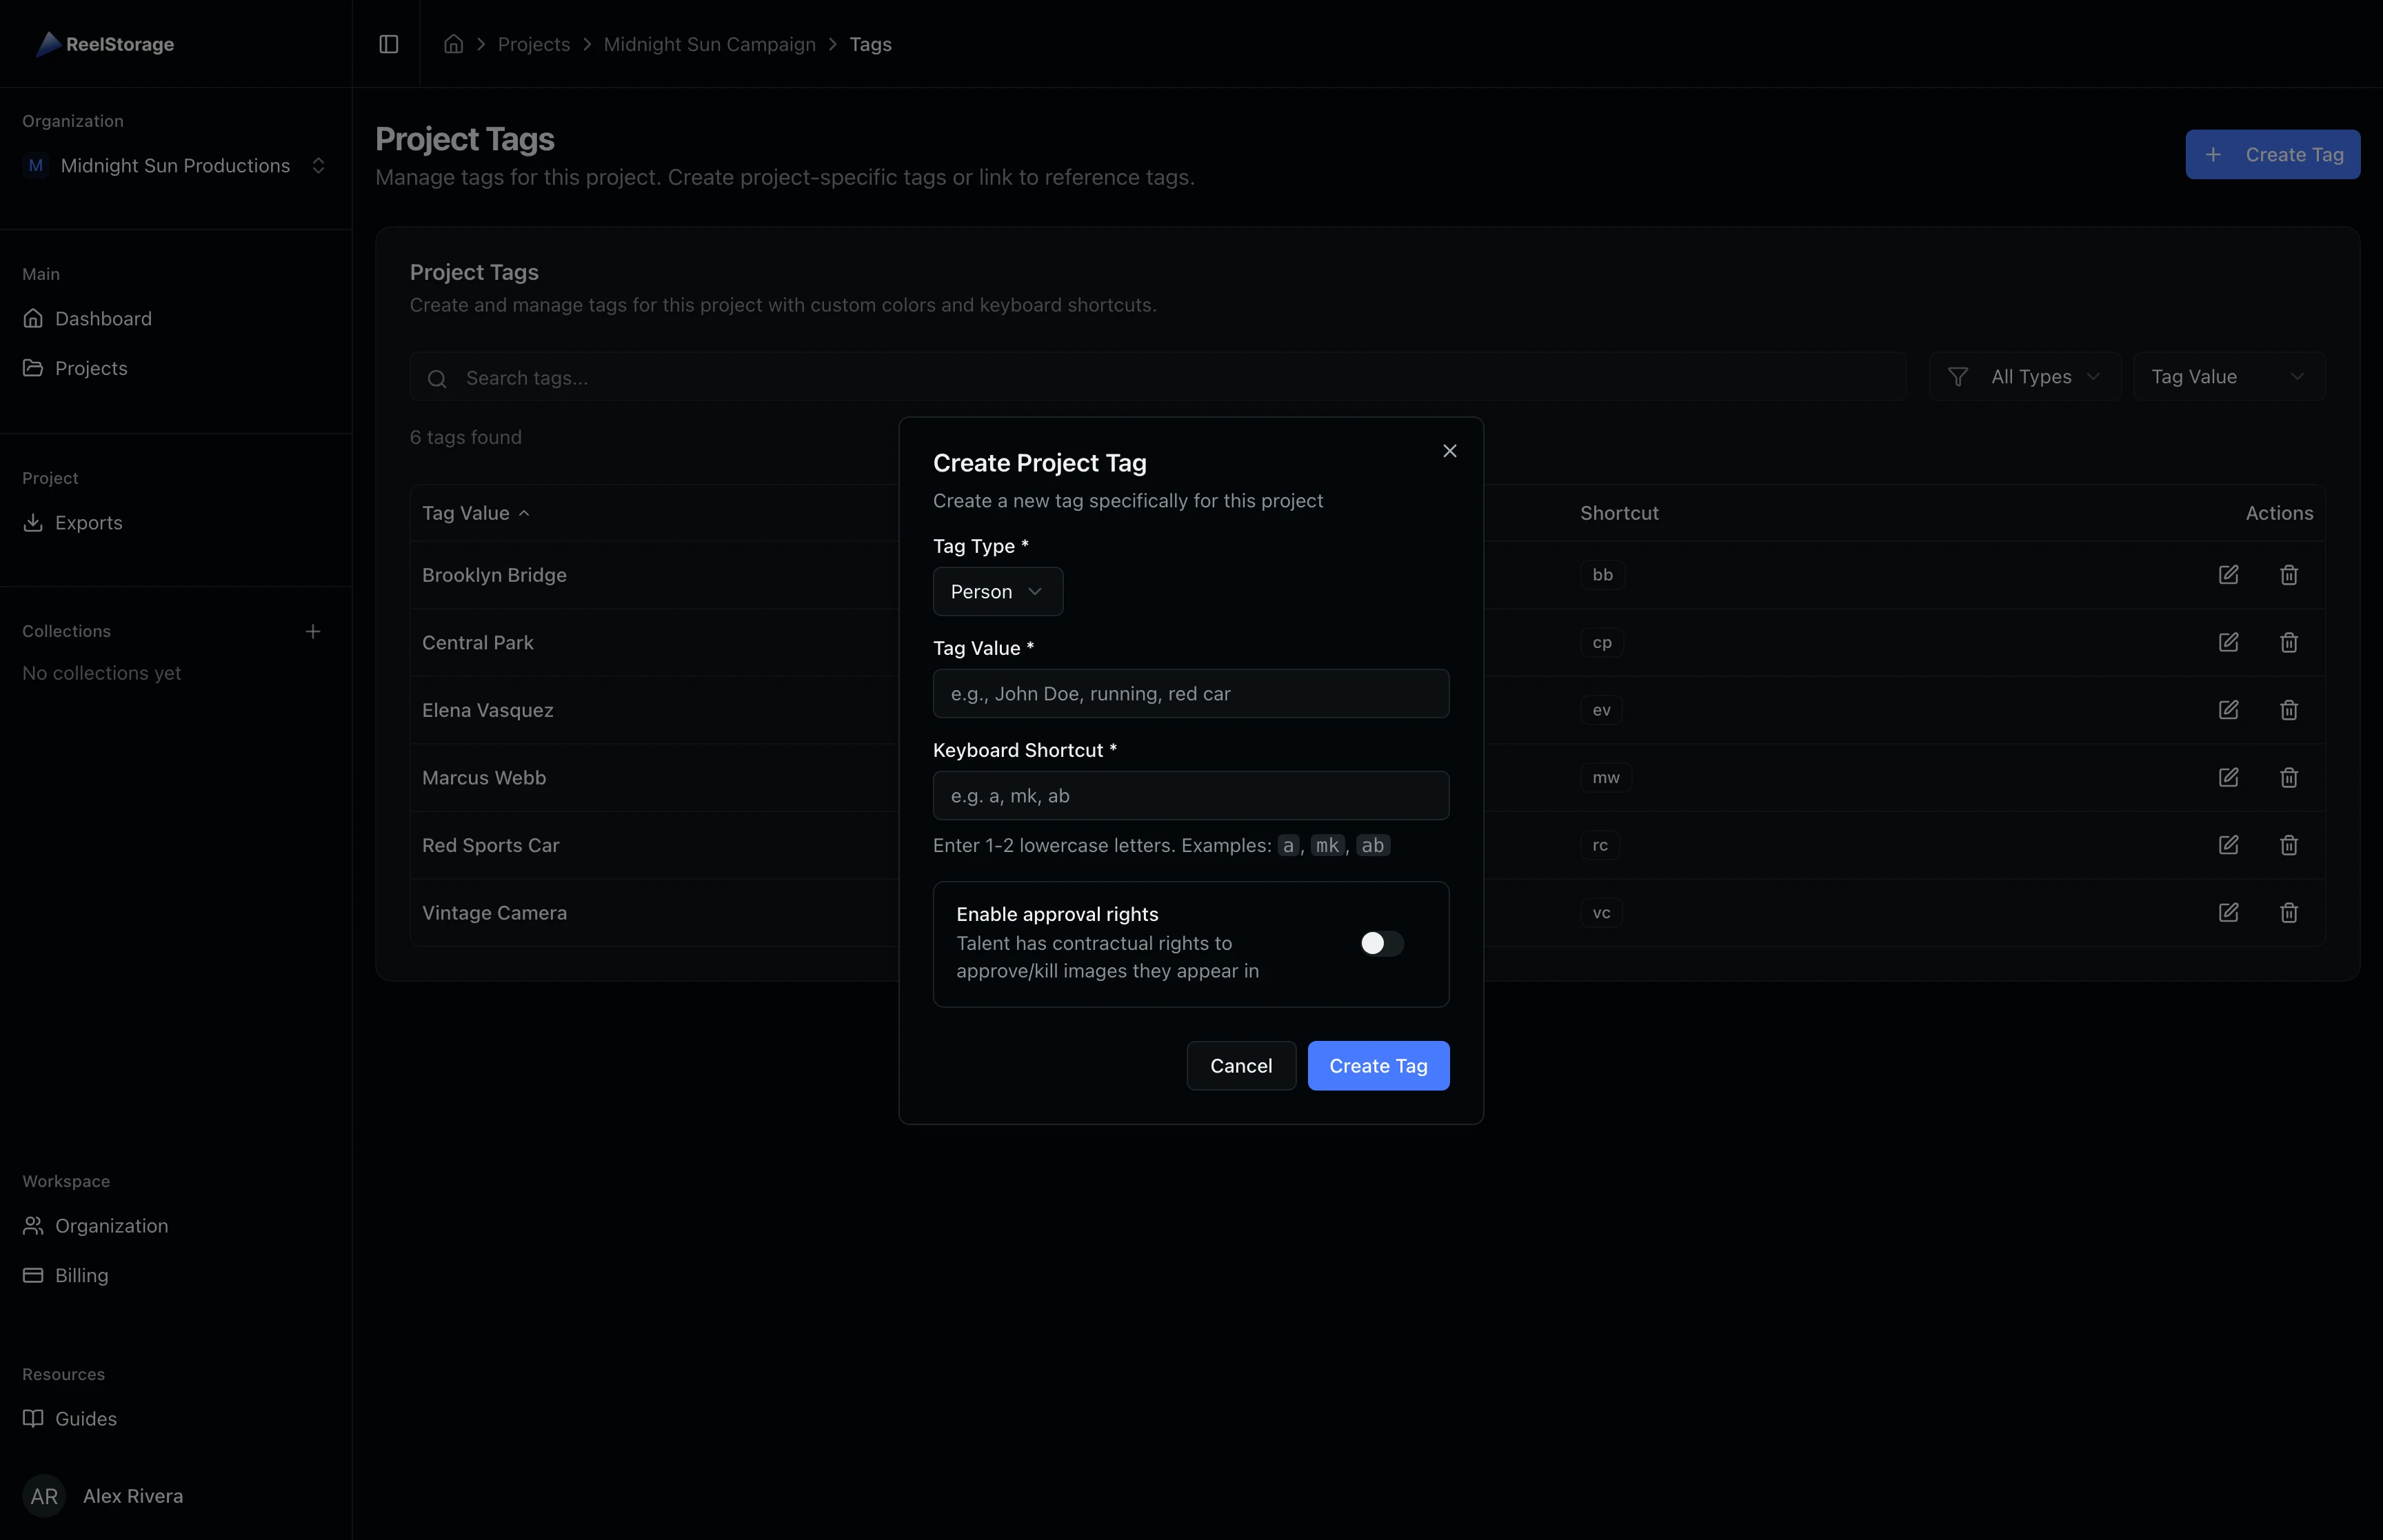
Click the Create Tag button in the top-right corner. A dialog opens with fields for the tag type, tag value, keyboard shortcut, and approval rights. The tag type and value are required. Approval rights only appear when you select the Person type, since only people can have contractual image approval.
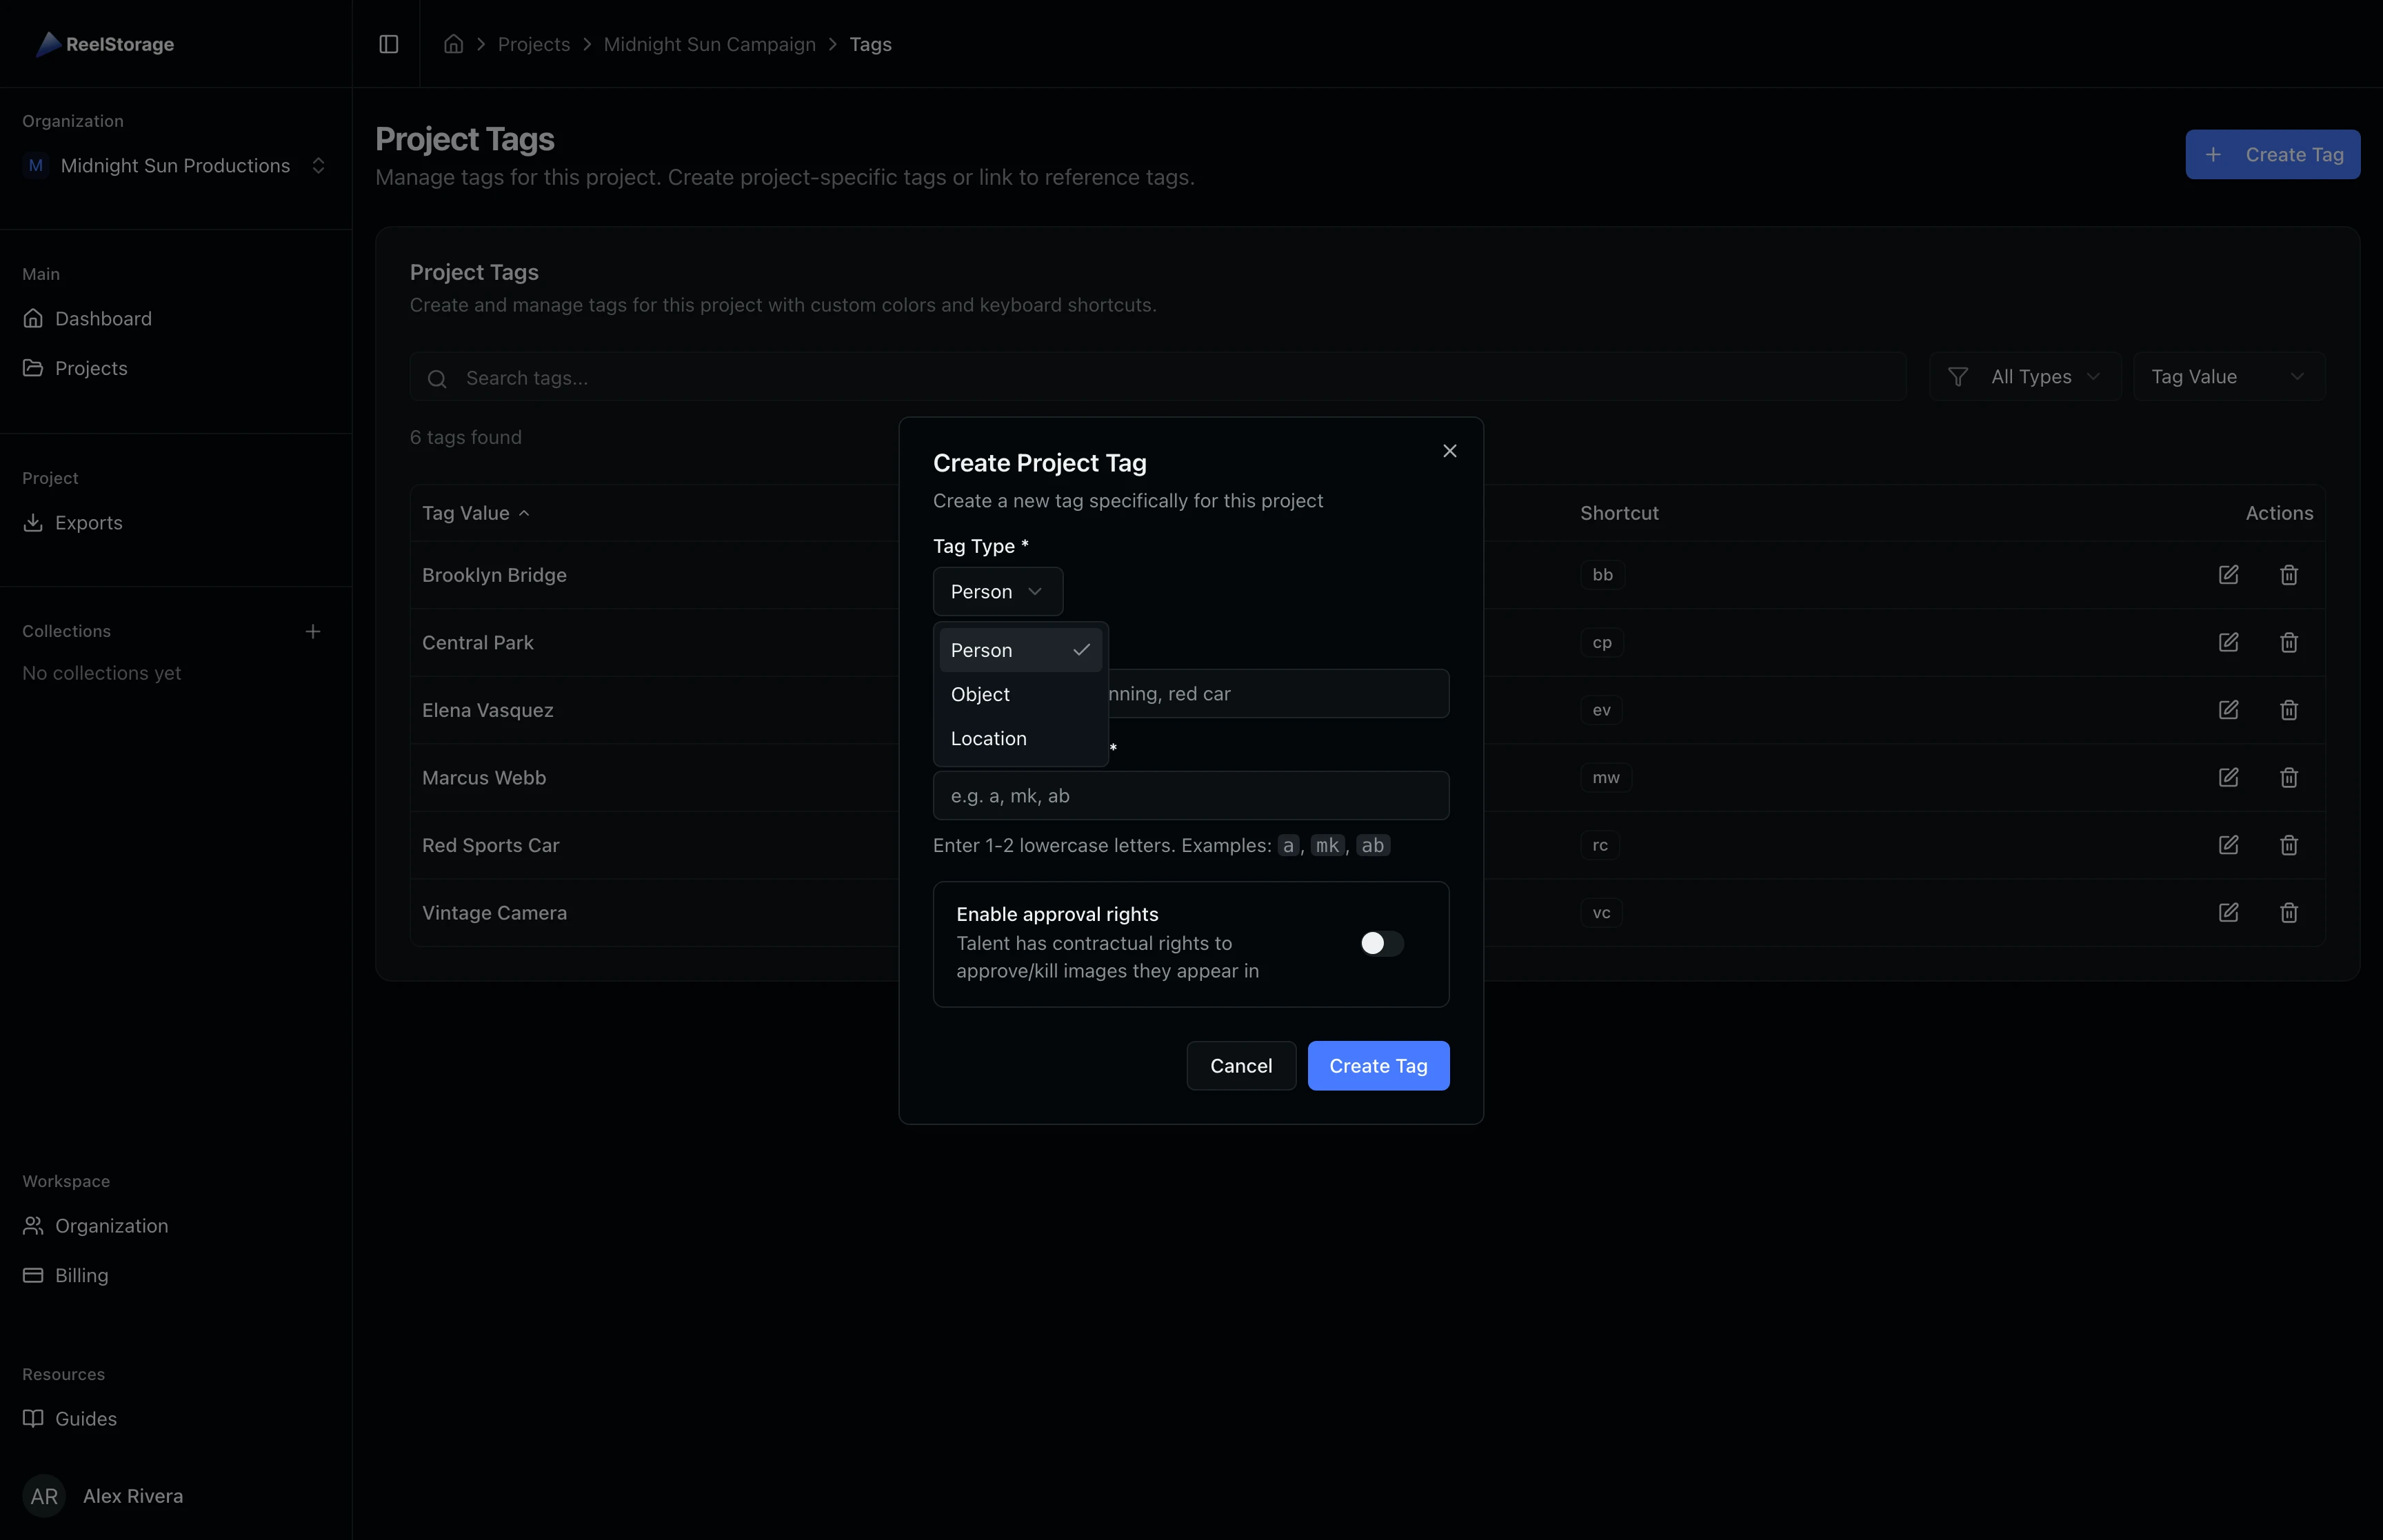
Step 3: Select a Tag Type
Click the Tag Type dropdown to choose between three types:
- Person - Names of talent, crew, or other individuals in the shot. Person tags can carry approval rights for talent who have contractual image approval.
- Object - Items, props, wardrobe pieces, or other physical objects visible in the frame.
- Location - Shooting locations, sets, or landmarks where the photo was taken.
Choose the type that best describes what the tag represents. The type determines the color-coded badge shown in the table and controls whether the approval rights toggle is available.
Step 4: Fill In the Tag Details
Enter the tag value (the name or label you want to apply to assets), assign a keyboard shortcut (1-2 lowercase letters), and toggle approval rights if this is a person tag for talent with contractual approval. The keyboard shortcut lets you tag assets quickly while browsing the grid by pressing the assigned keys instead of opening a menu.
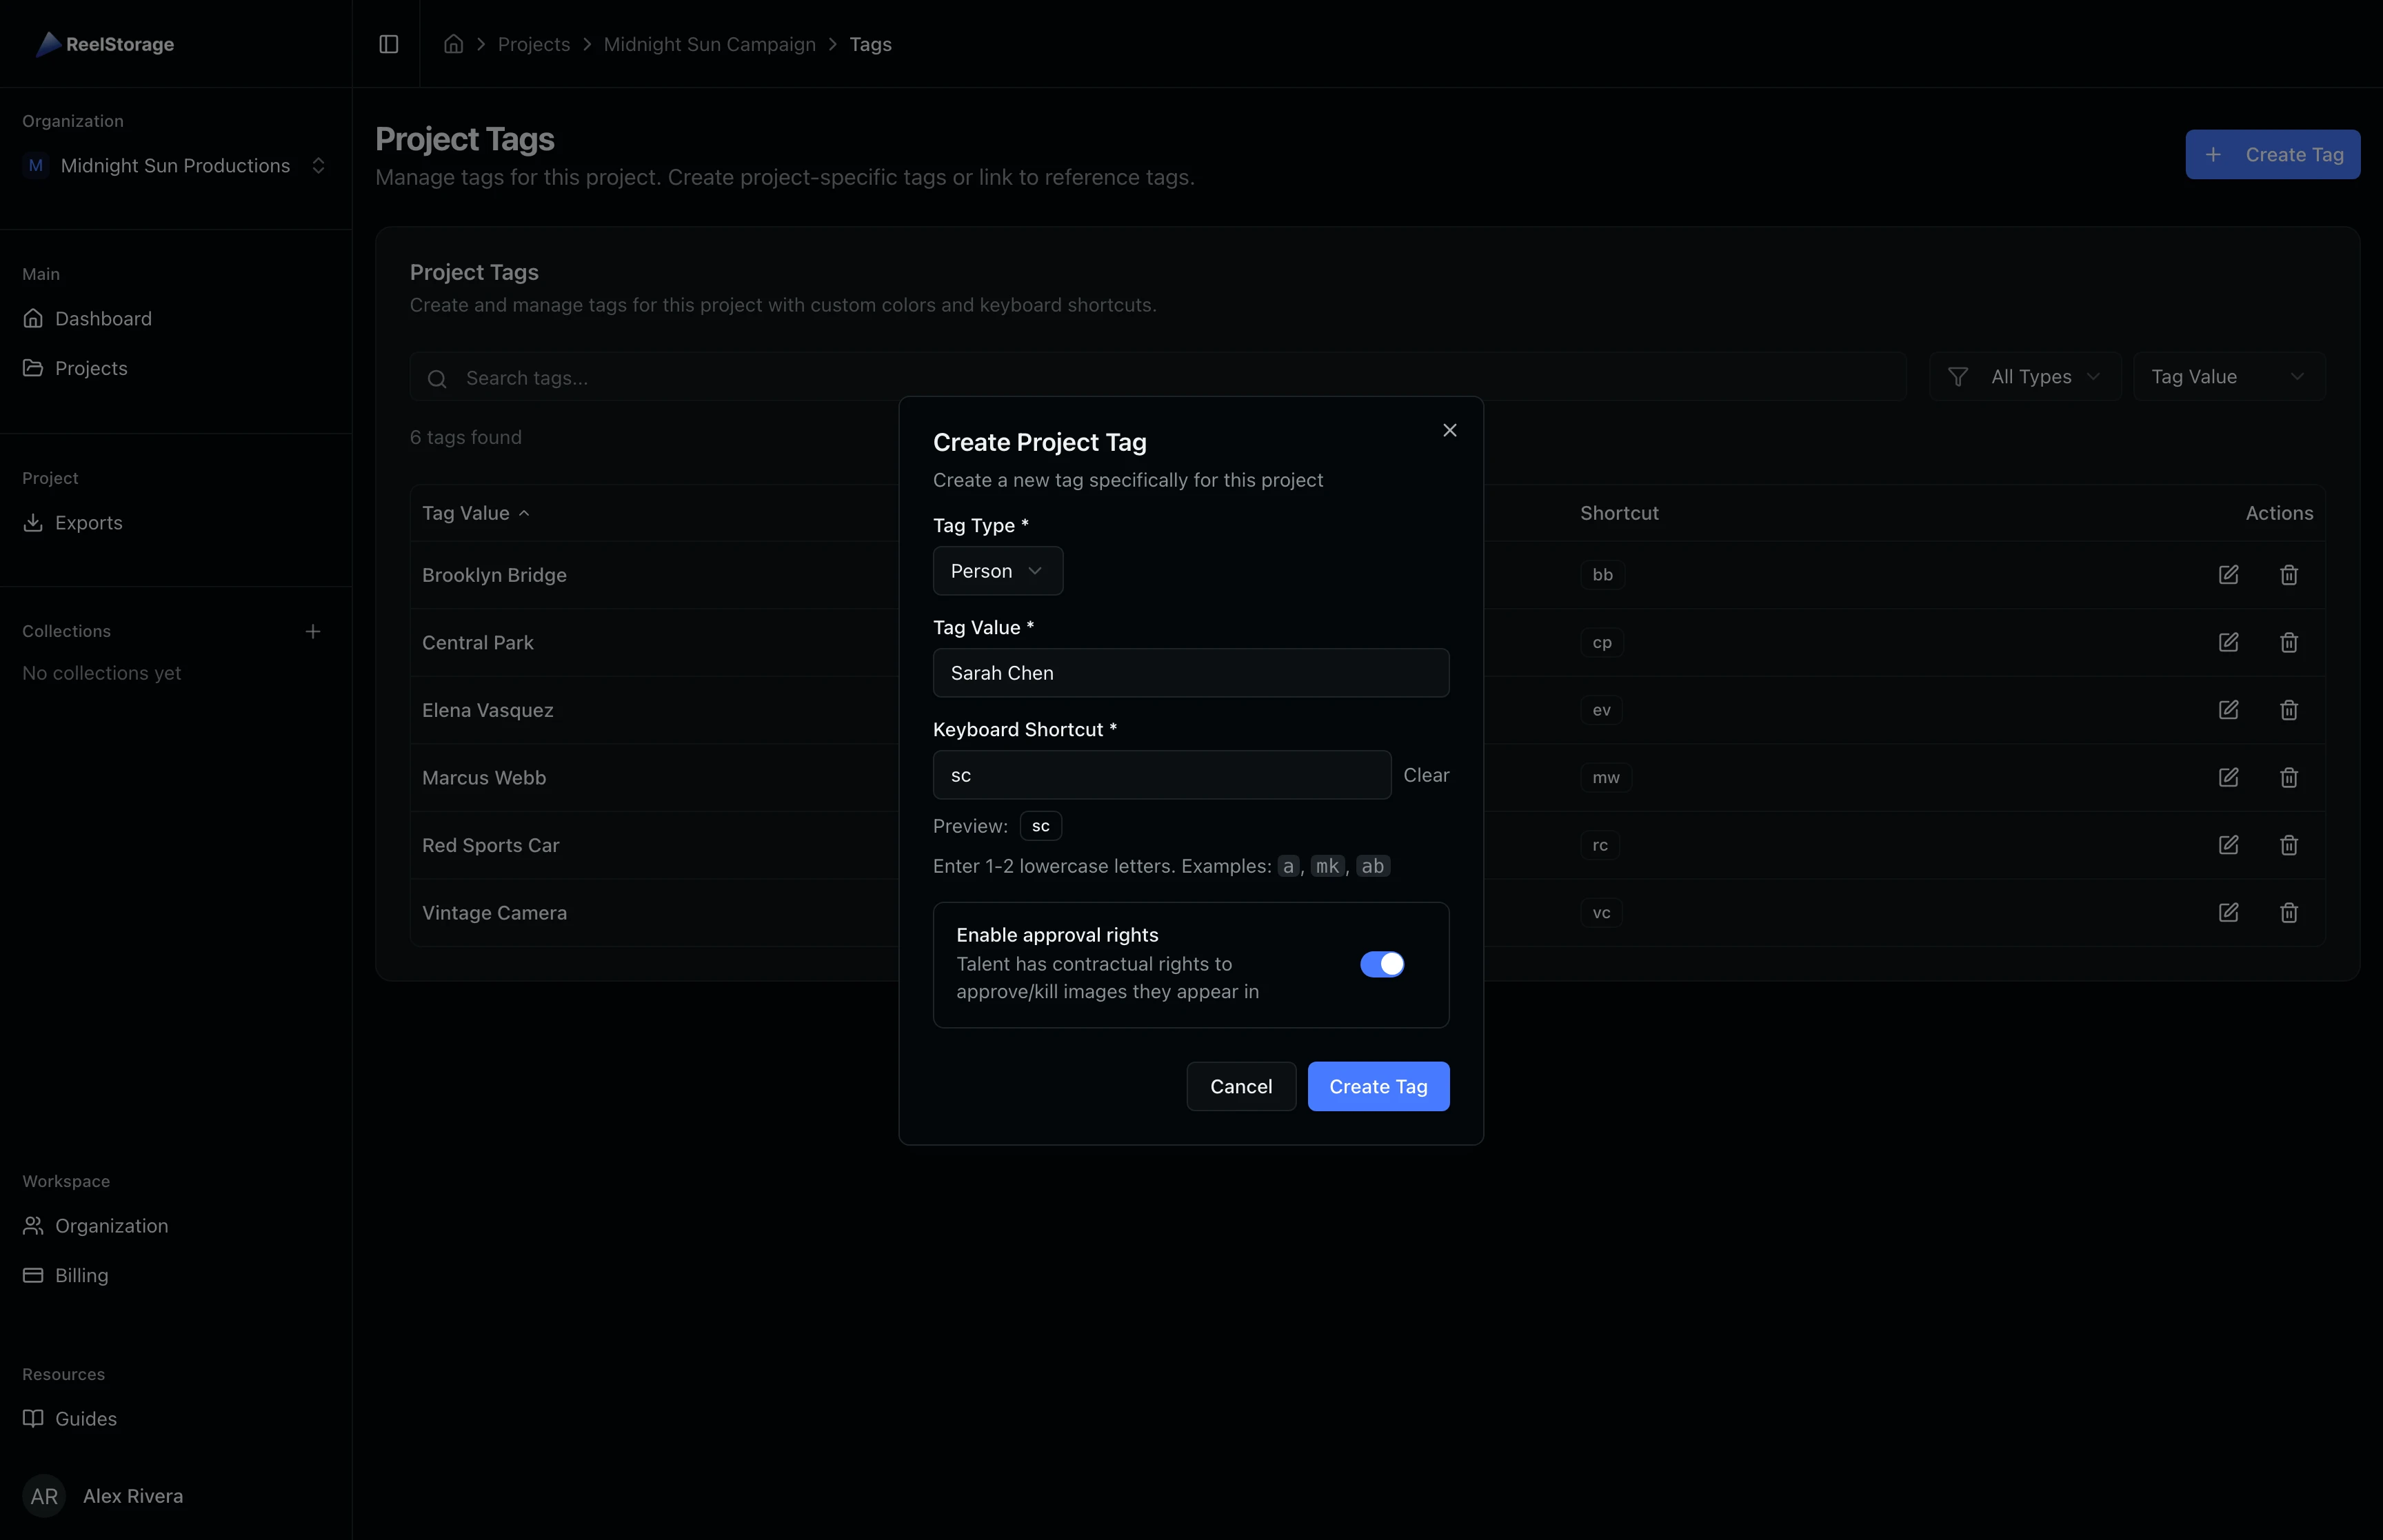
Choose short, memorable keyboard shortcuts. Use initials for people (for example, "sc" for Sarah Chen) and abbreviations for locations (for example, "bb" for Brooklyn Bridge). Shortcuts must be unique within the project and can only use lowercase letters.
Step 5: View the New Tag in the List
After submitting the form, the tag appears in the table with a success notification. You can see its type badge, usage count (how many assets it has been applied to), and the keyboard shortcut you assigned. New tags start with a usage count of zero until you apply them to assets.
Step 6: Edit a Tag
Click the edit (pencil) icon next to any tag to open the edit dialog. The form pre-populates with the tag's current values, including its type, name, keyboard shortcut, and approval rights setting. You can change any of these fields. Updating the tag value changes it on all assets where the tag is already applied.
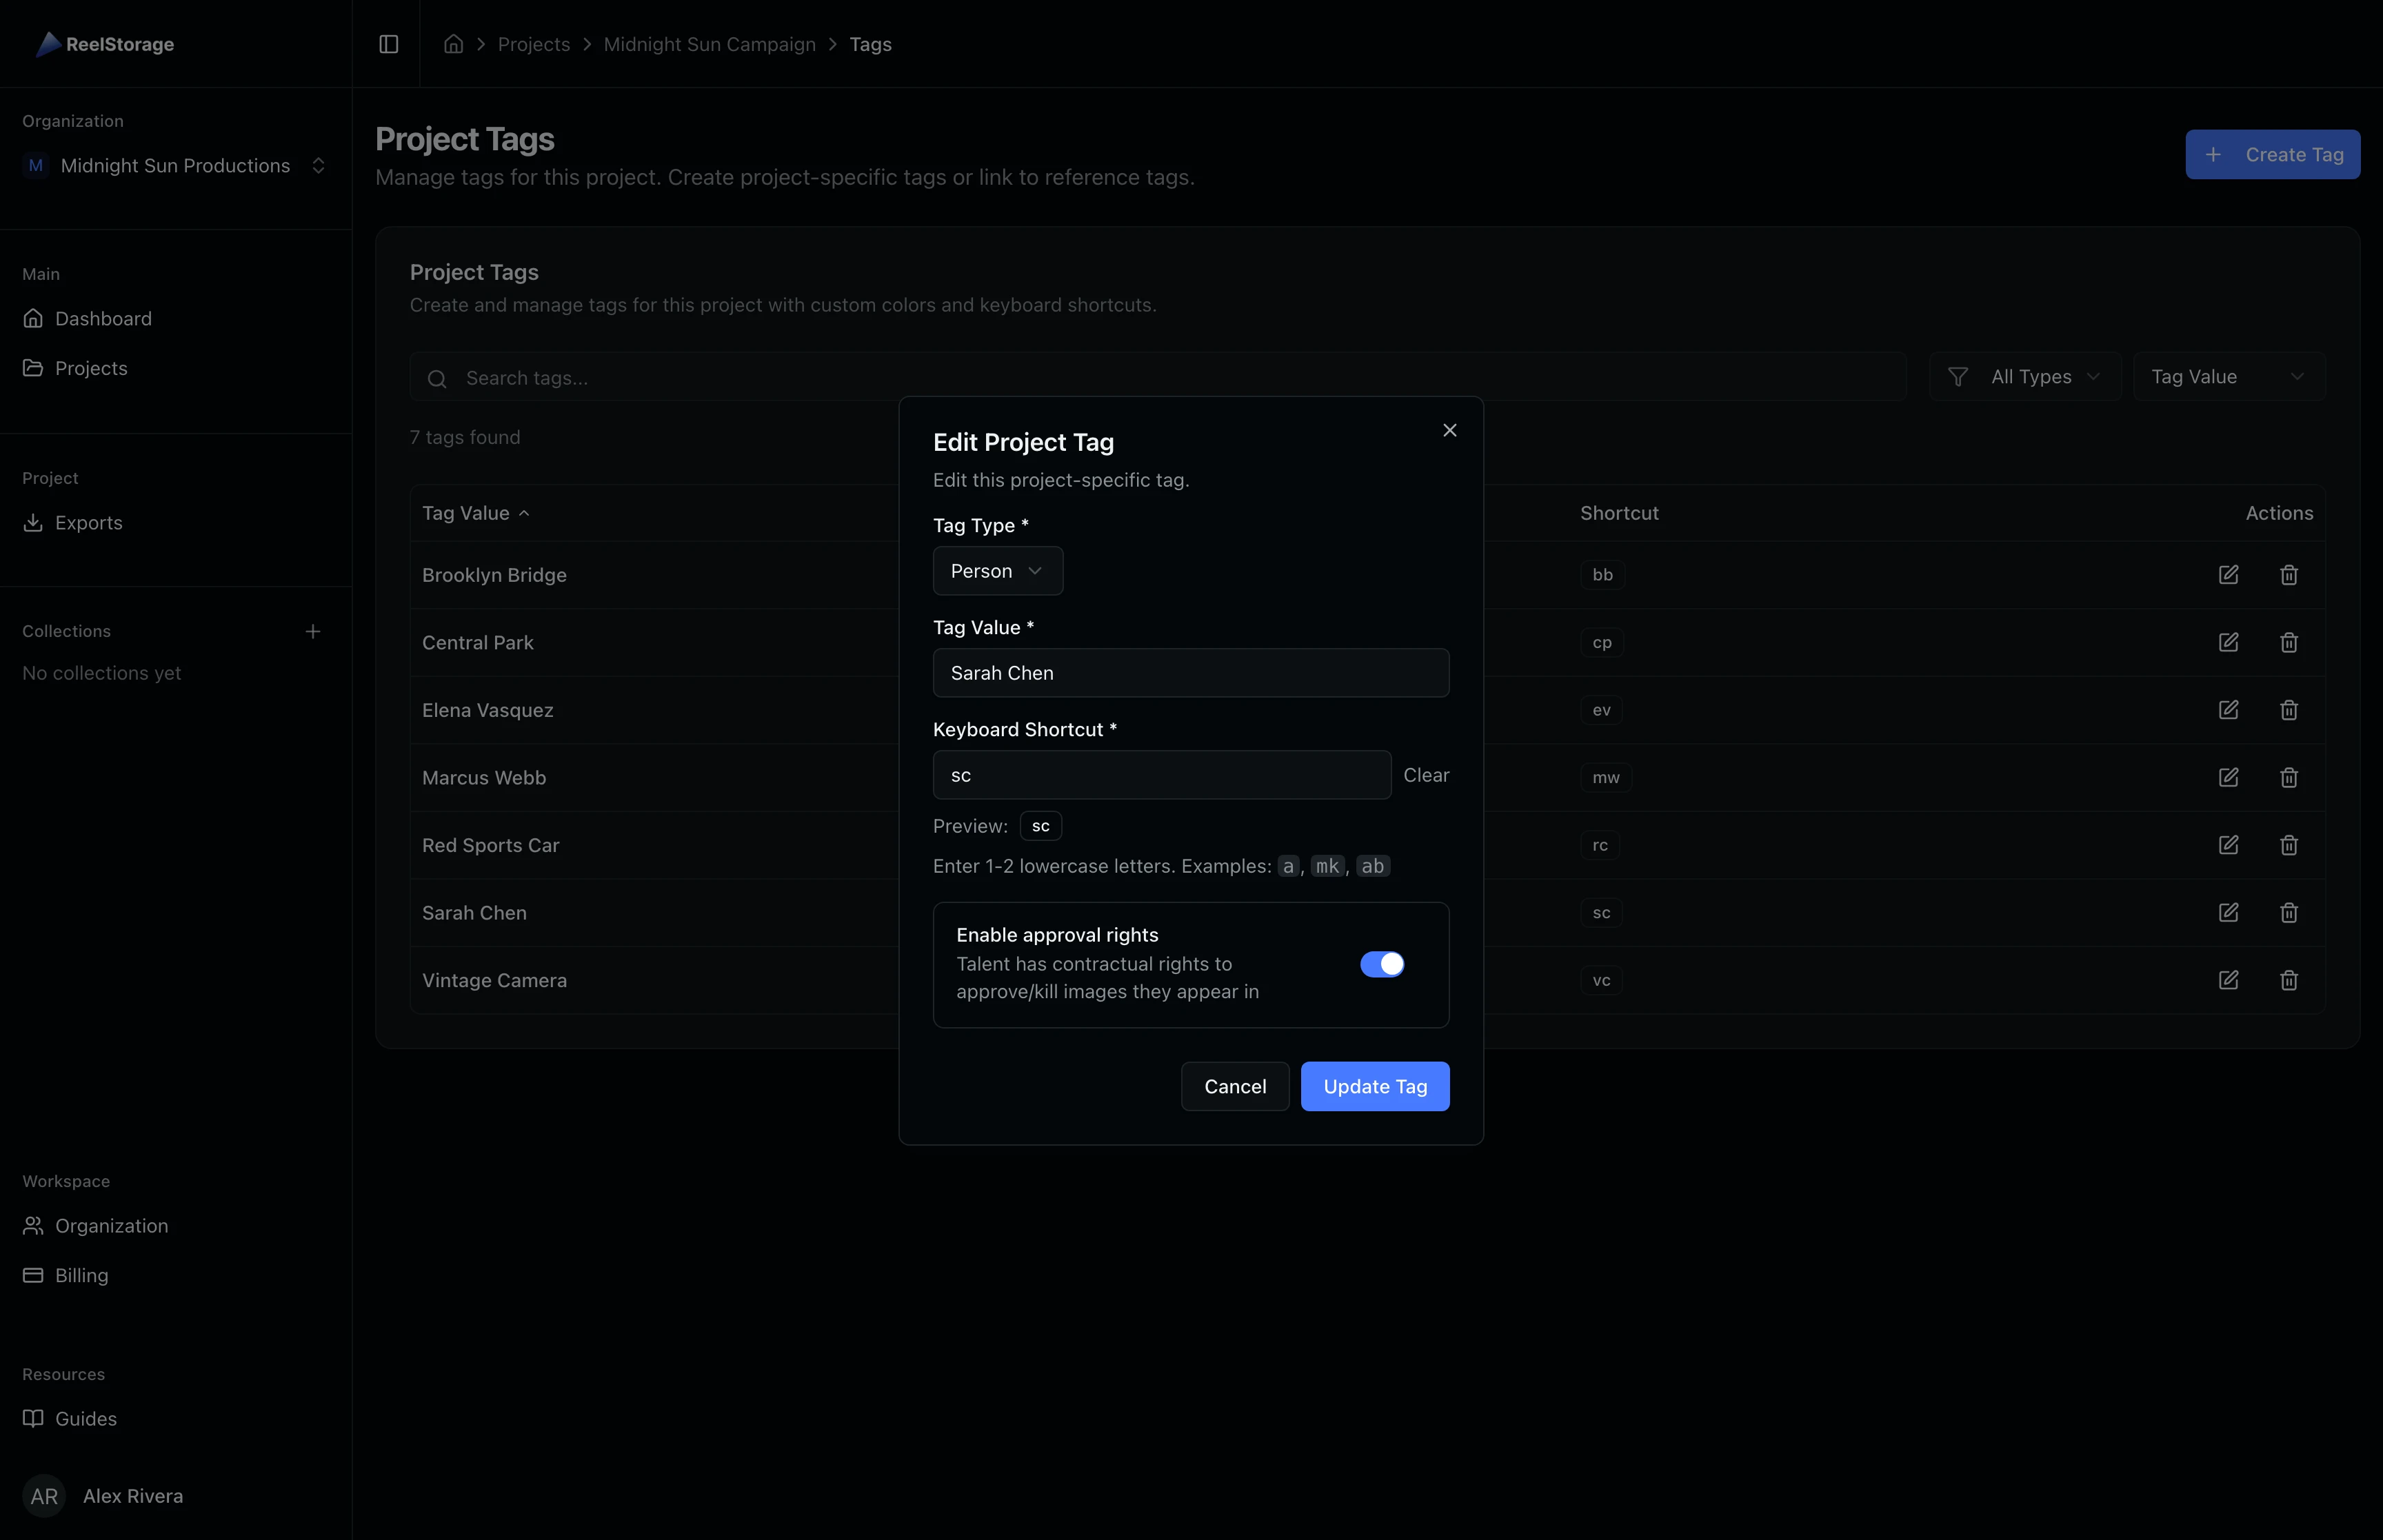
If you change a person tag to another type, any approval rights association is removed automatically. Make sure you do not need the approval workflow for that tag before switching its type.
Step 7: Delete a Tag
Click the delete (trash) icon next to a tag to open the confirmation dialog. The dialog displays the tag name and type so you can confirm you are removing the correct one. If the tag is applied to assets, the dialog shows a warning with the number of affected assets.
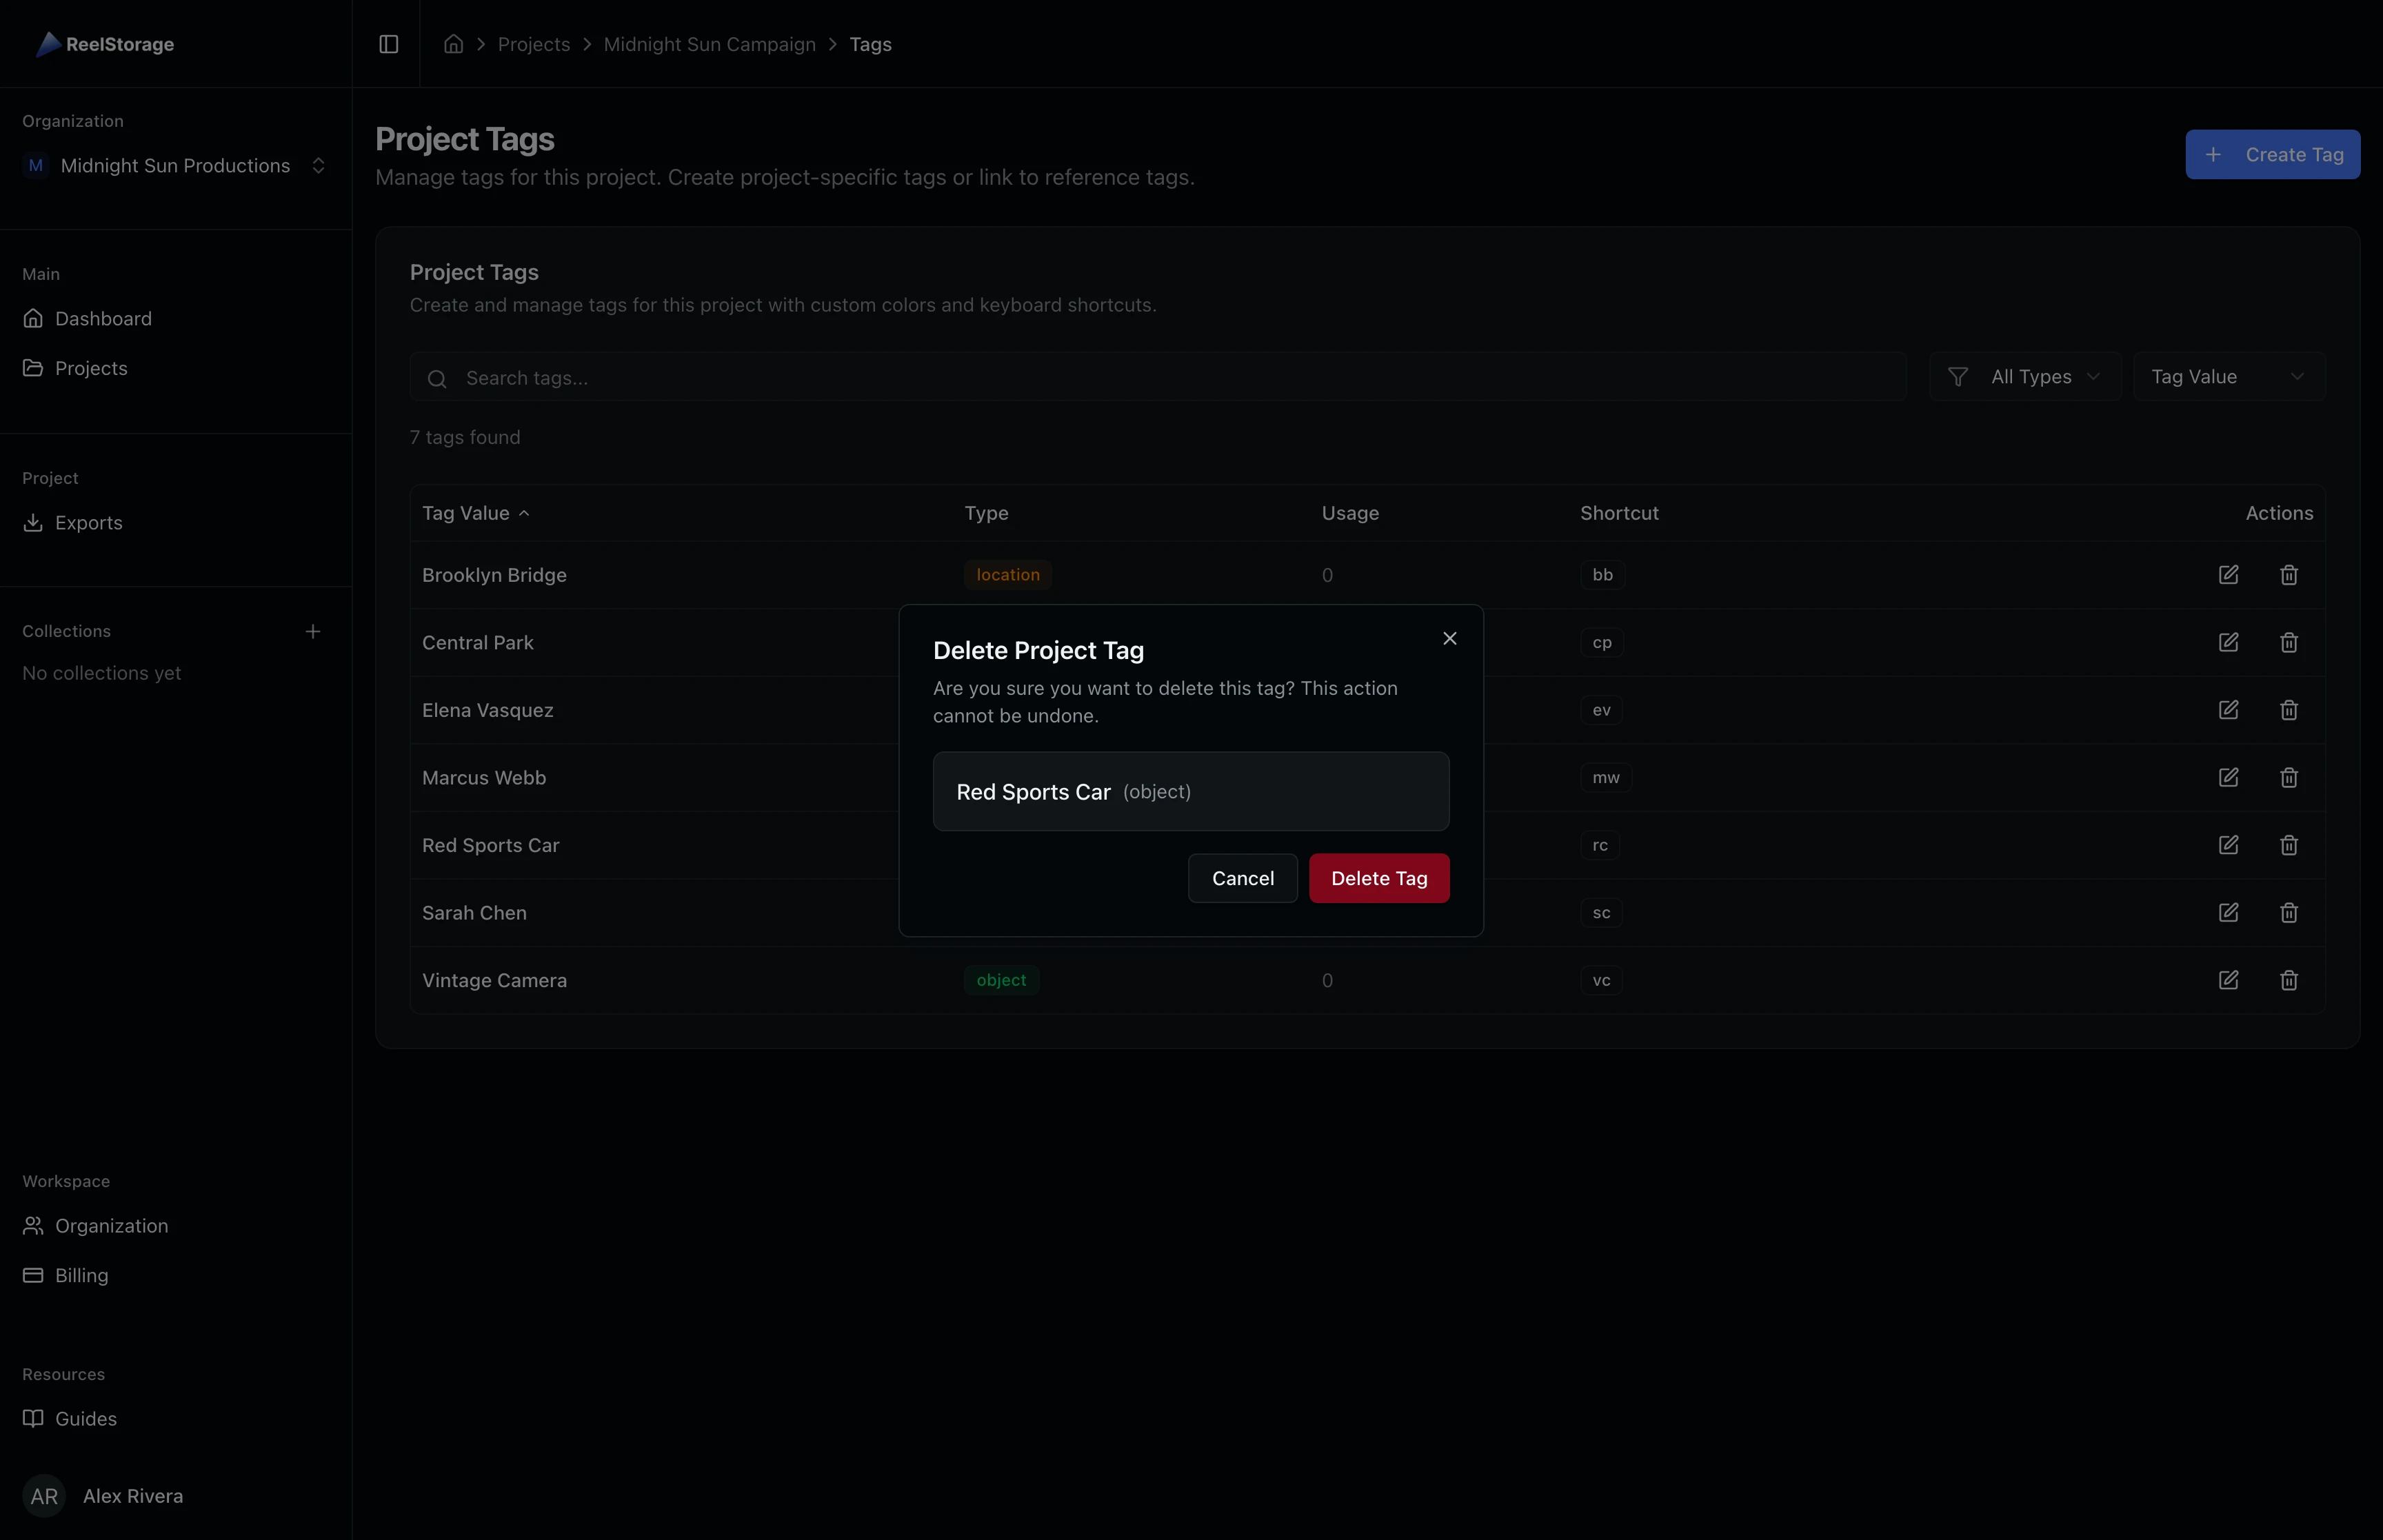
Deleting a tag cannot be undone. All associations between this tag and your assets are removed permanently. The assets themselves are not affected, only the tag link is removed. Consider whether you want to keep the tag for historical reference before confirming.
Step 8: Filter Tags by Type
Click the All Types dropdown above the table to filter tags by type. Select Person, Object, or Location to narrow the list. This is useful when your project has many tags and you need to review or manage tags of a specific category.
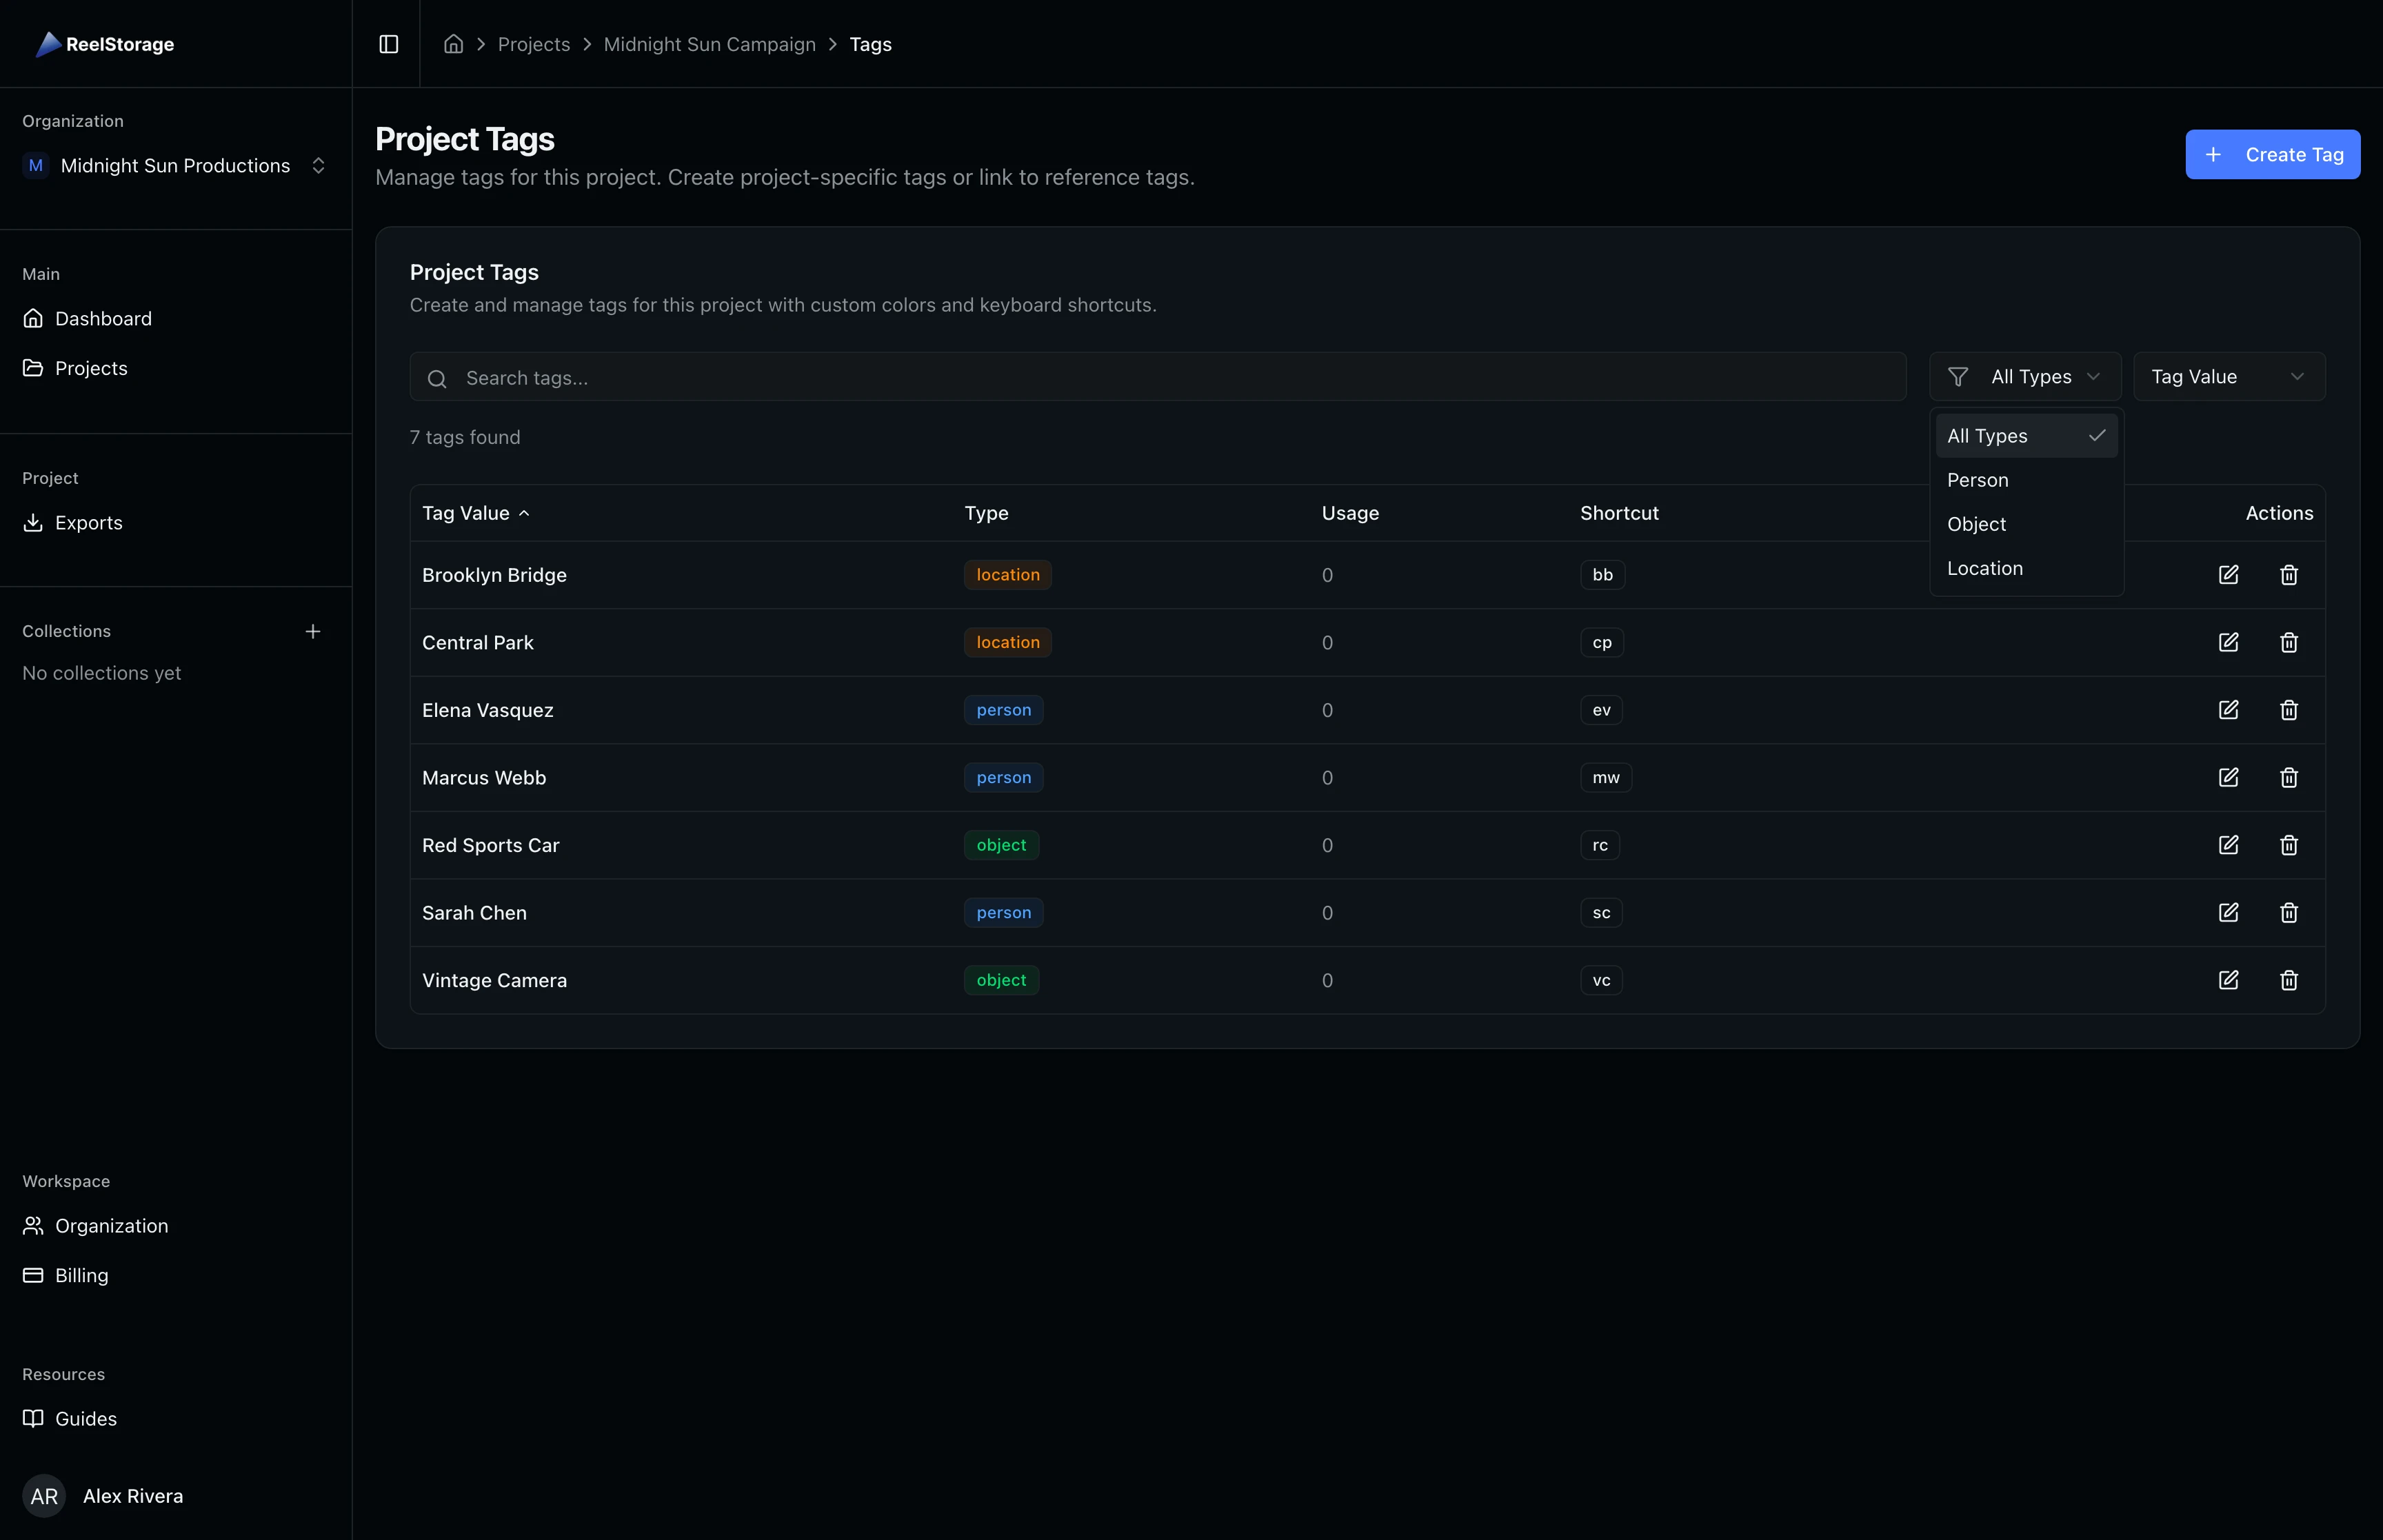
After selecting a filter, the table updates to show only matching tags. The count label adjusts to reflect the filtered results. Click Reset Filters to clear all active filters and return to the full tag list.
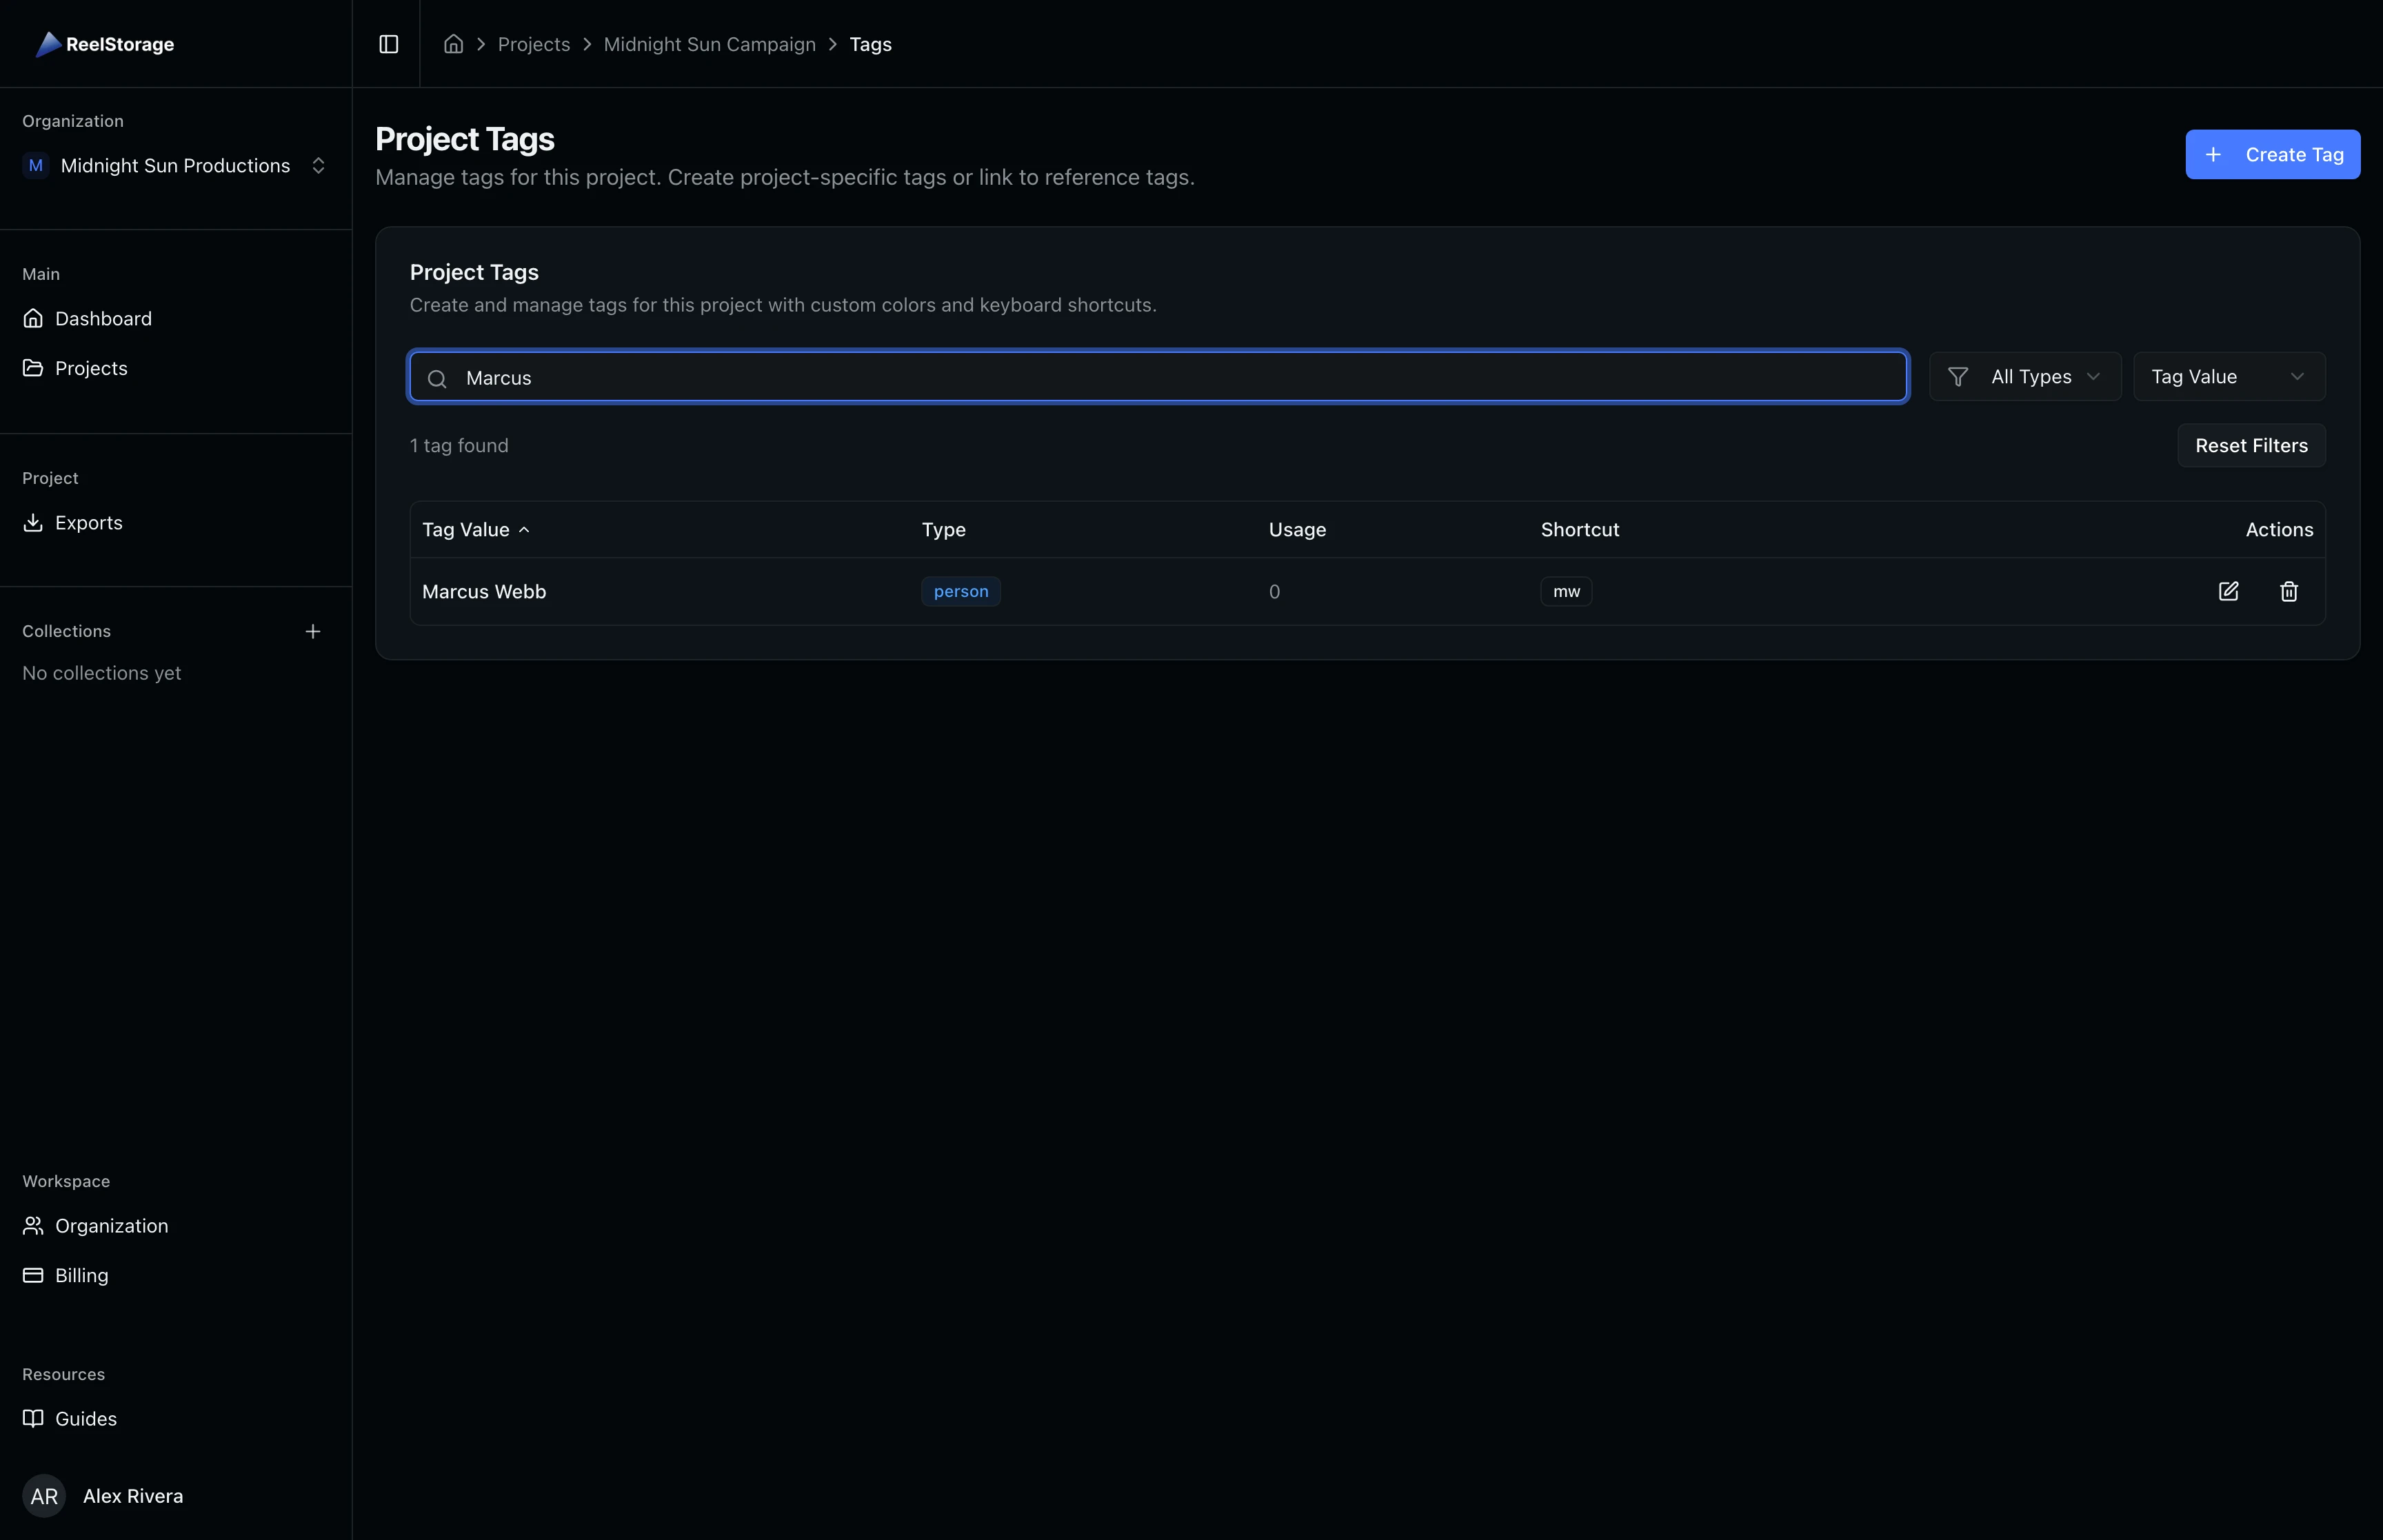
Step 9: Search Tags
Type in the search bar to find tags by name. The table filters in real time as you type, matching against the tag value. You can combine search with the type filter to narrow results further. For example, search for "Marcus" while filtering by Person to find a specific talent tag quickly.
Tips and Best Practices
- Use keyboard shortcuts for speed. Assign short 1-2 letter shortcuts to your most-used tags. When browsing the asset grid, press the shortcut keys to toggle a tag on the selected asset without opening any menus.
- Keep tag names consistent. Use full names for people (for example, "Sarah Chen" not "Sarah") and specific terms for objects and locations. This prevents duplicates and makes filtering more reliable across your team.
- Enable approval rights early. If talent has contractual approval over their images, enable the toggle when creating their person tag. This connects the tag to the approvals workflow so tagged images are automatically included when you send approval requests.
- Review usage counts. Tags with zero usage may be candidates for cleanup. Check the usage column periodically to remove tags that are no longer relevant to the project.
- Coordinate tag creation with your team. Before creating tags for a new shoot, agree on naming conventions with other project members to avoid duplicate or inconsistent tags.
Troubleshooting
Why can't I see the Create Tag button?
You need the "Create Tags" permission in your project role. Ask a project owner or admin to update your permissions in the project settings.
Can I change a tag's type after creating it?
Yes, open the edit dialog and select a new type. Changing a person tag to another type removes any approval rights association. The tag keeps its name and keyboard shortcut.
What happens when I delete a tag that is in use?
The confirmation dialog shows how many assets use the tag. Deleting it removes the tag from all associated assets permanently. The assets themselves are not affected; only the tag association is removed.
What's Next
- Uploading Assets - Learn how to upload photos to your projects
- Sending Approvals to Talent - Use person tags with approval rights to send talent approvals
Related Guides
Uploading Assets
Learn how to upload photos and videos to your project using the upload window, monitor progress, and verify your files appear in the asset grid.
Sending Approvals to Talent
Create talent approvals, assign images for review, and track approval progress with detailed statistics and settings.