Organizing Assets with Folders
Prerequisites
Use folders to group your project assets by shoot day, location, or any other category. Folders help your team find what they need without scrolling through hundreds of thumbnails.
What You'll Learn
- How to create a new folder inside a project
- How to open a folder and view its contents
- How to access folder actions (rename, delete, download)
- How to rename a folder
- How to delete a folder (assets are preserved)
Step 1: Open Your Project
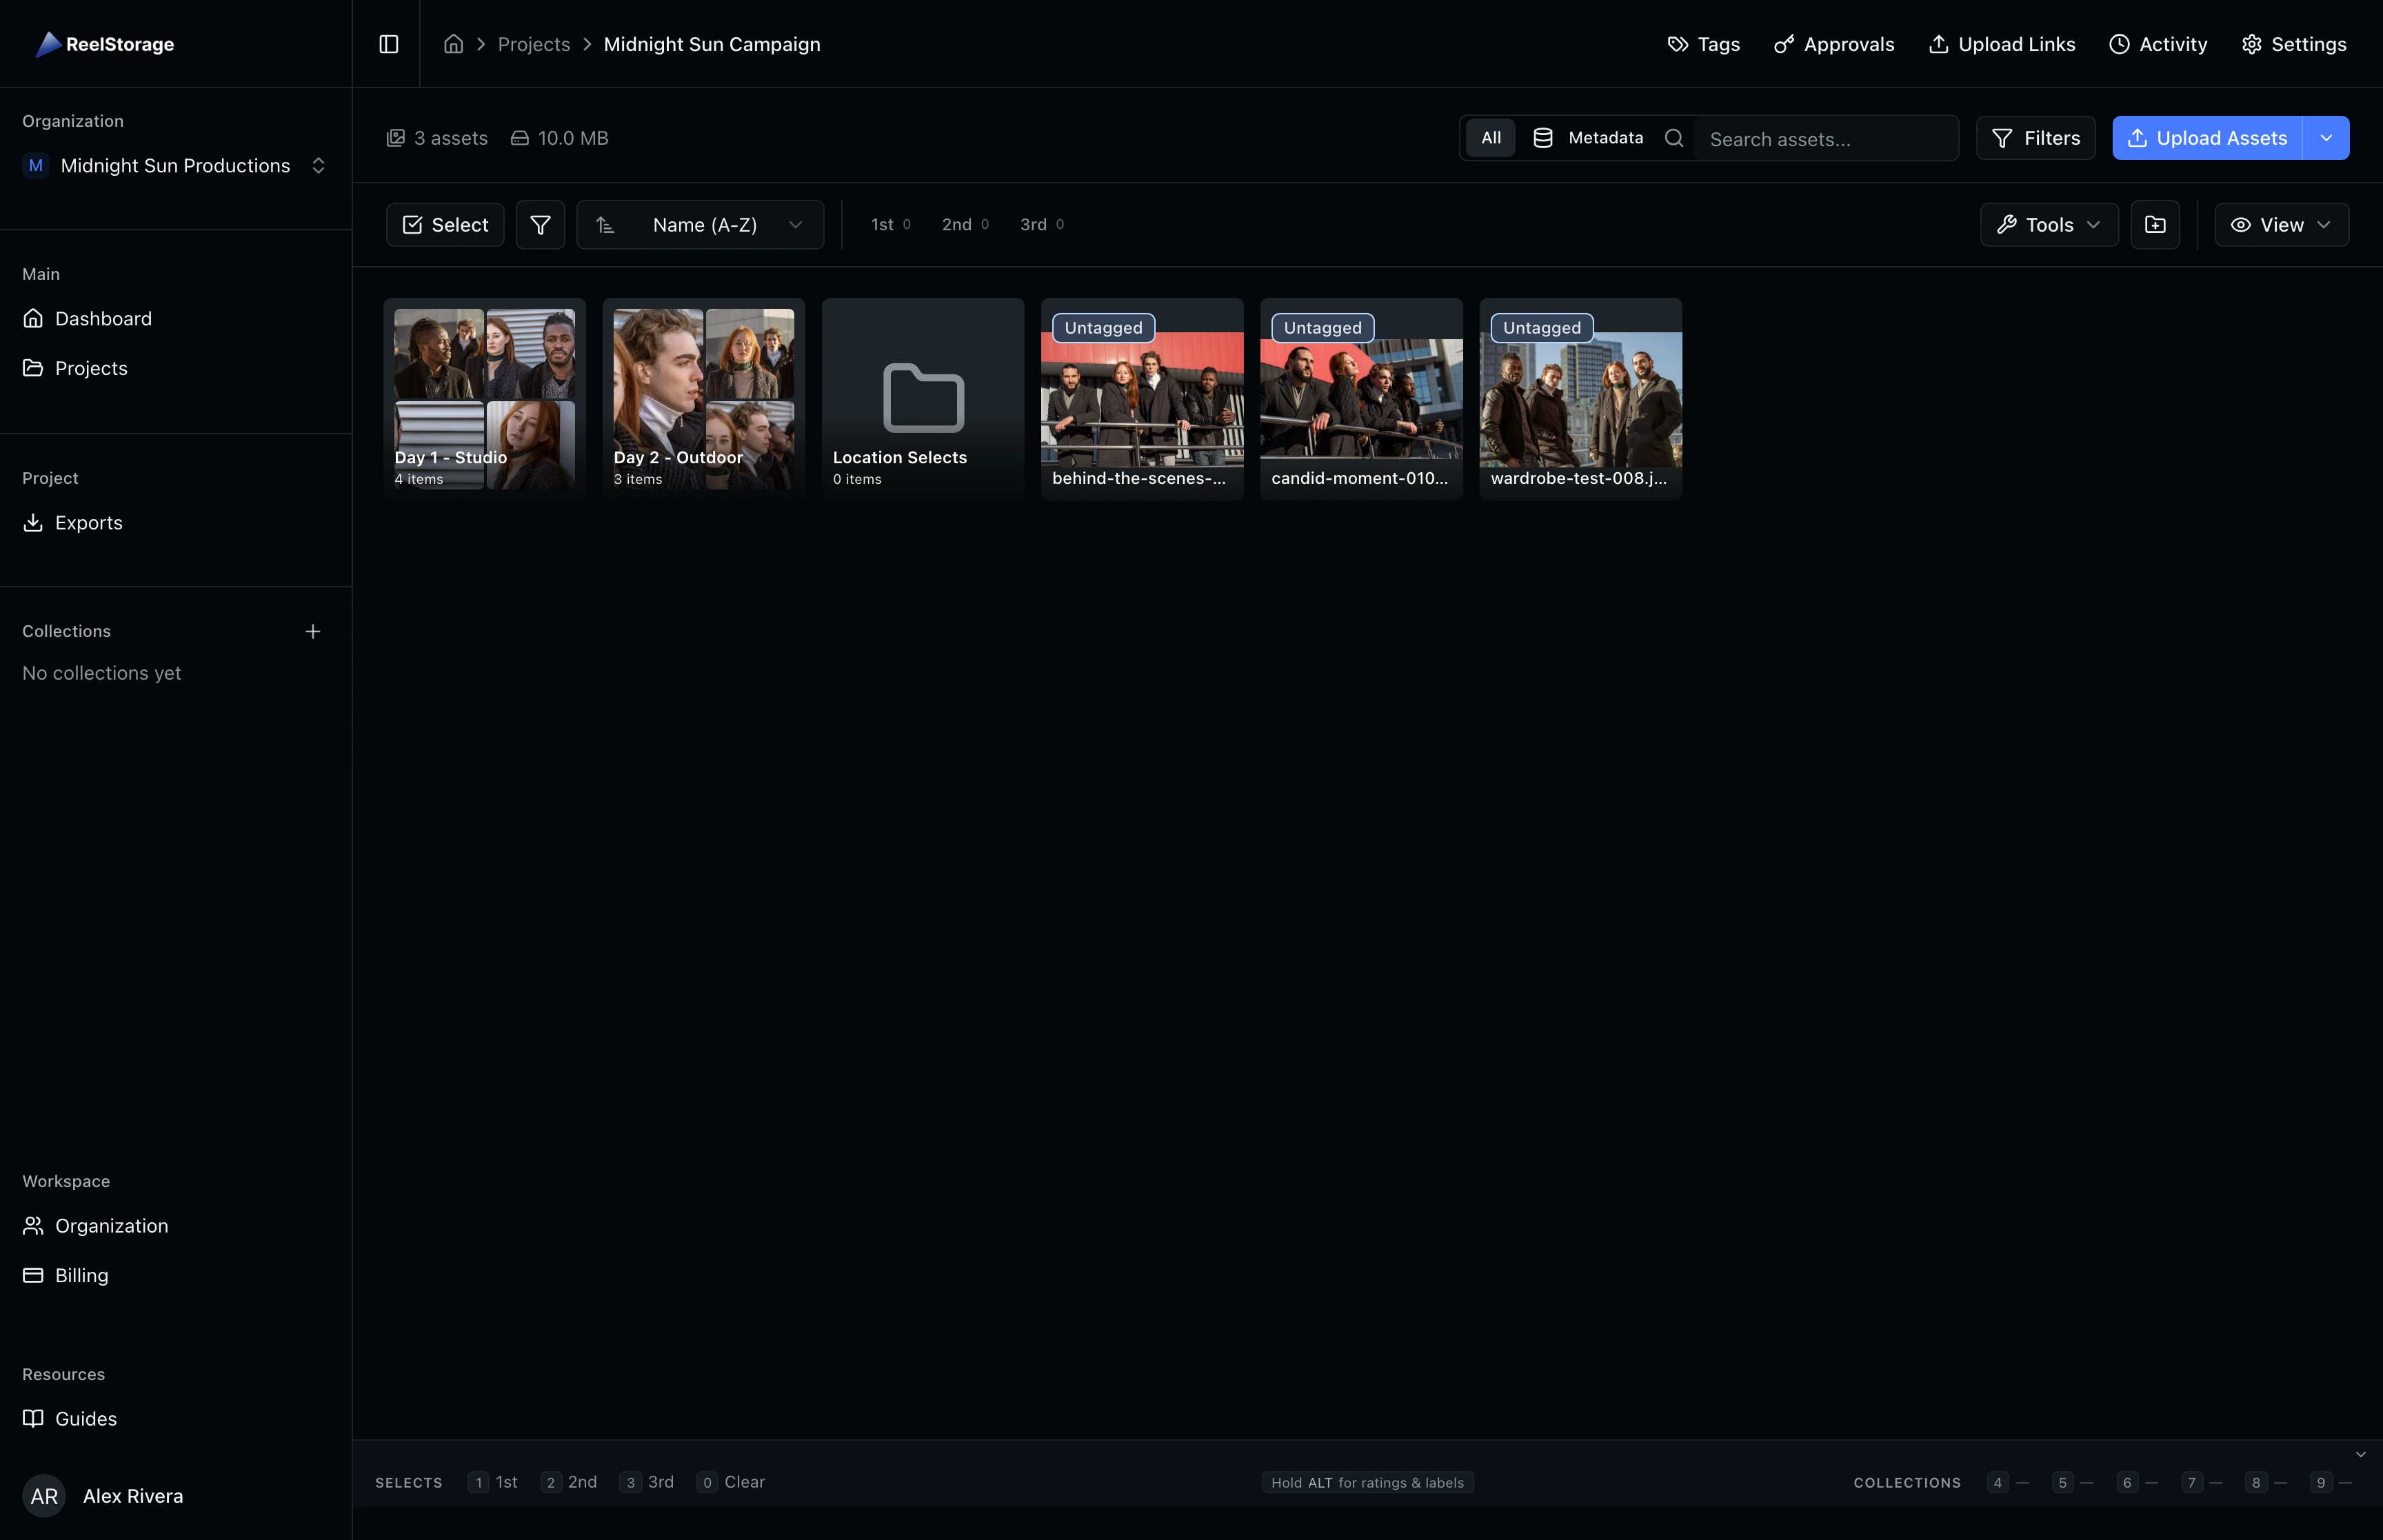
Go to your project page. You will see your assets displayed in a grid along with any existing folders at the top. Folders appear as square cards with thumbnail previews of the assets inside them. Each card shows the folder name and item count.
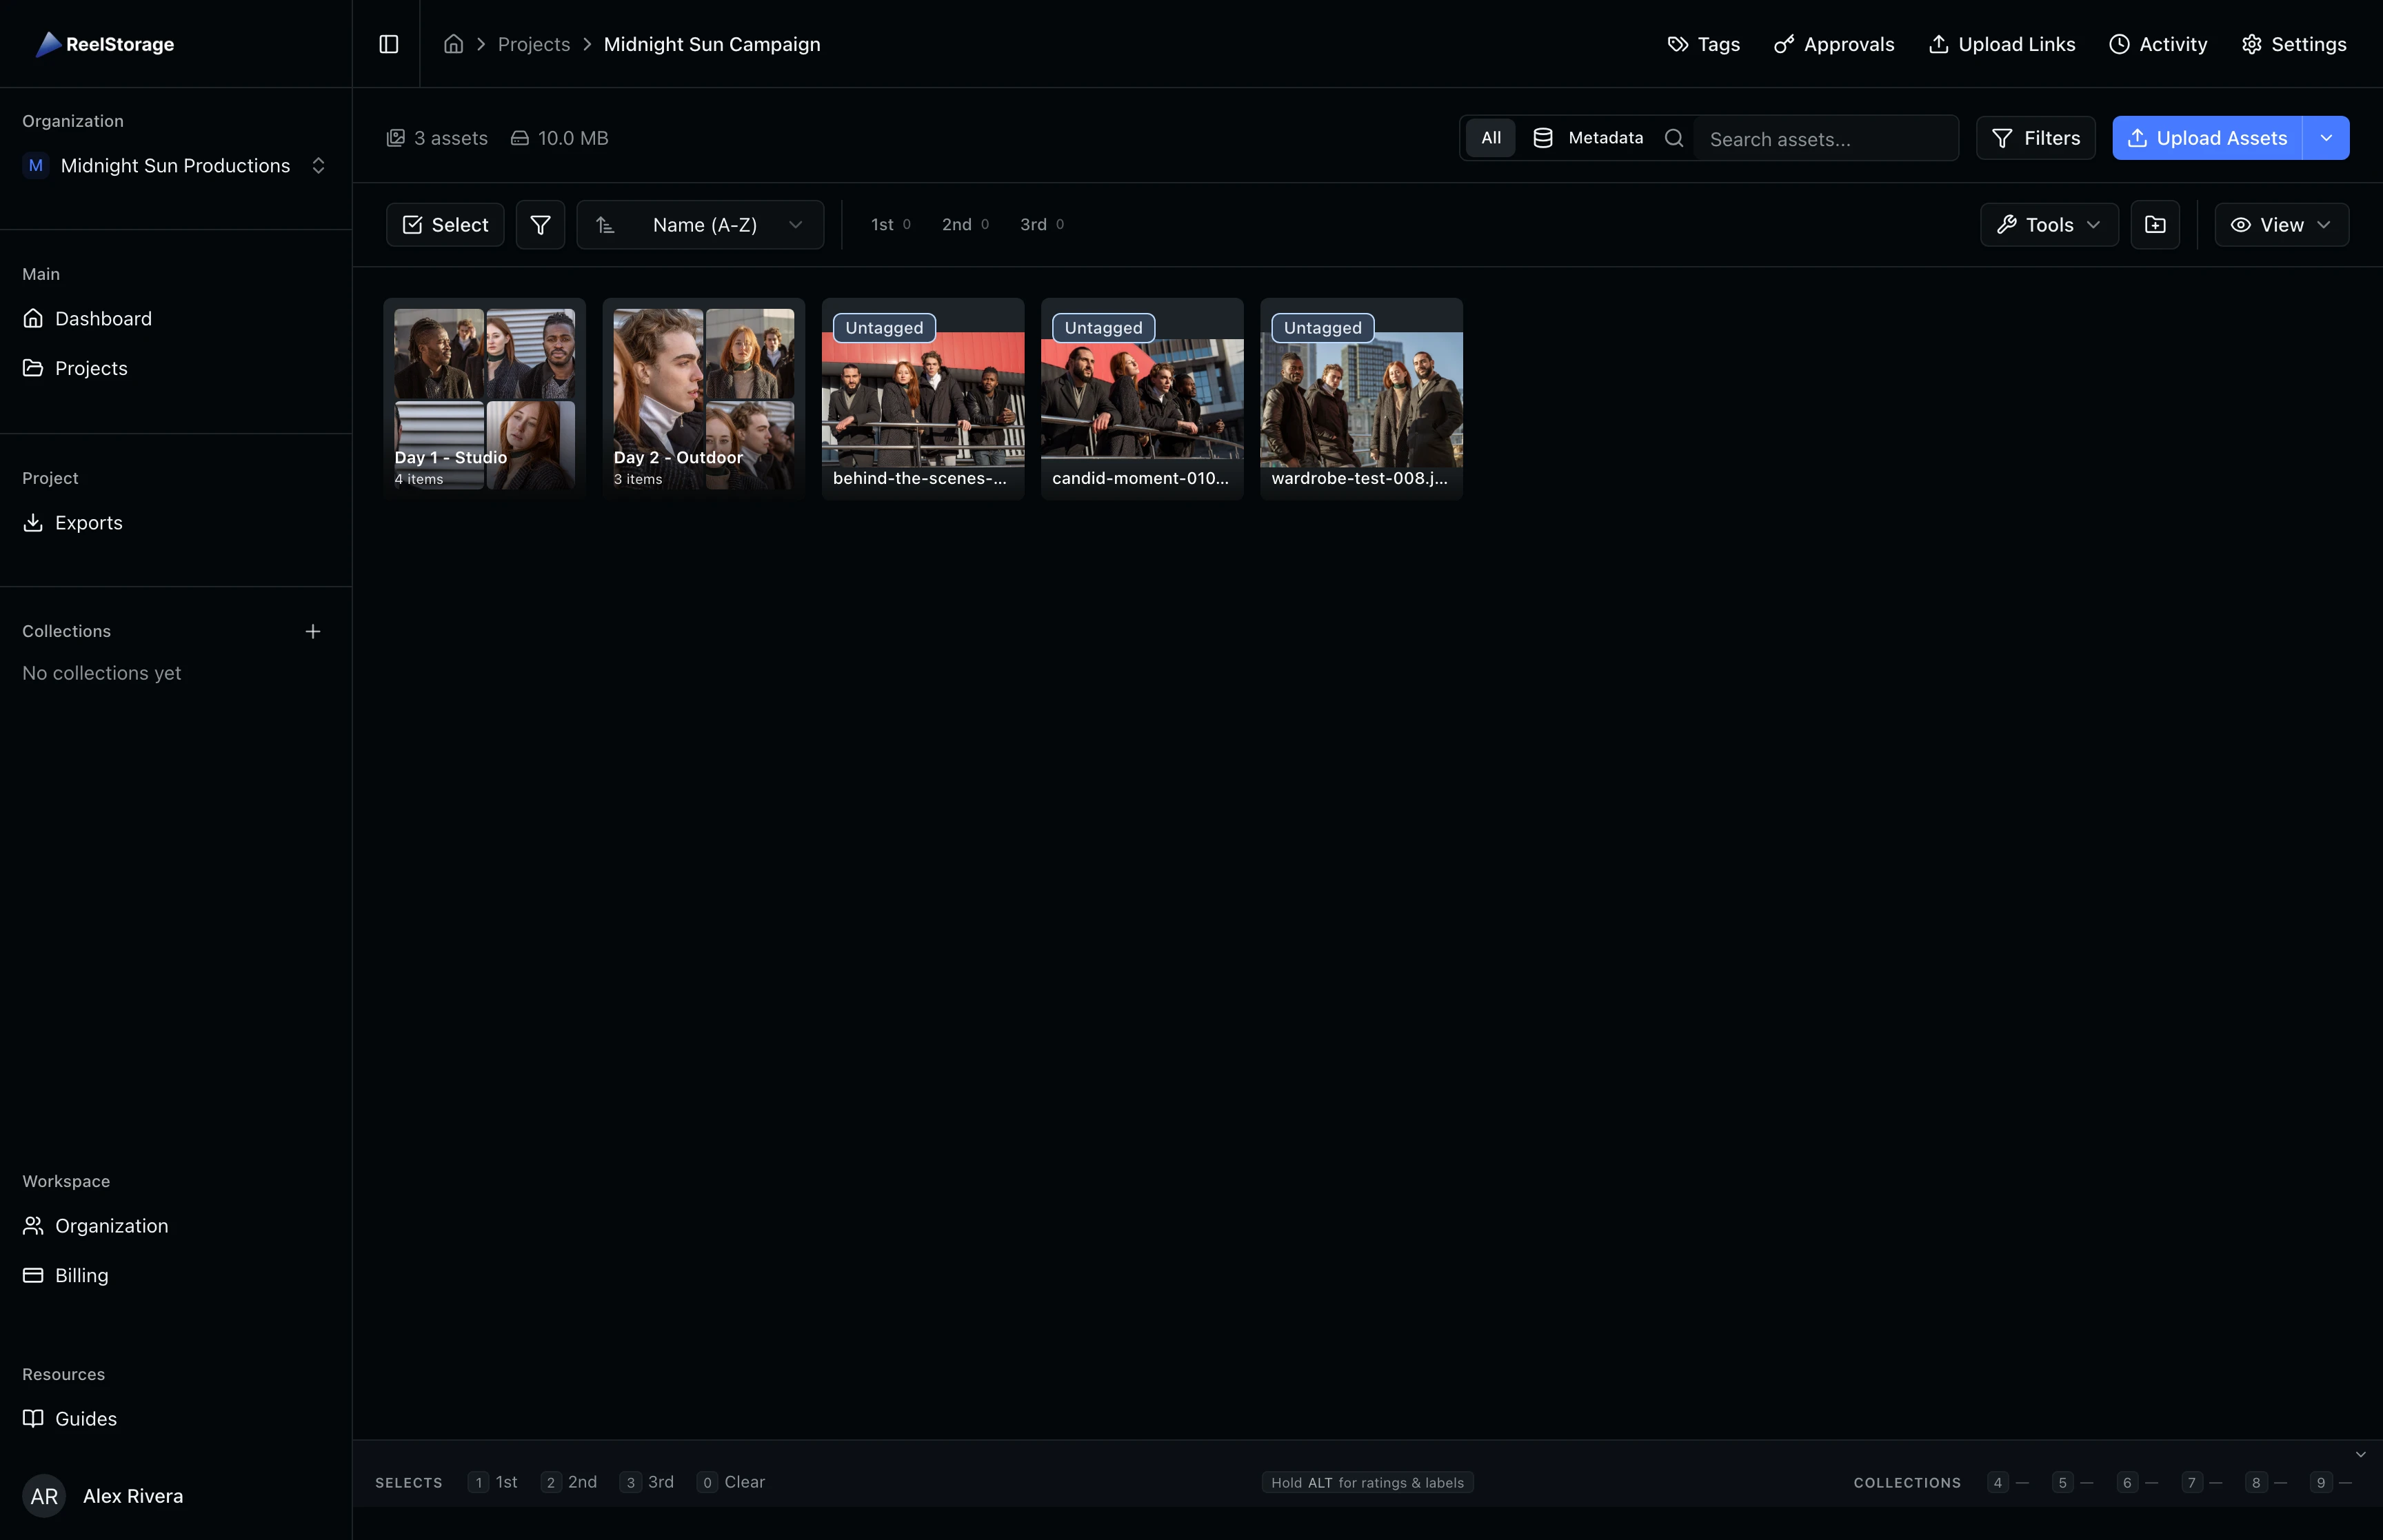
Root-level assets (those not inside any folder) appear below the folder cards. You can scroll through both sections independently.
Step 2: Create a New Folder
Click the New Folder button in the toolbar above the asset grid. A dialog opens where you enter a name for your folder. Names can include letters, numbers, spaces, hyphens, underscores, periods, and parentheses.
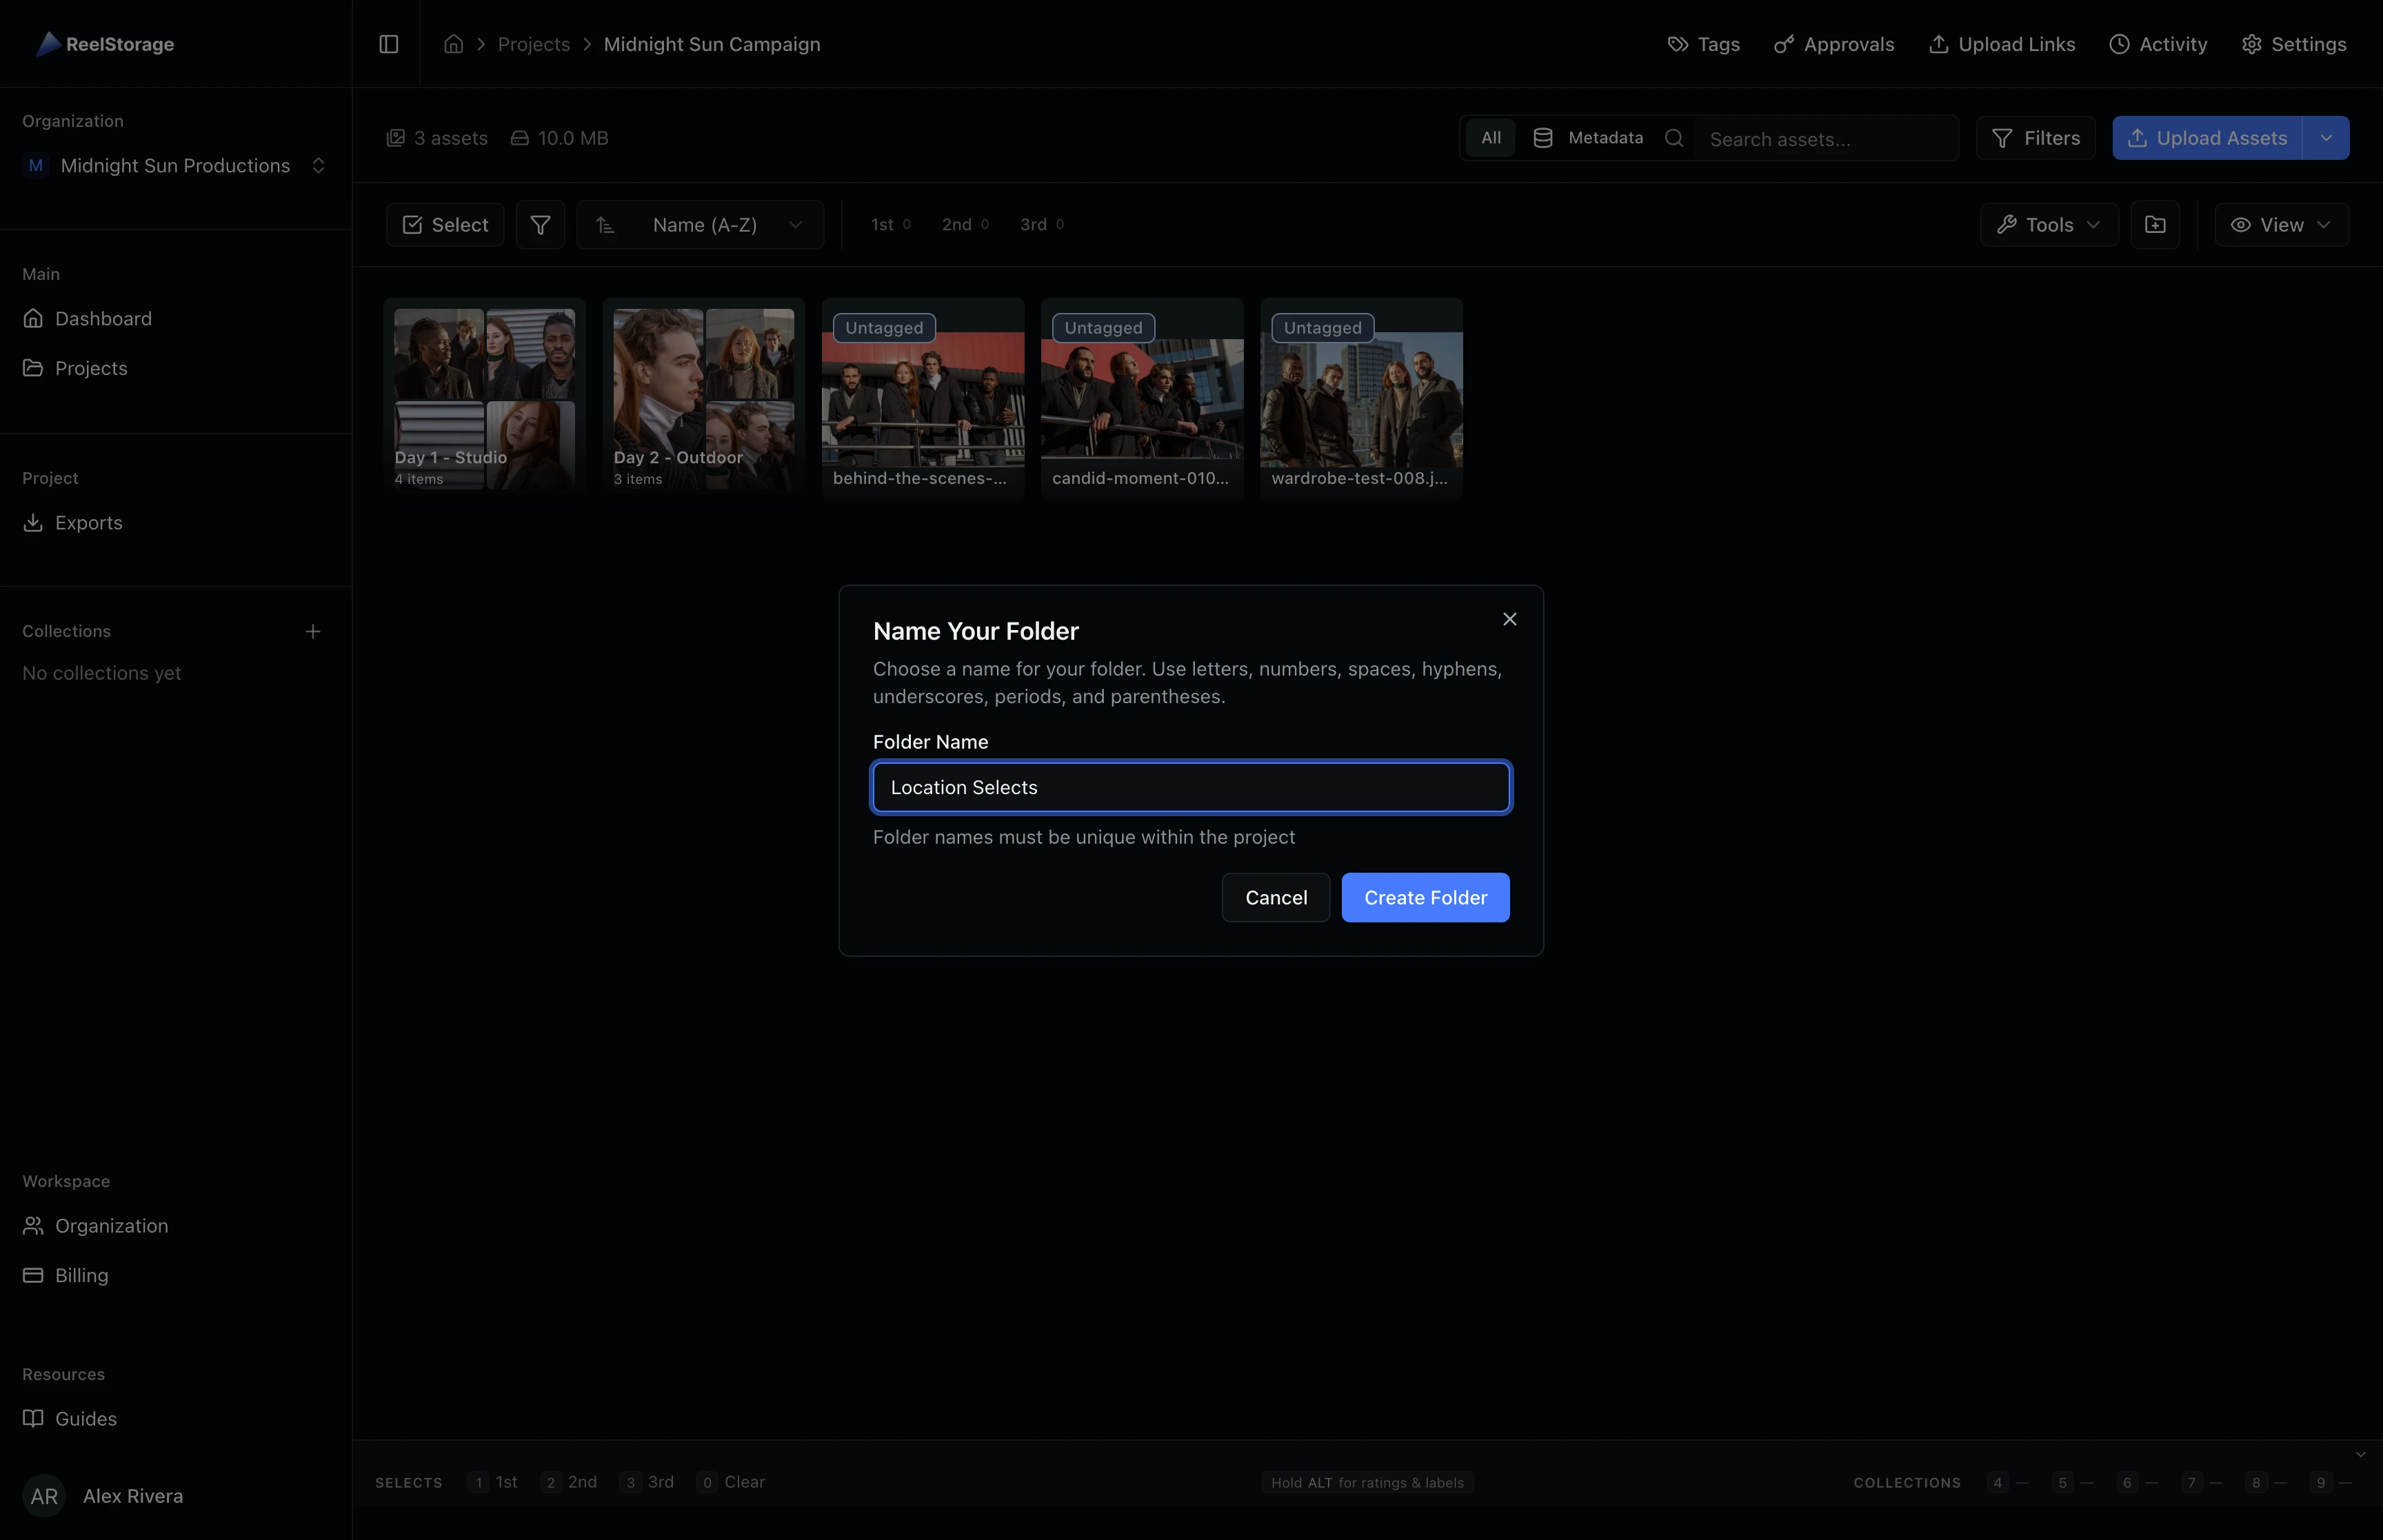
Type a descriptive name (for example, "Location Selects" or "Day 1 - Studio") and click Create Folder. The new folder appears in the grid immediately.
Folder names must be unique within the project. If you enter a name that already exists, the form will show a validation error.
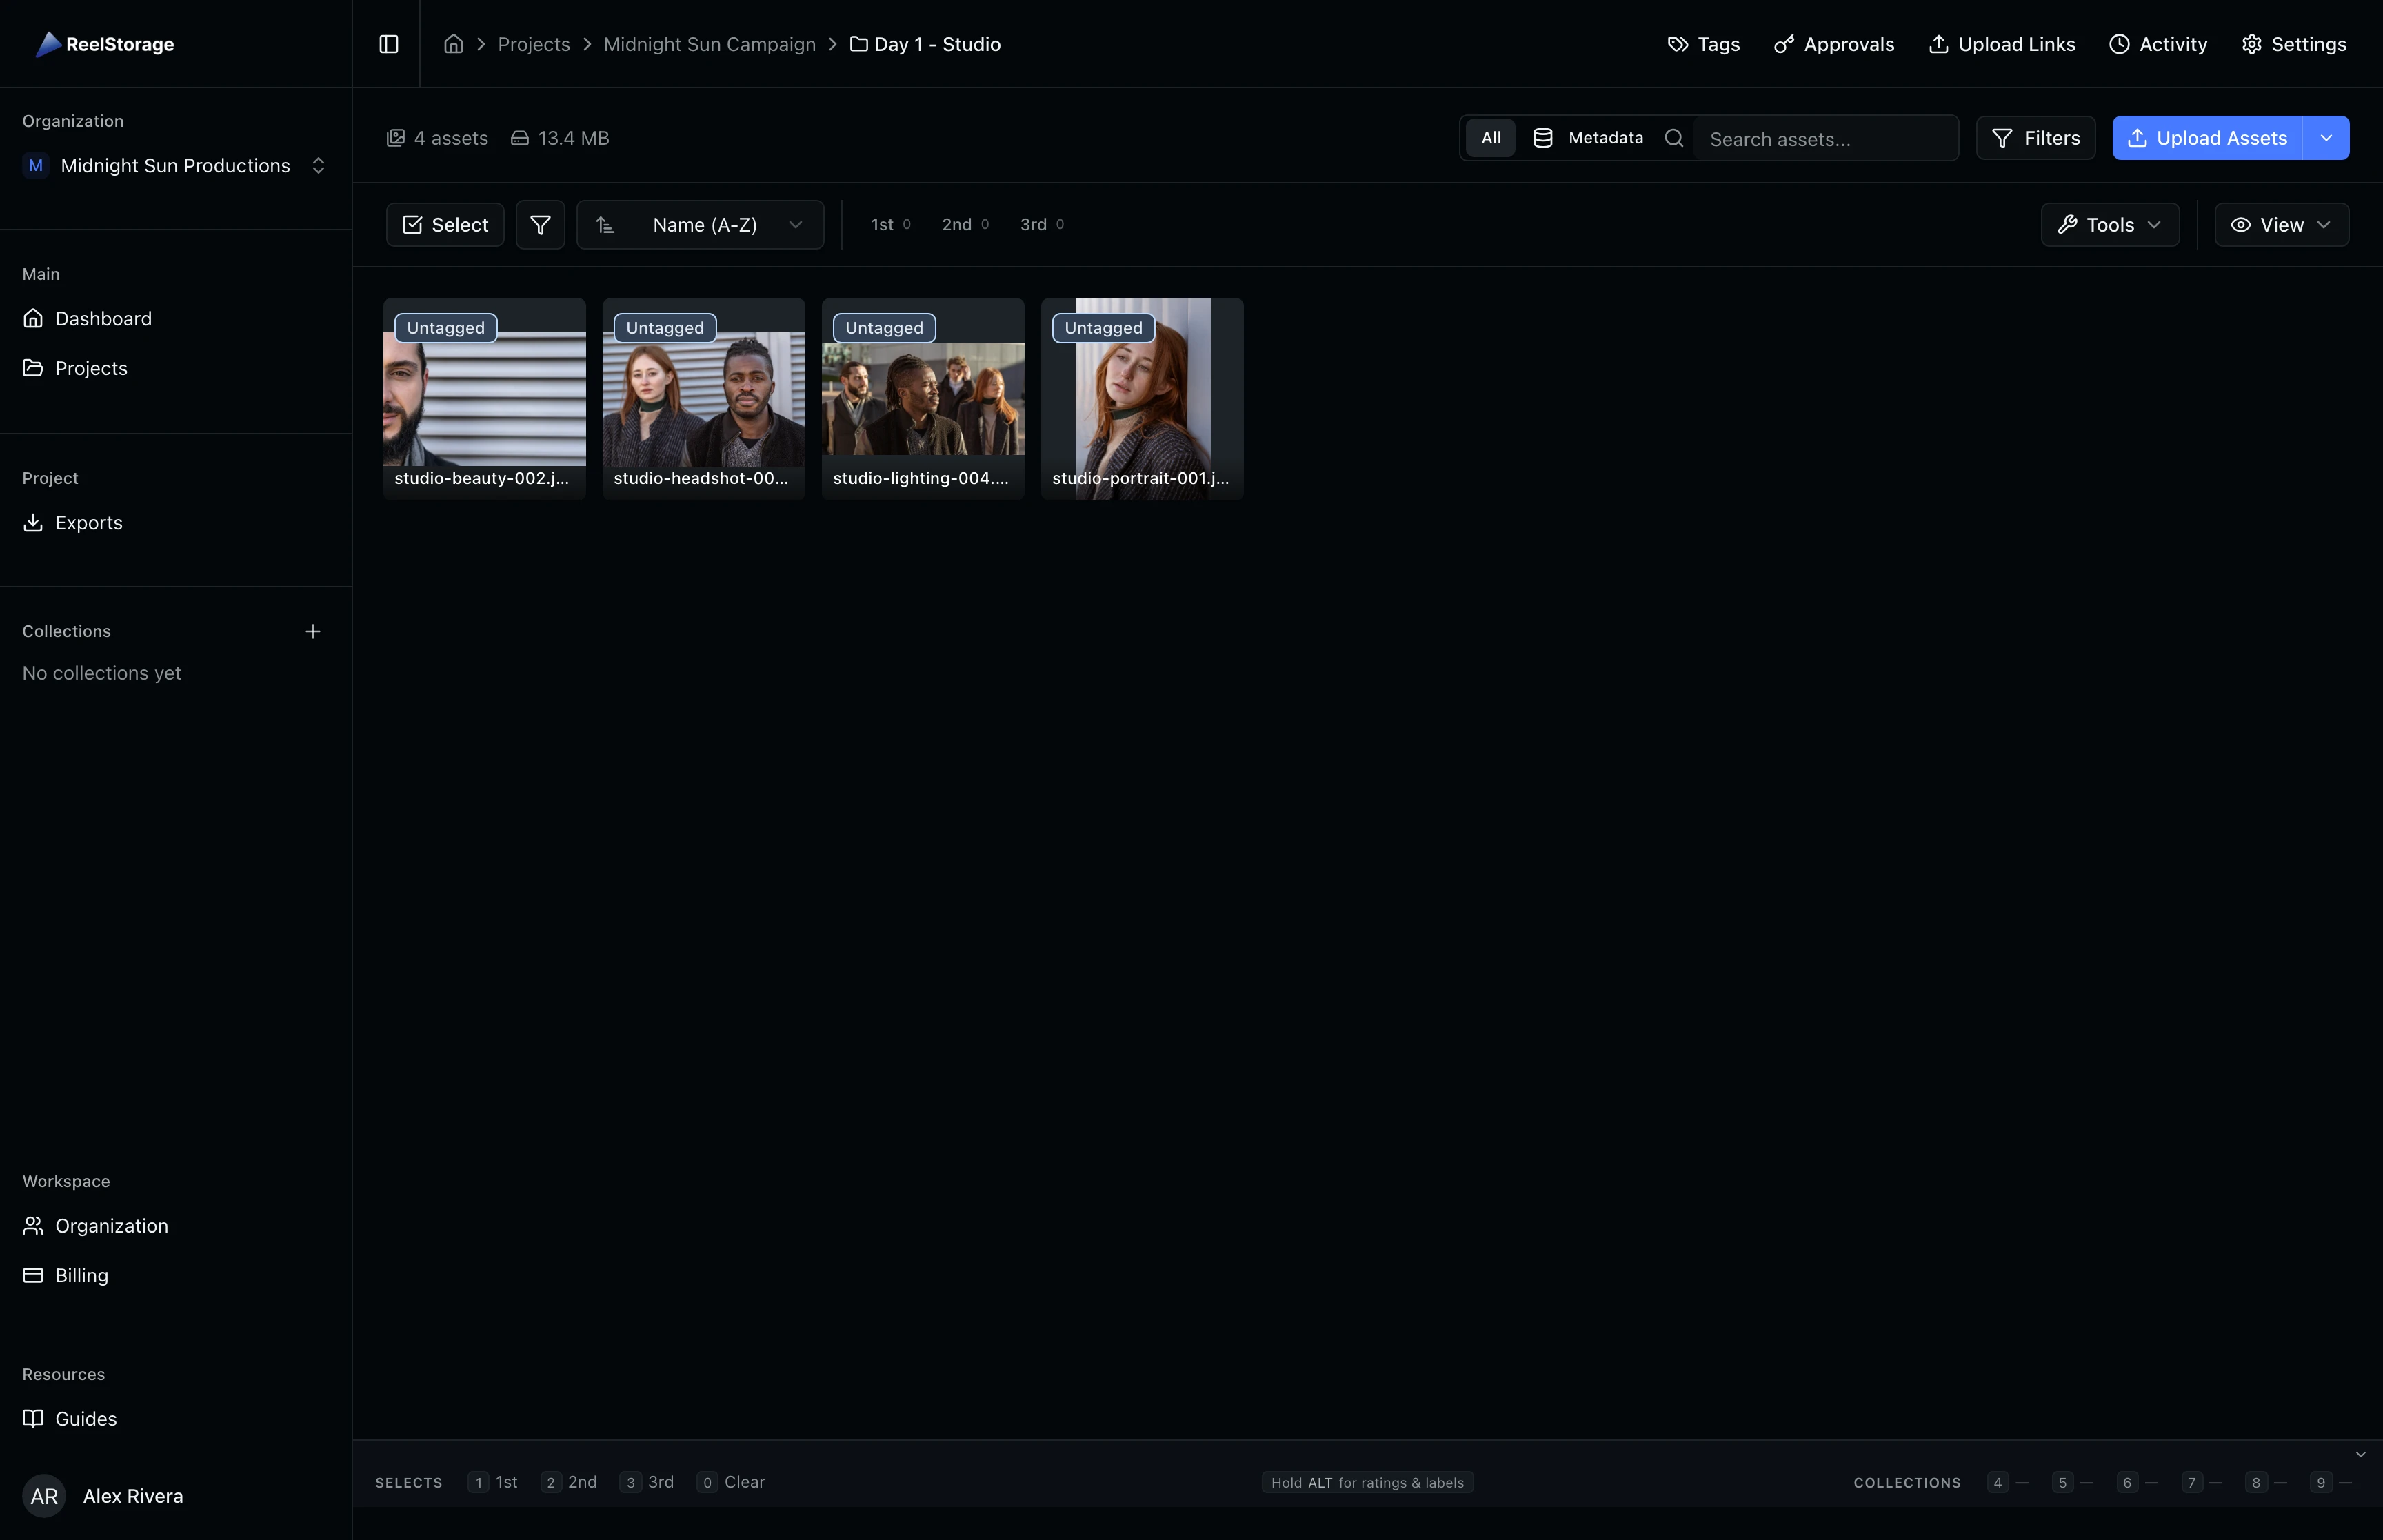
Step 3: Open a Folder
Click any folder card to open it. The view filters to show only the assets inside that folder, and the breadcrumb updates to show your current location within the project.
To go back to the project root and see all folders again, click the project name in the breadcrumb bar at the top of the page.
Step 4: Access Folder Actions
Hover over a folder card and click the three-dot menu icon that appears in the corner. A dropdown opens with four options: Open Folder, Rename, Download All, and Delete Folder.
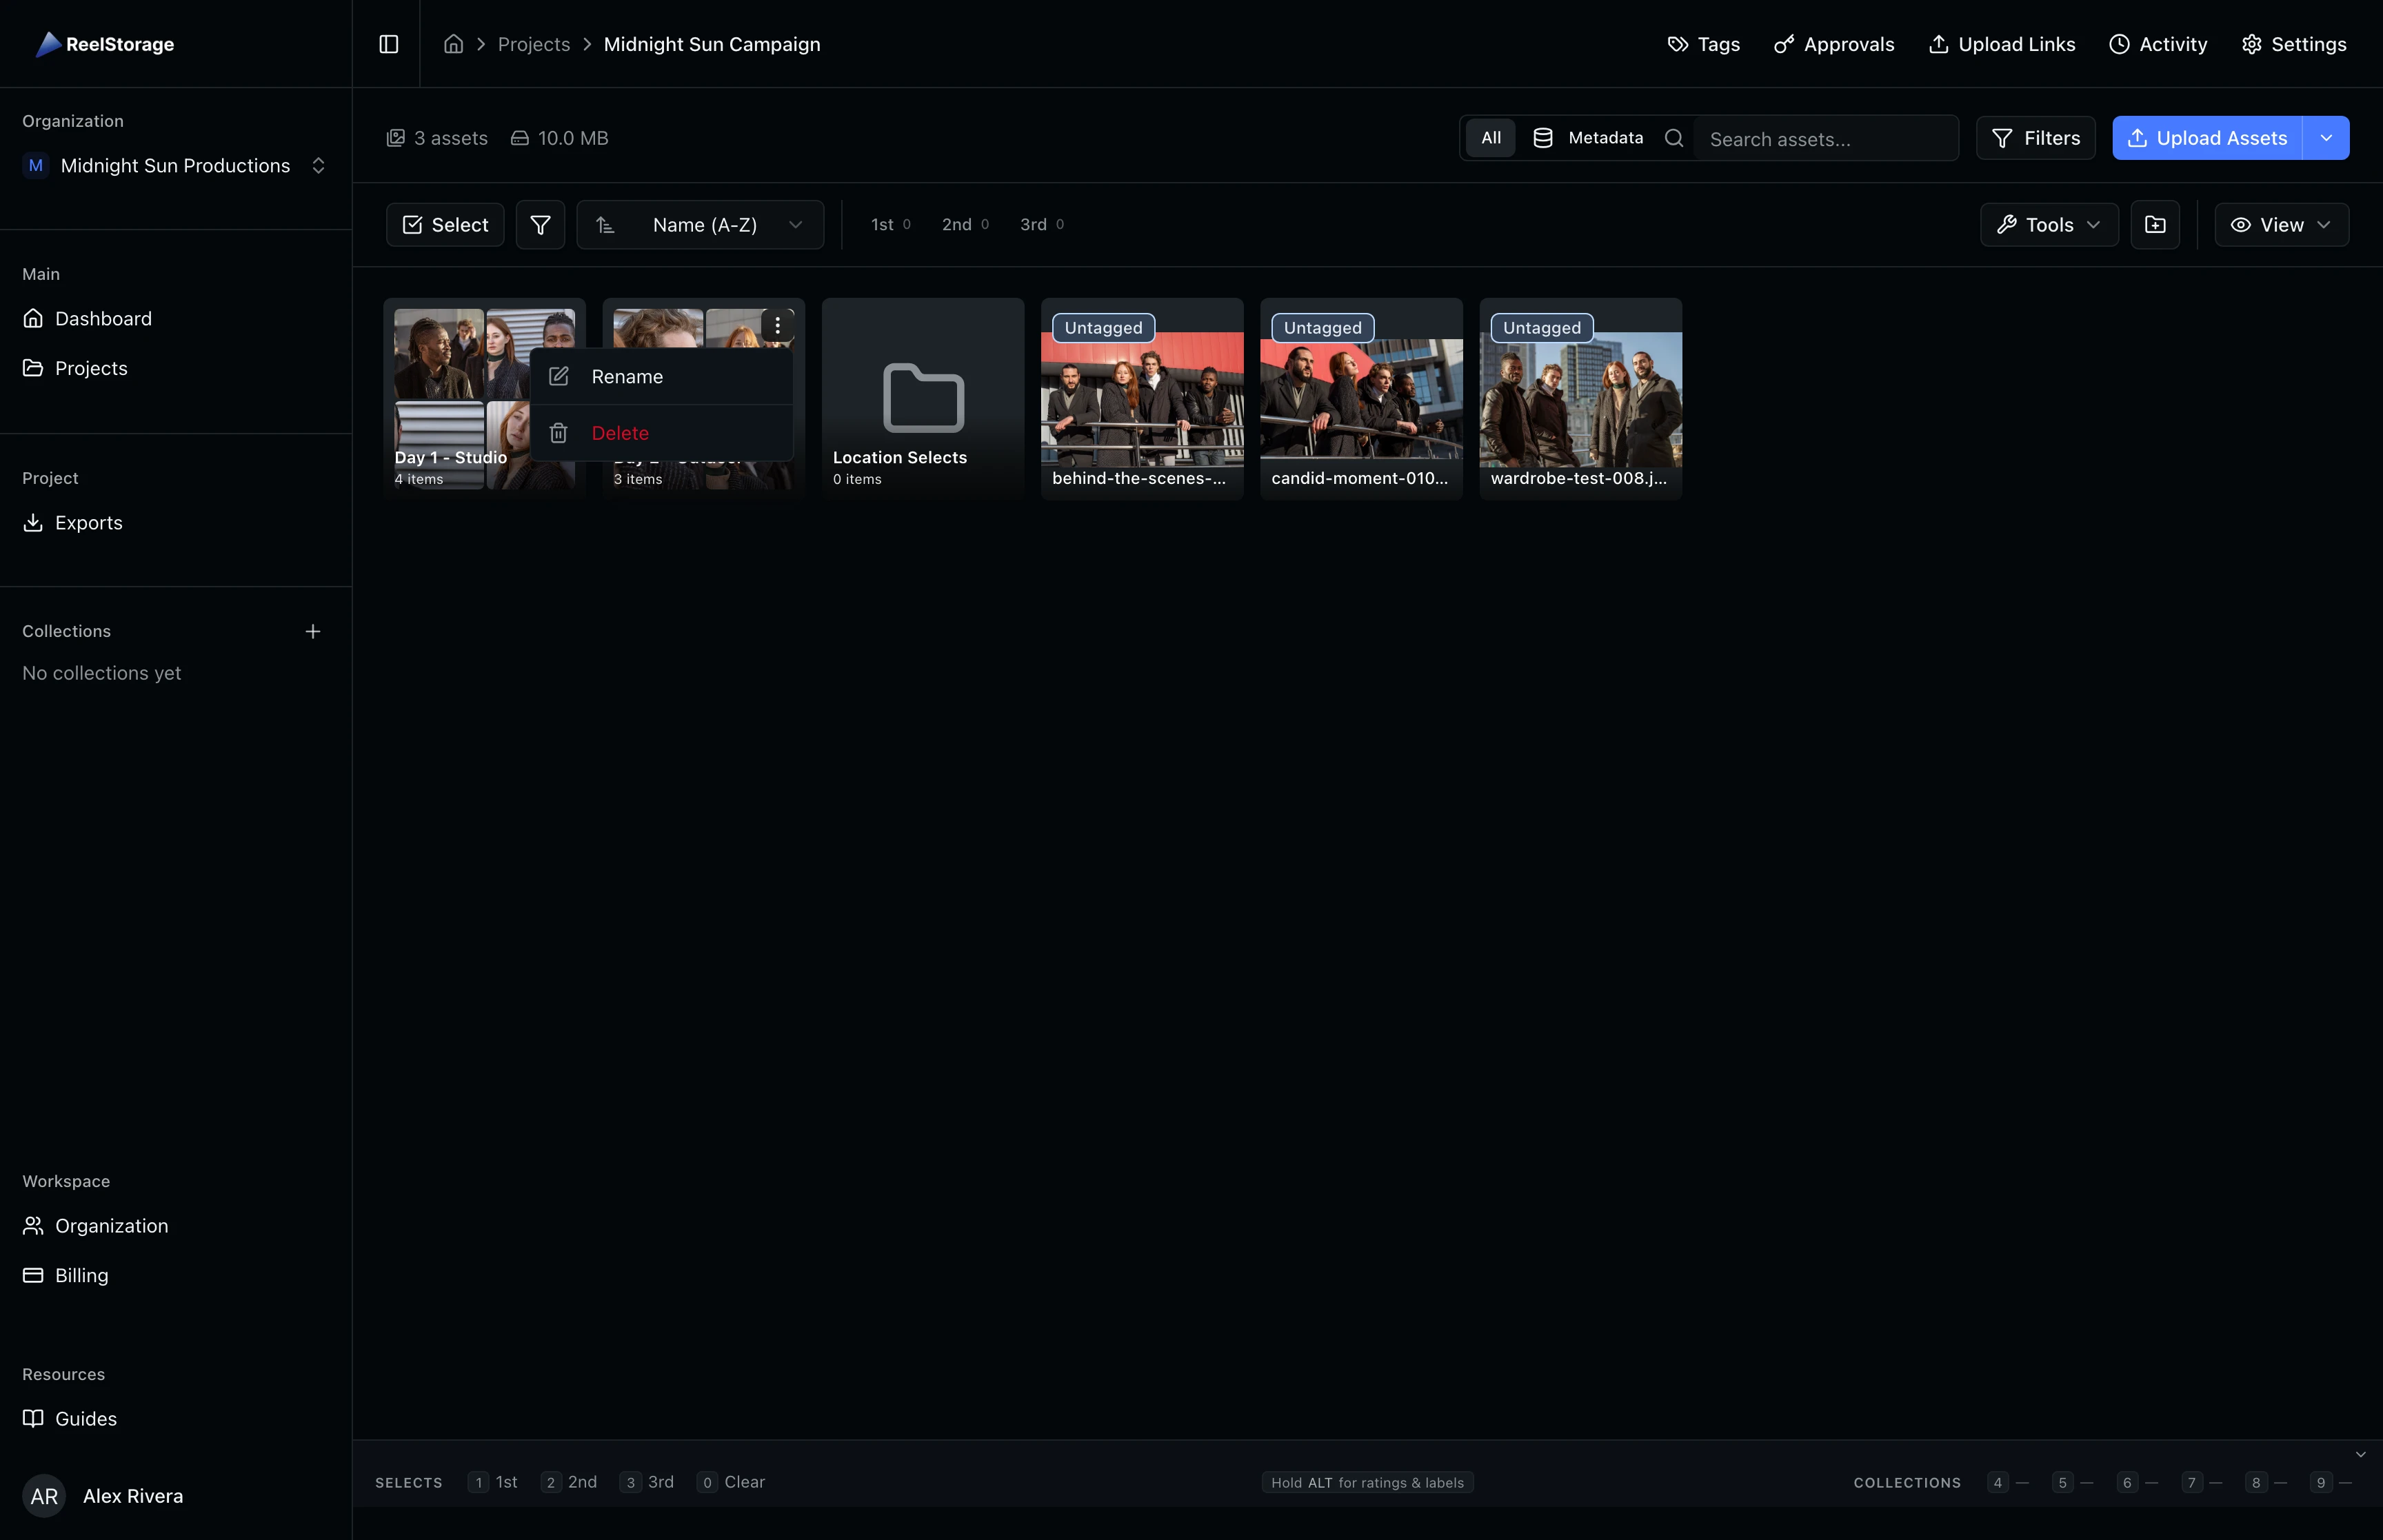
The actions available depend on your project permissions. If you do not see Rename or Delete, ask your project admin to grant you the "Rename Folders" or "Delete Folders" permission.
Step 5: Rename a Folder
Select Rename from the folder actions dropdown. The rename dialog opens with the current name pre-filled and shows the current name below the input for reference.
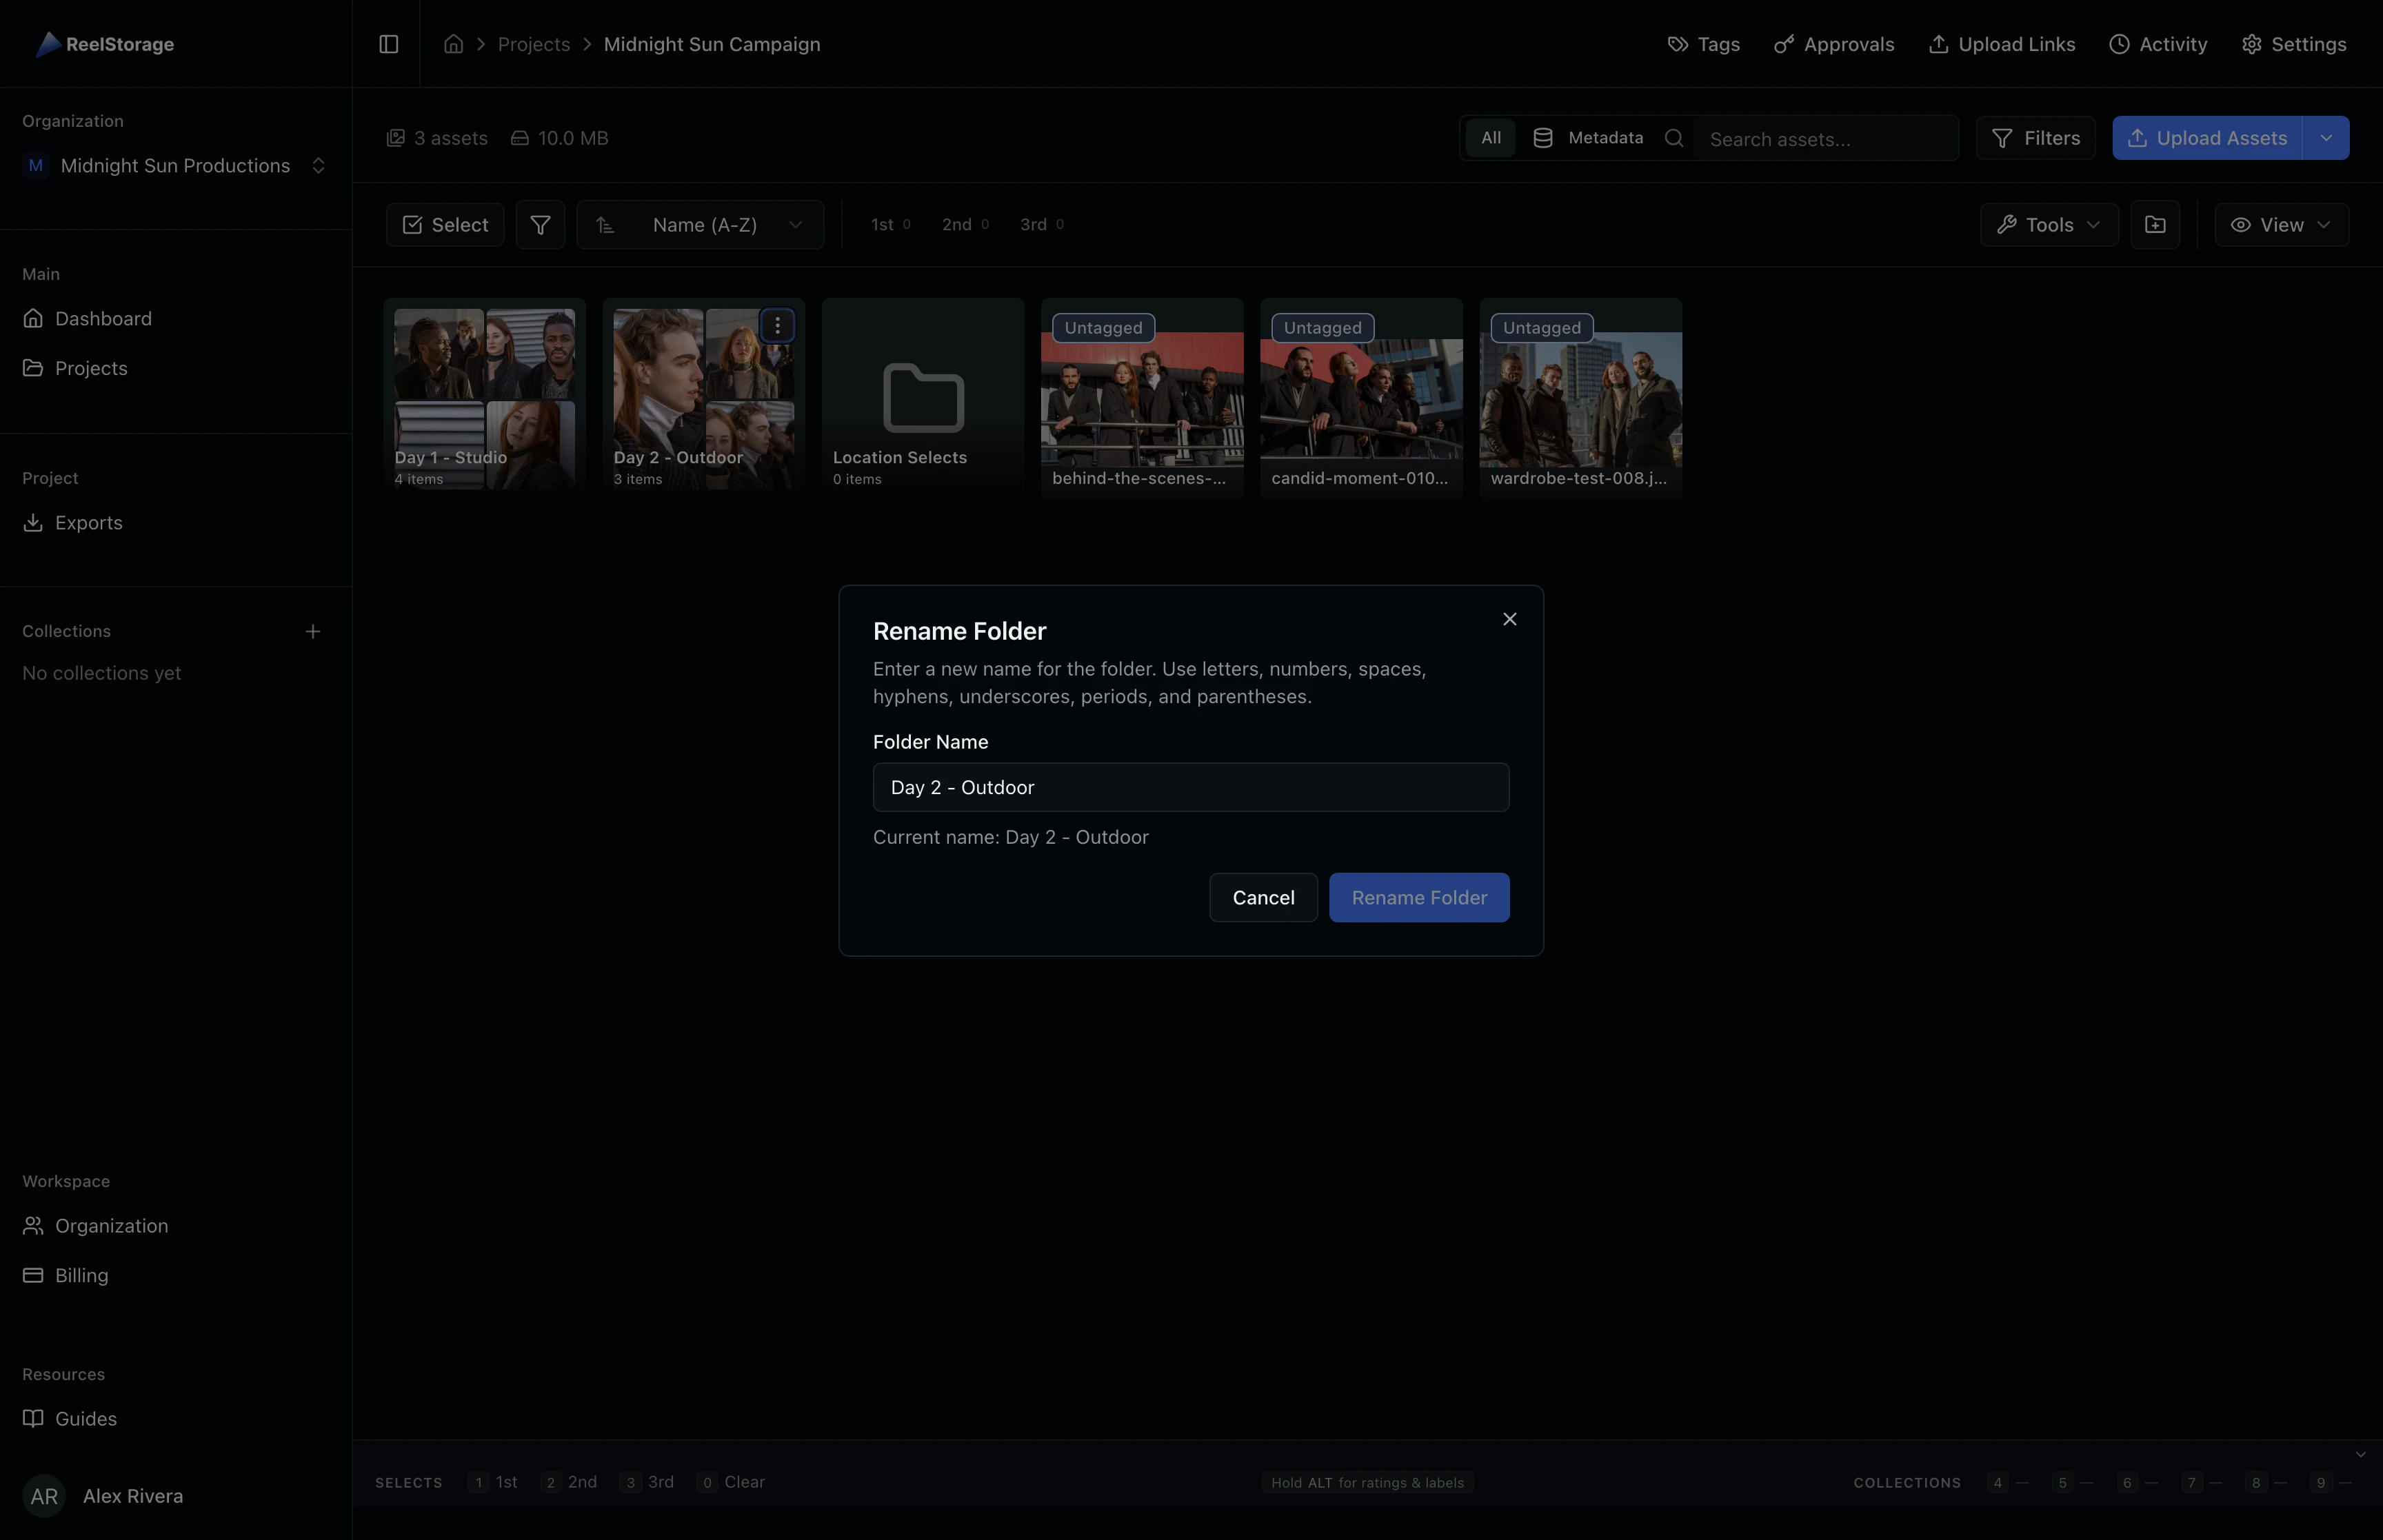
Enter the new name and click Rename Folder. The updated name appears on the folder card right away. Like creation, renamed folders must have a unique name within the project.
Step 6: Delete a Folder
Select Delete Folder from the actions dropdown. A confirmation dialog shows how many assets are inside and warns that the action cannot be undone.
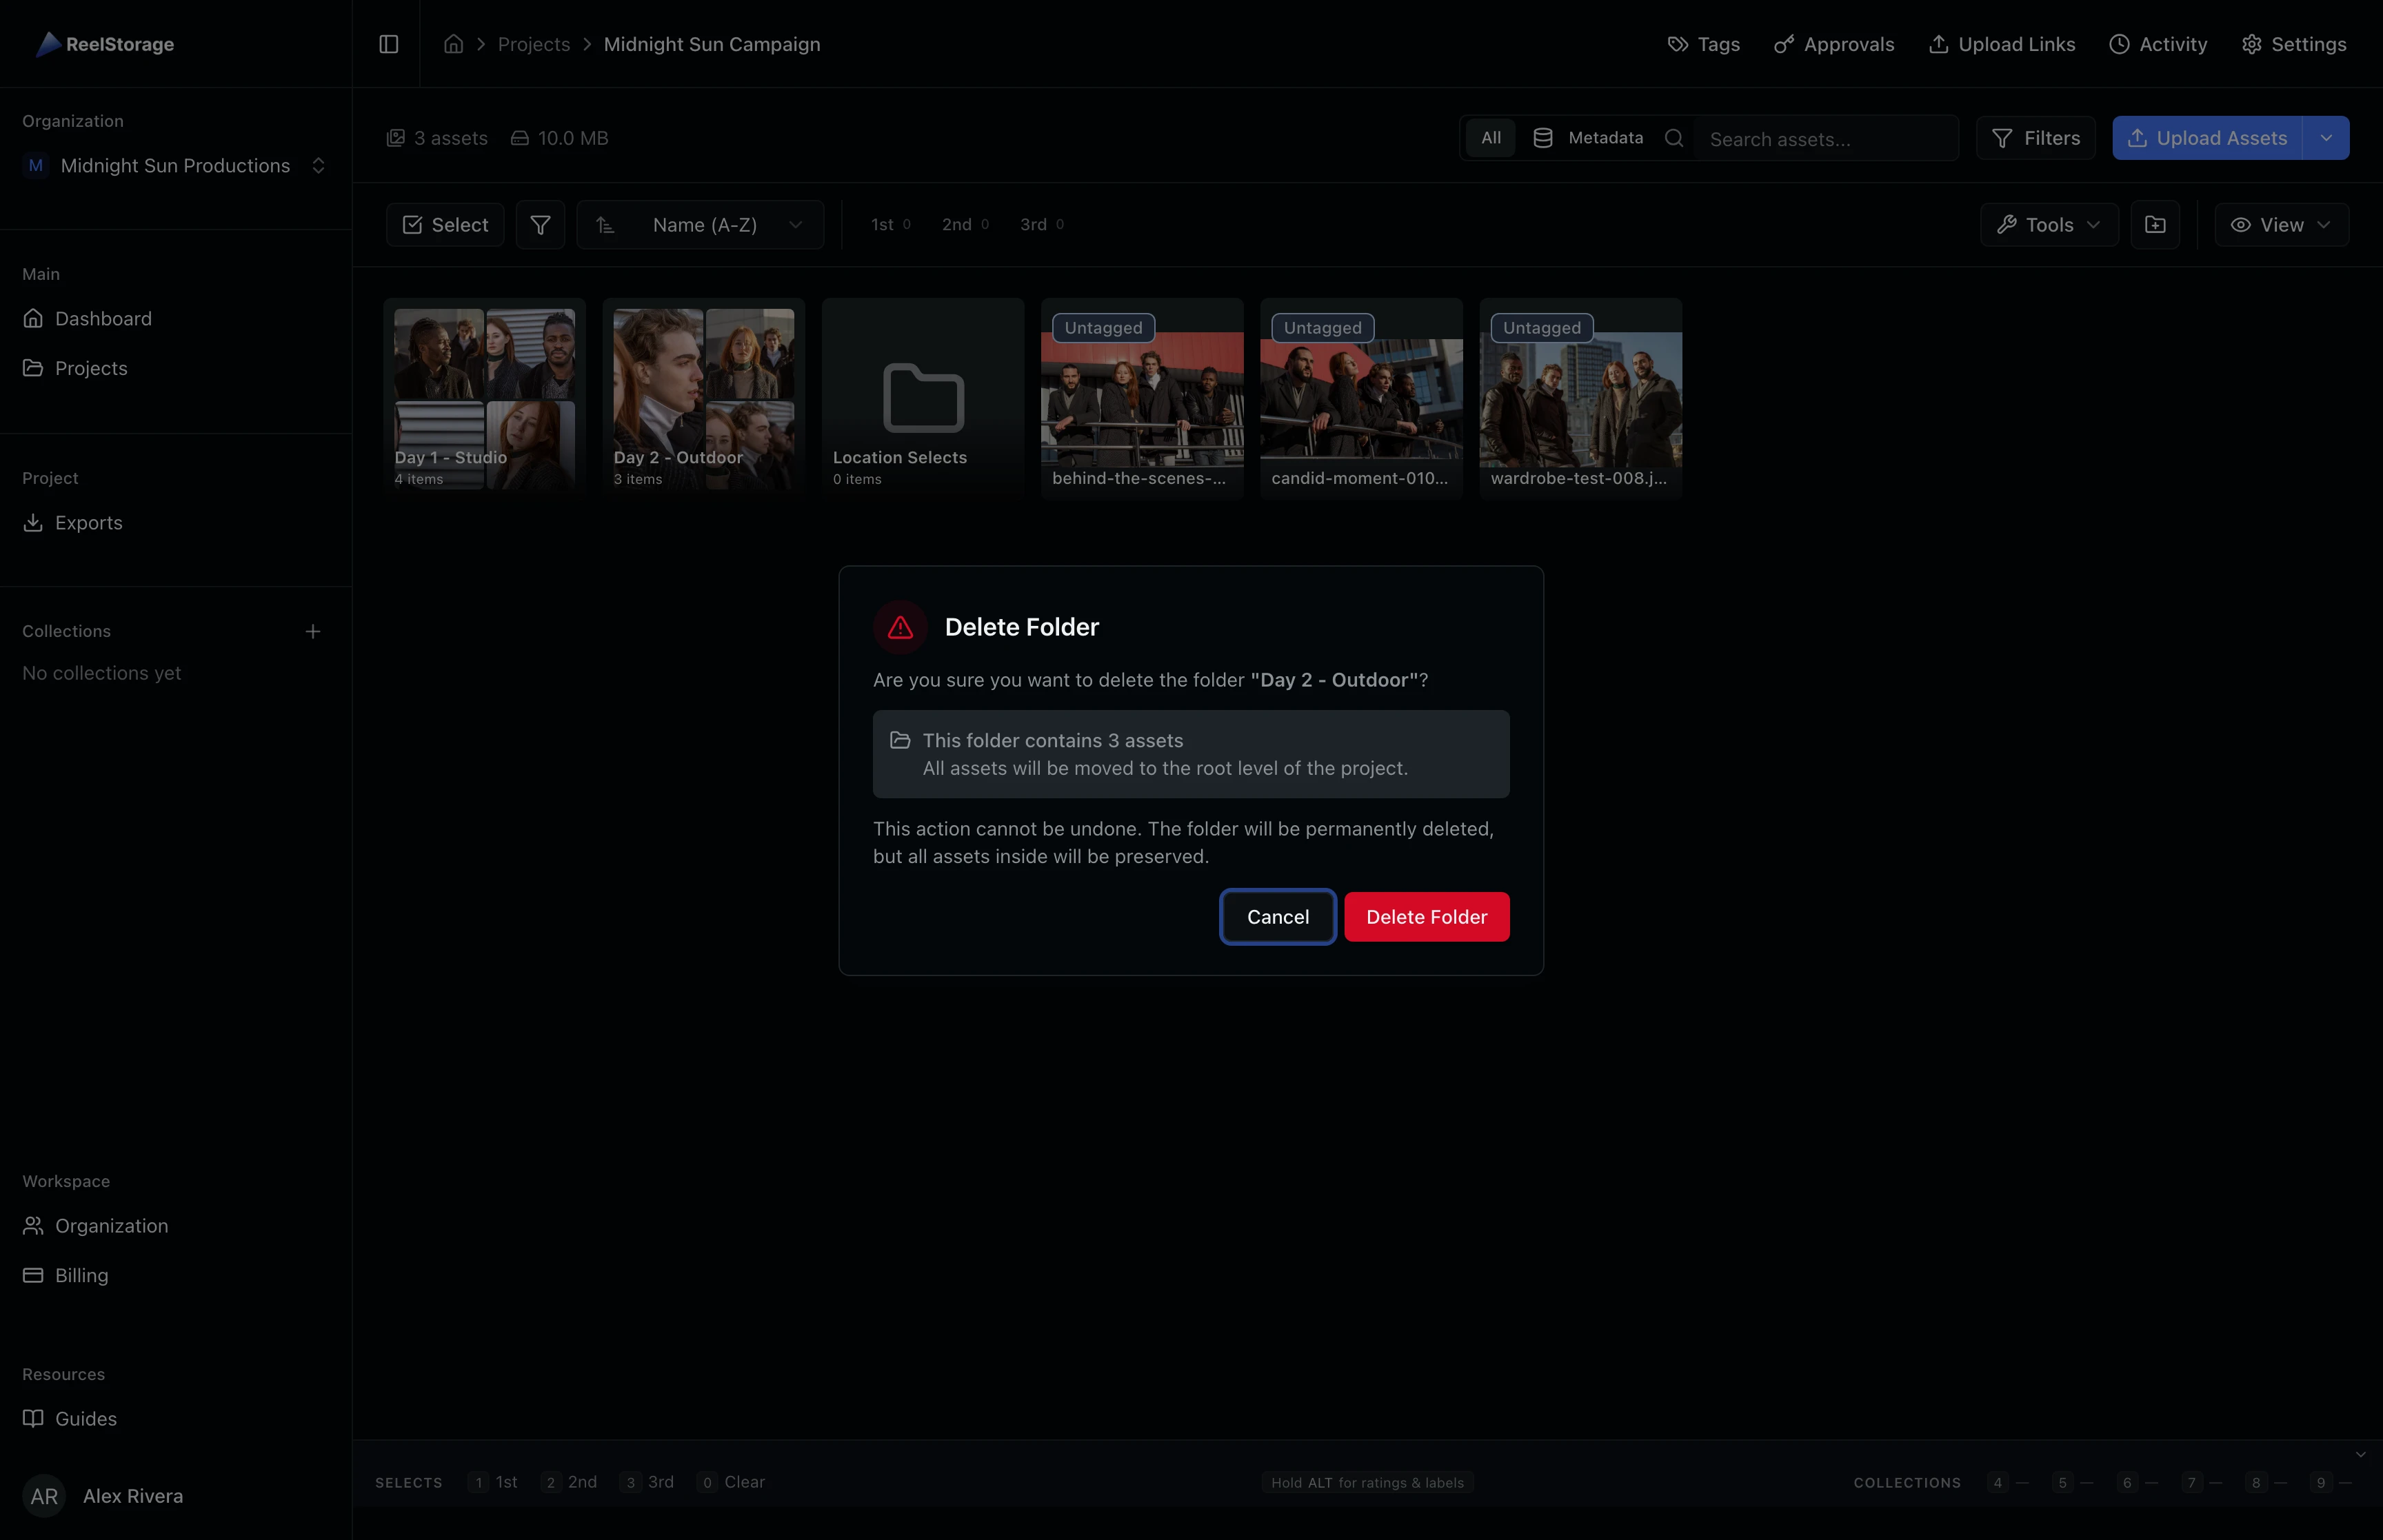
Deleting a folder is permanent, but your assets are safe. All assets inside the folder move back to the root level of the project. No files are lost.
Tips and Best Practices
- Use consistent naming: Adopt a naming convention like "Day 01", "Day 02" or "Location - Studio A" so folders sort predictably in the grid.
- Keep it flat: Folders work best as a single level of organization. For cross-cutting groupings, use collections instead.
- Drag and drop: You can drag assets onto folder cards to move them into a folder, or drag them to the project breadcrumb to move them back to root.
- Download All: Use the "Download All" option in the folder actions menu to download every asset in a folder as a single archive.
Troubleshooting
Why can't I create a folder?
You need the "Create Folders" permission on the project. Ask your project admin to update your permissions in project settings.
What happens to assets when I delete a folder?
All assets inside the folder are moved to the root level of the project. They are never deleted when you remove a folder.
Can I nest folders inside other folders?
Folders are single-level only. For more advanced grouping, combine folders with collections or tags.
What's Next
- Organizing Assets with Collections: Group assets across folders using collections for flexible curation
- Browsing and Selecting Assets: Learn keyboard shortcuts and bulk selection for faster workflows
Related Guides
Organizing Assets with Collections
Learn how to create collections, add assets to them, view collection contents, and manage collections from the sidebar.
Browsing and Selecting Assets
Learn how to browse your asset grid, search by name or metadata, sort and filter results, and select assets for bulk actions.