Viewing the Activity Log
Prerequisites
The activity log records every action taken in your project. Use it to see who uploaded files, changed metadata, created folders, sent approvals, and more. Each entry shows the action type, the team member responsible, the affected resource, and a timestamp.
What You'll Learn
- How to open the activity log for a project
- How to read timeline entries and understand action types
- How to filter activity by action type, team member, and date range
- How to combine filters to find specific events
- How to clear filters and return to the full log
Step 1: Open the Activity Log
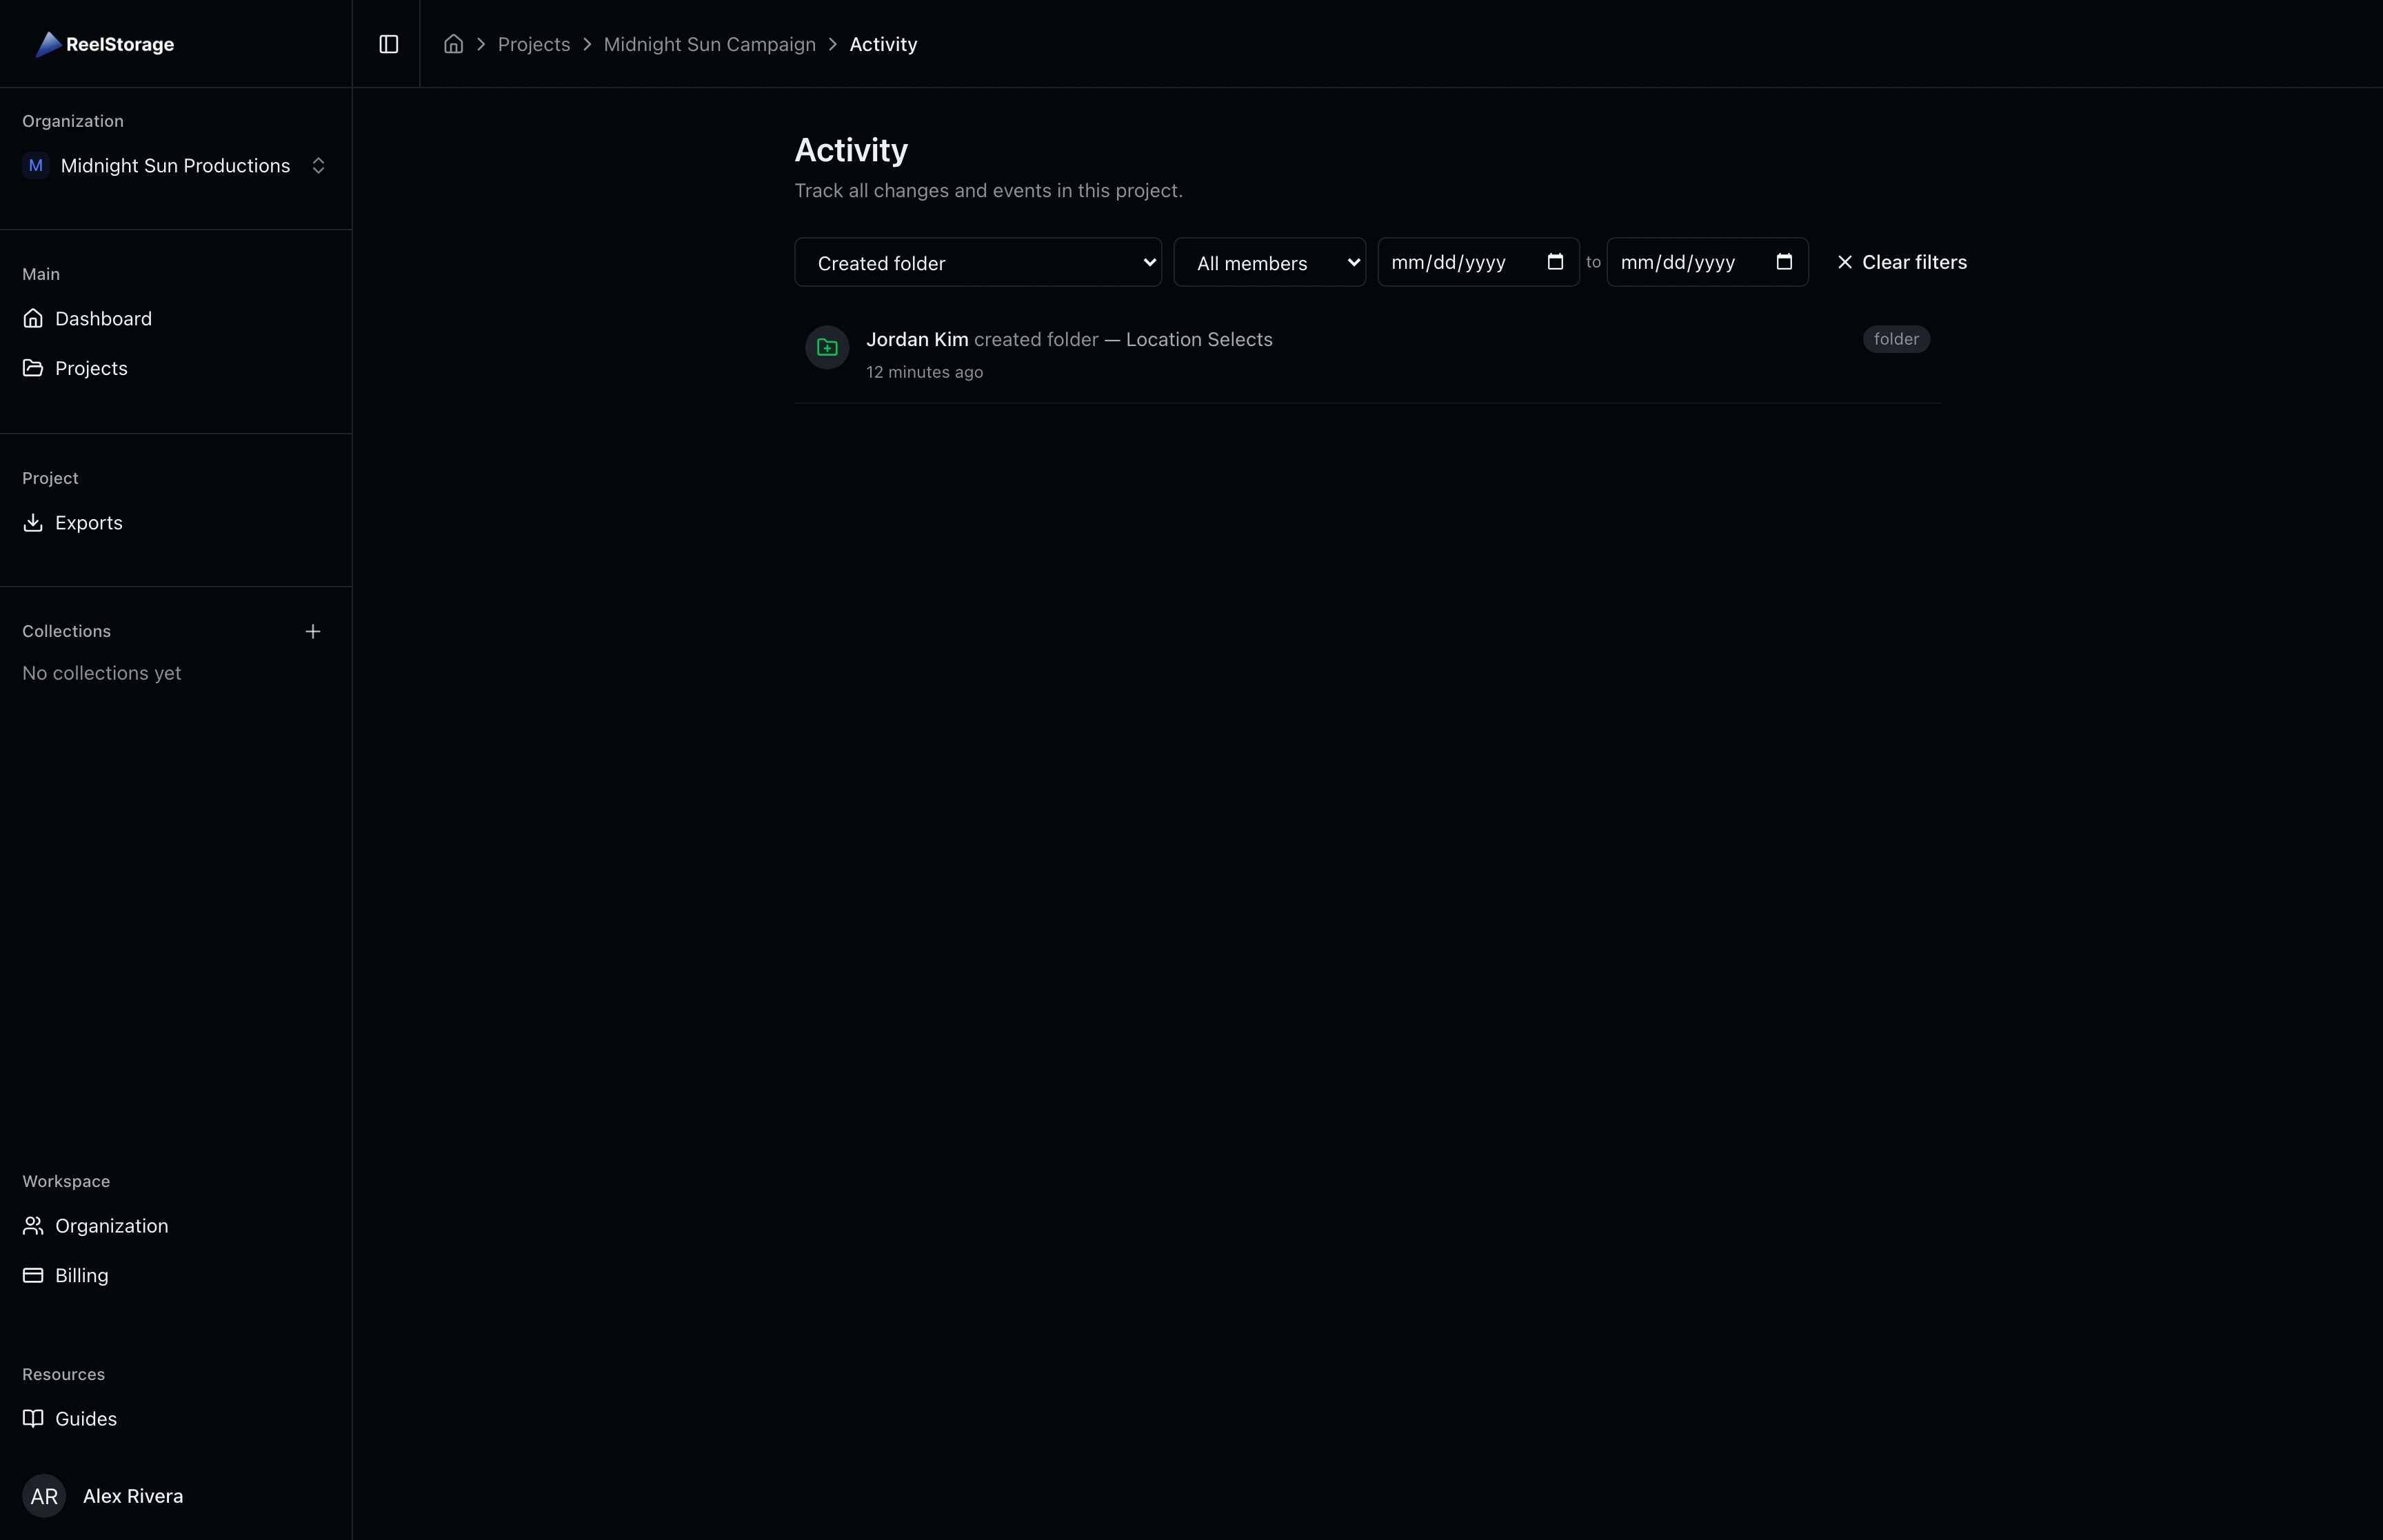
Navigate to your project and click the Activity tab in the sidebar under Project. The page displays a chronological timeline of every recorded action, with the most recent entries at the top.
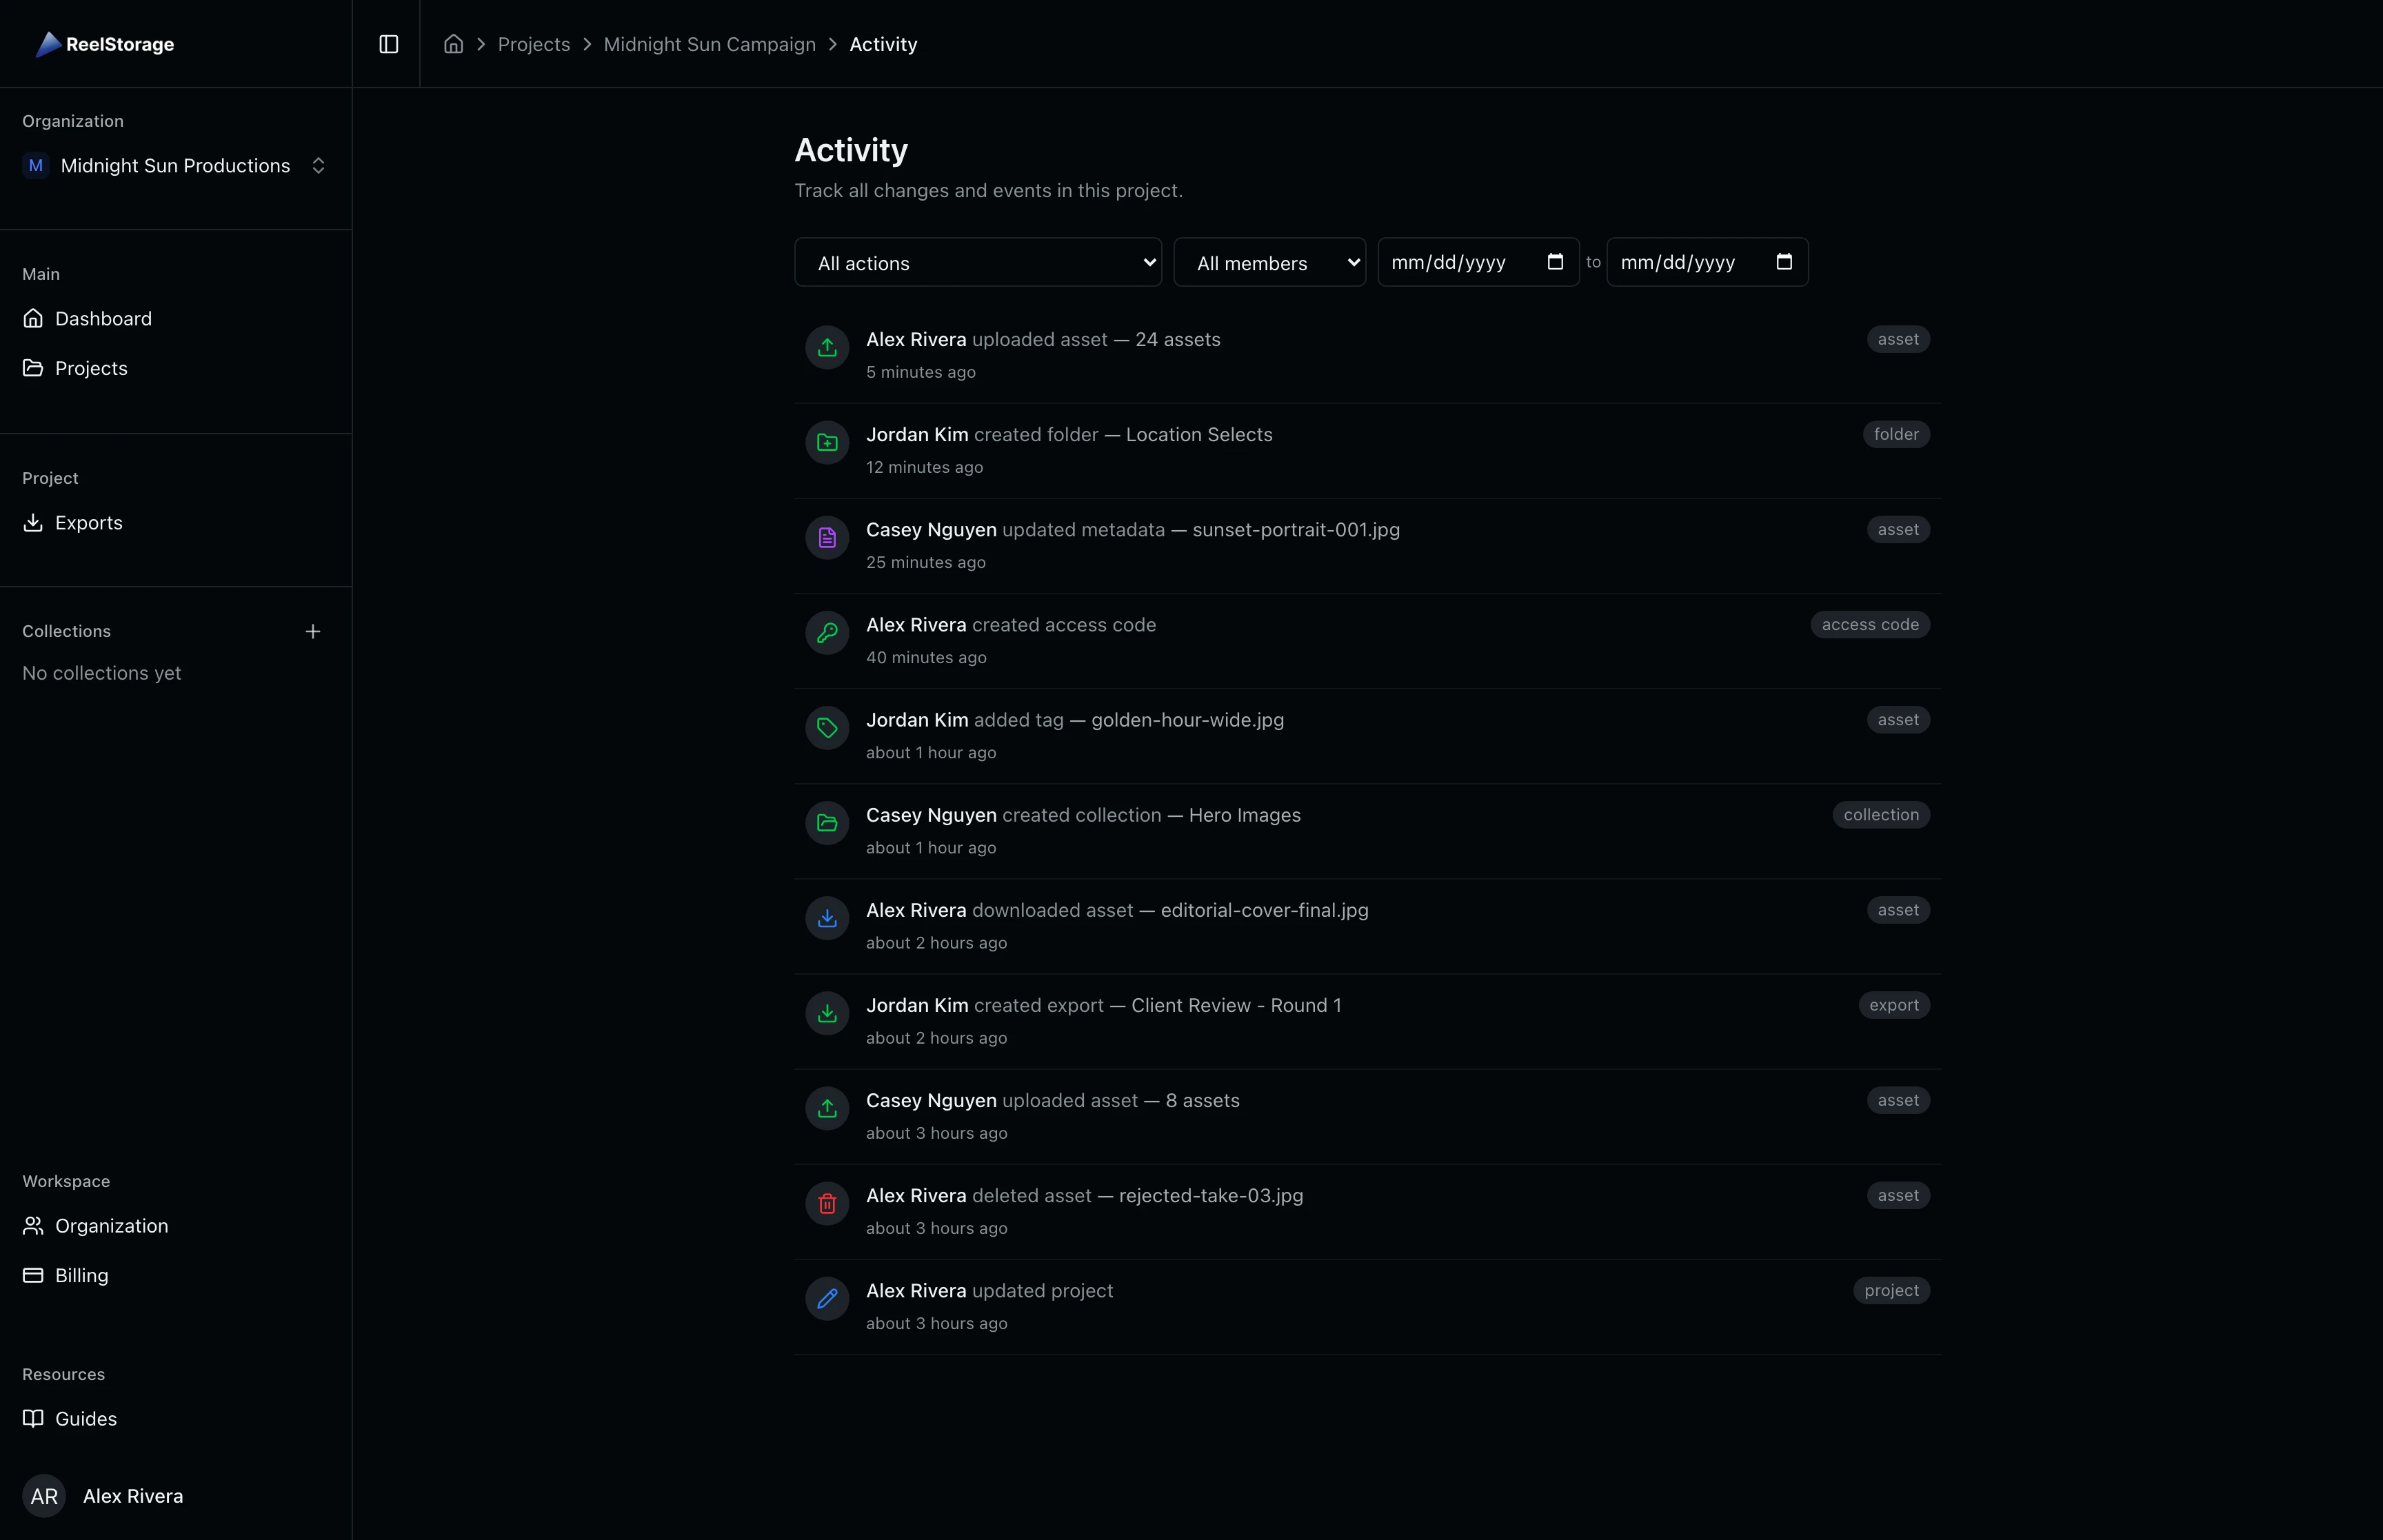
Each entry includes three parts: a colored icon on the left indicating the action type, the team member's name and action description in the center, and a resource type badge on the right. Icons use color to signal categories at a glance: green for uploads and creations, red for deletions, blue for edits and downloads, and purple for metadata changes. Timestamps display as relative values like "5 minutes ago" or "about 2 hours ago."
The activity log captures actions from all team members, including uploads, folder creation, metadata edits, approval sends, collection updates, and exports. It also records asset deletions and downloads, so you have a complete picture of file movement.
Step 2: Filter by Action Type
Select the All actions dropdown at the top of the page to narrow the log to a specific action type. The dropdown groups actions by domain: Assets (uploads, deletions, downloads, tag changes), Metadata (updates, IPTC edits, CSV imports), Folders (creation, renaming, deletion), Access Codes (creation, updates), Collections, Exports, and more. Pick any action to see only matching entries.

You can also select a domain-level wildcard (for example, "All Assets") to see every asset-related action at once. When a filter is active, the dropdown label changes to reflect the selected action and a Clear filters button appears.
Step 3: Filter by Team Member
Select the All members dropdown to view activity from a specific team member. The dropdown lists every member who has been added to this project. Pick a name to see only their actions.
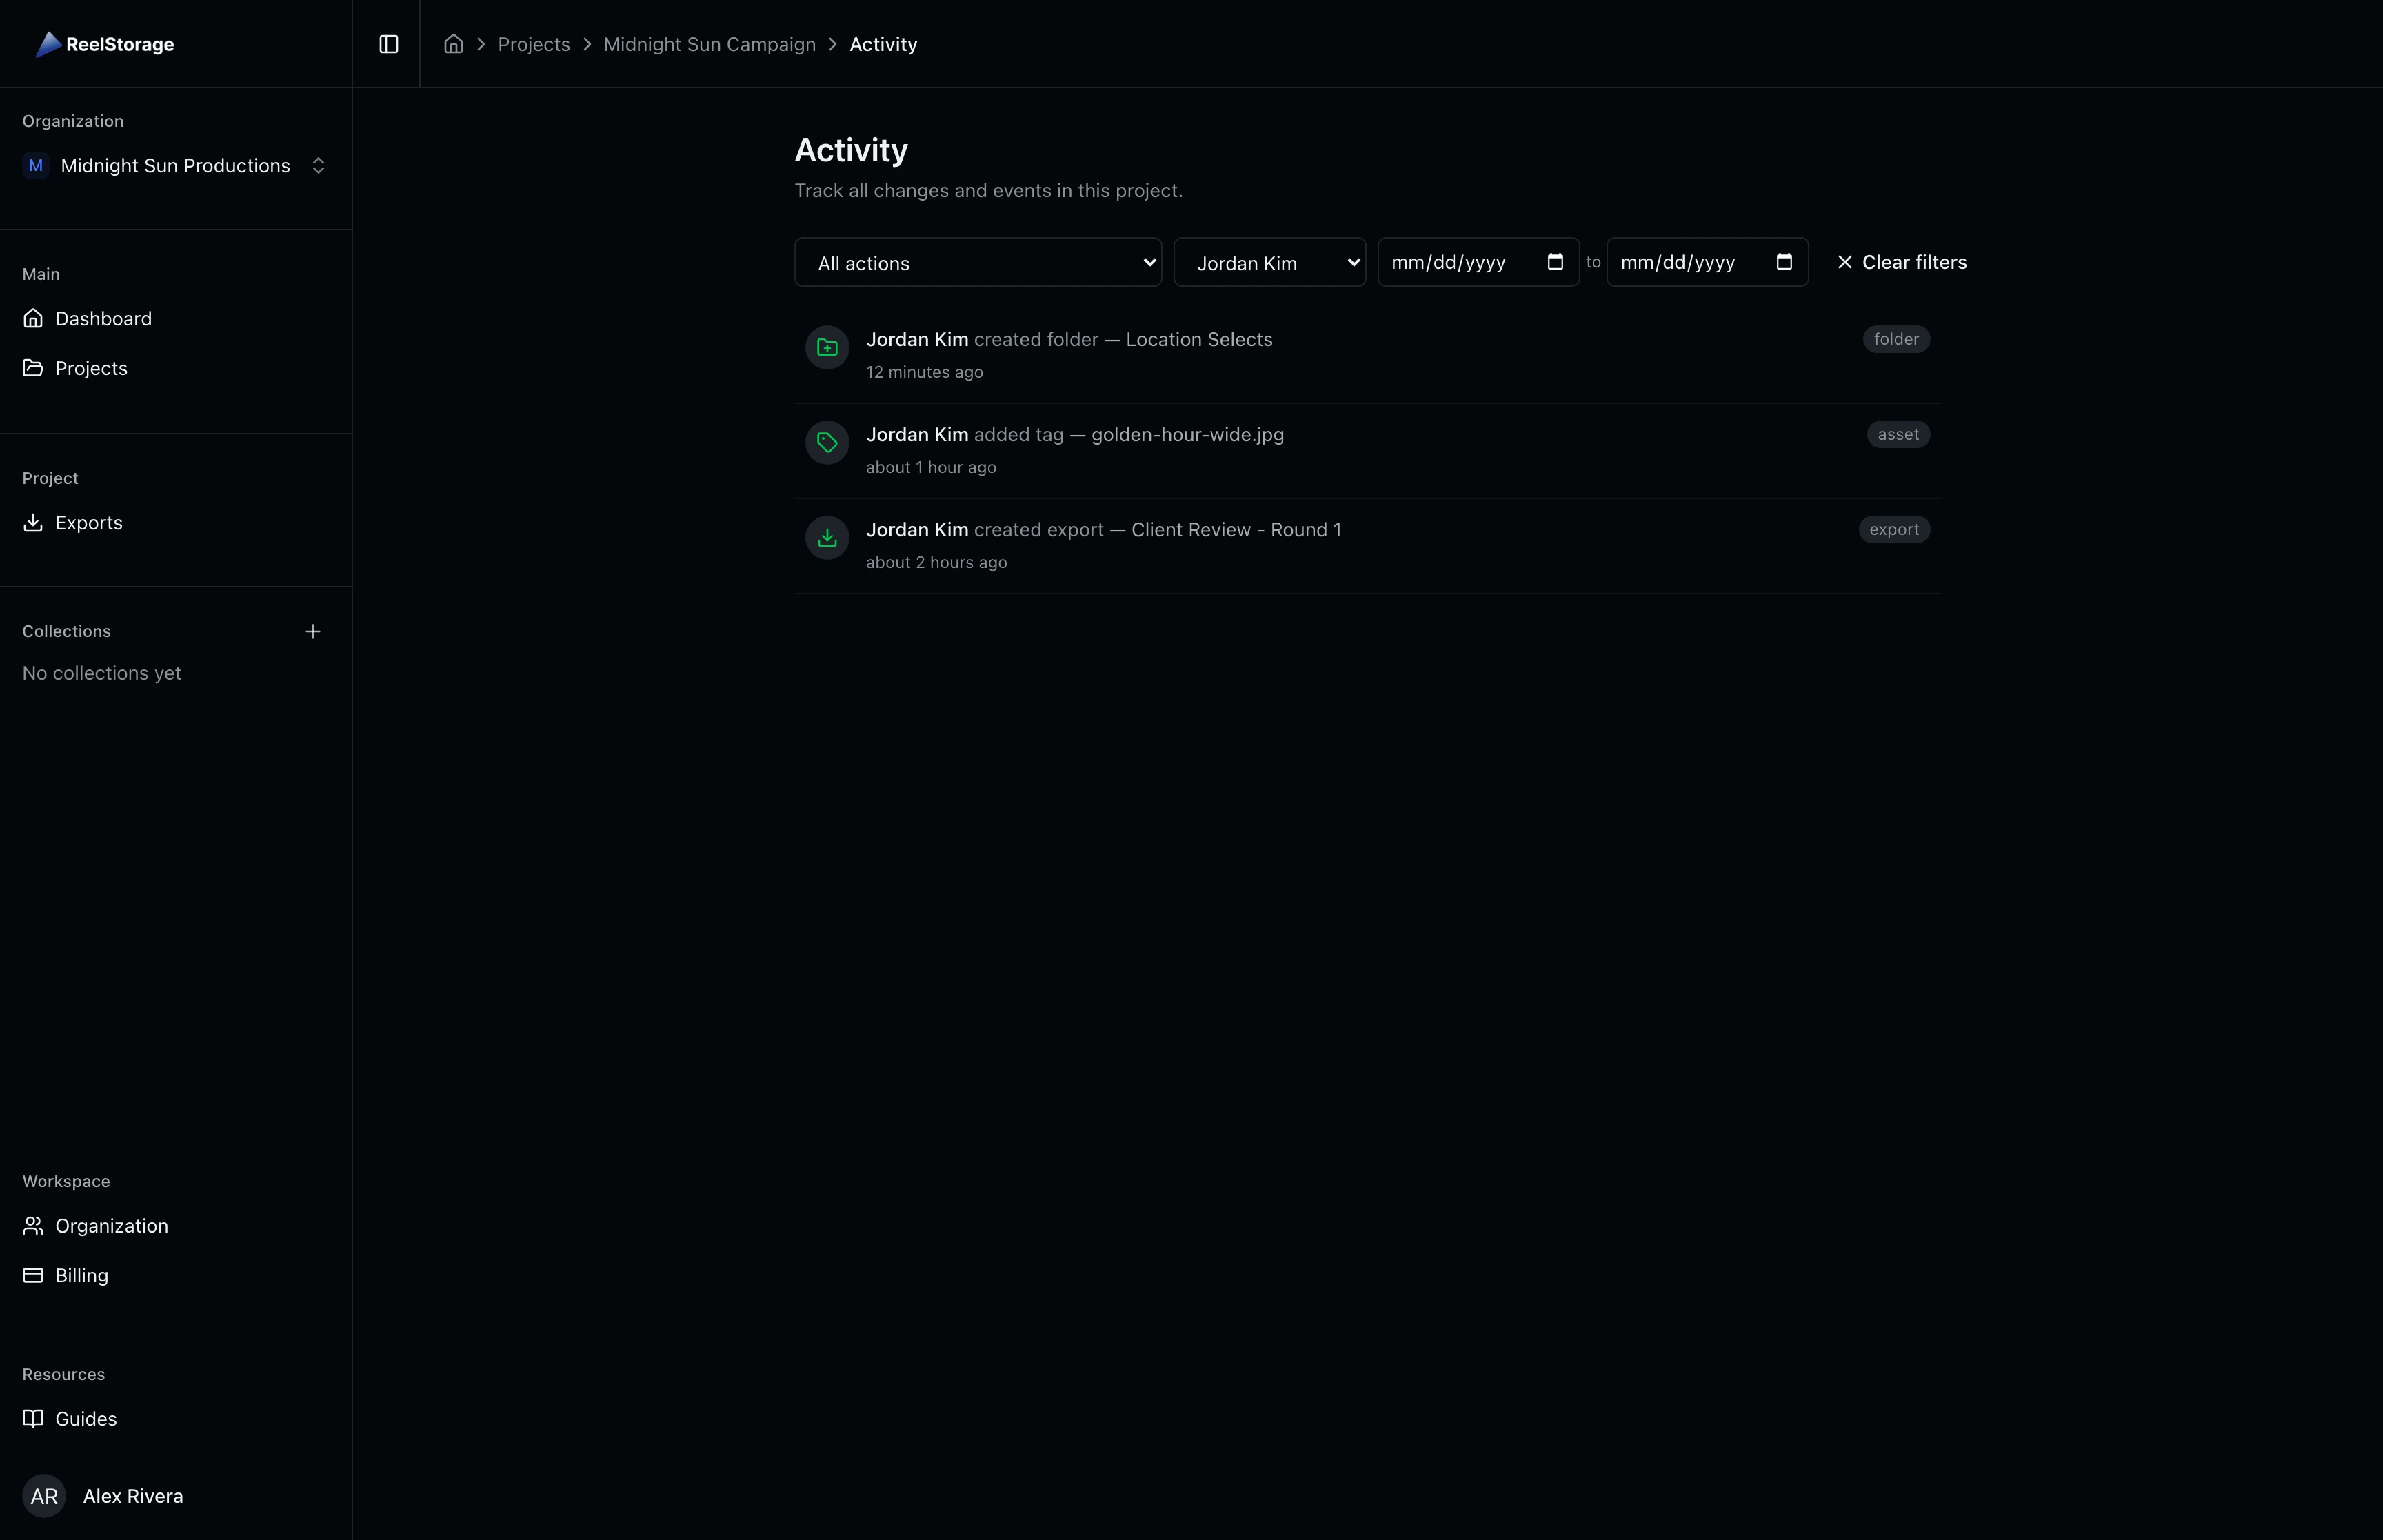
This filter is useful when reviewing what a specific photographer or editor contributed before a client review. Filtering by member gives you a focused view of one person's work across all action types.
Step 4: Filter by Date Range
The filter bar includes From and To date fields next to the action and member dropdowns. Set either or both dates to limit the log to a specific time window. Click on the date field and select or type a date in your browser's date picker format.
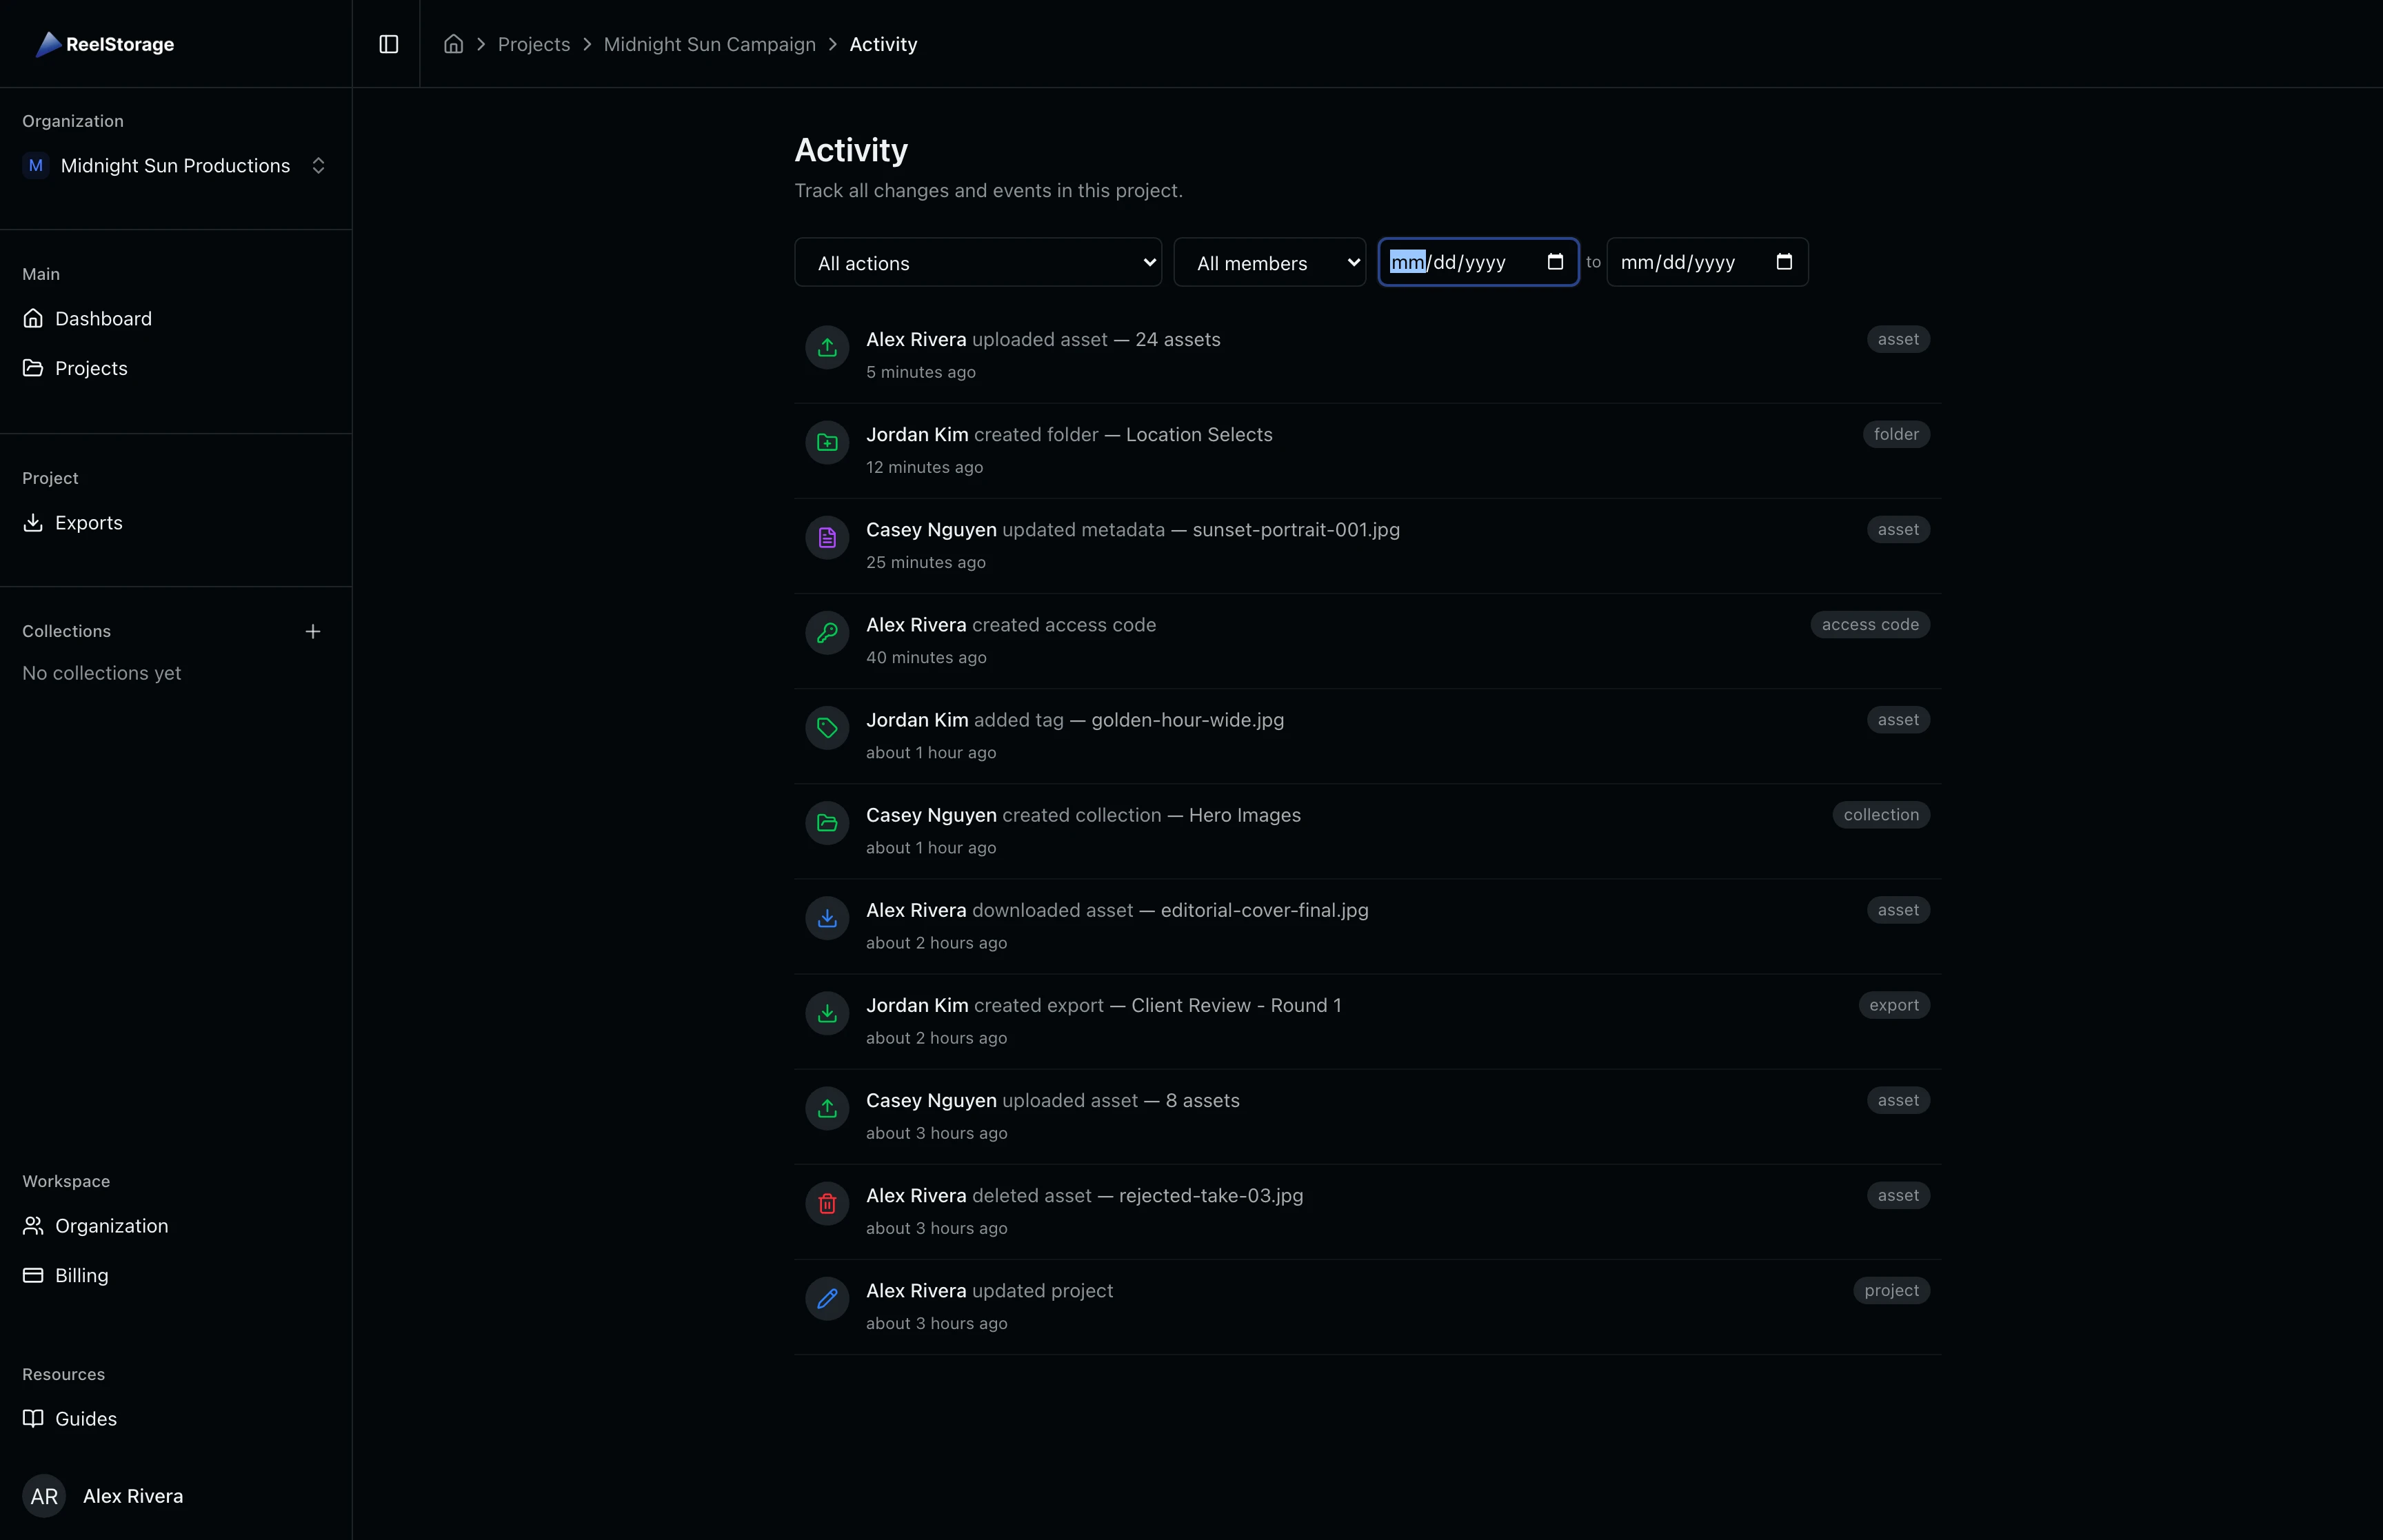
Date filters work well for reviewing activity around specific events. Set a start date to see everything that happened during a shoot day, or set both dates to audit a specific week of work.
Step 5: Combine Multiple Filters
You can stack all three filter types at once. For example, select "Uploaded asset" from the action dropdown and "Casey Nguyen" from the member dropdown to find exactly when that team member added files. The timeline updates to show only entries matching every active filter.
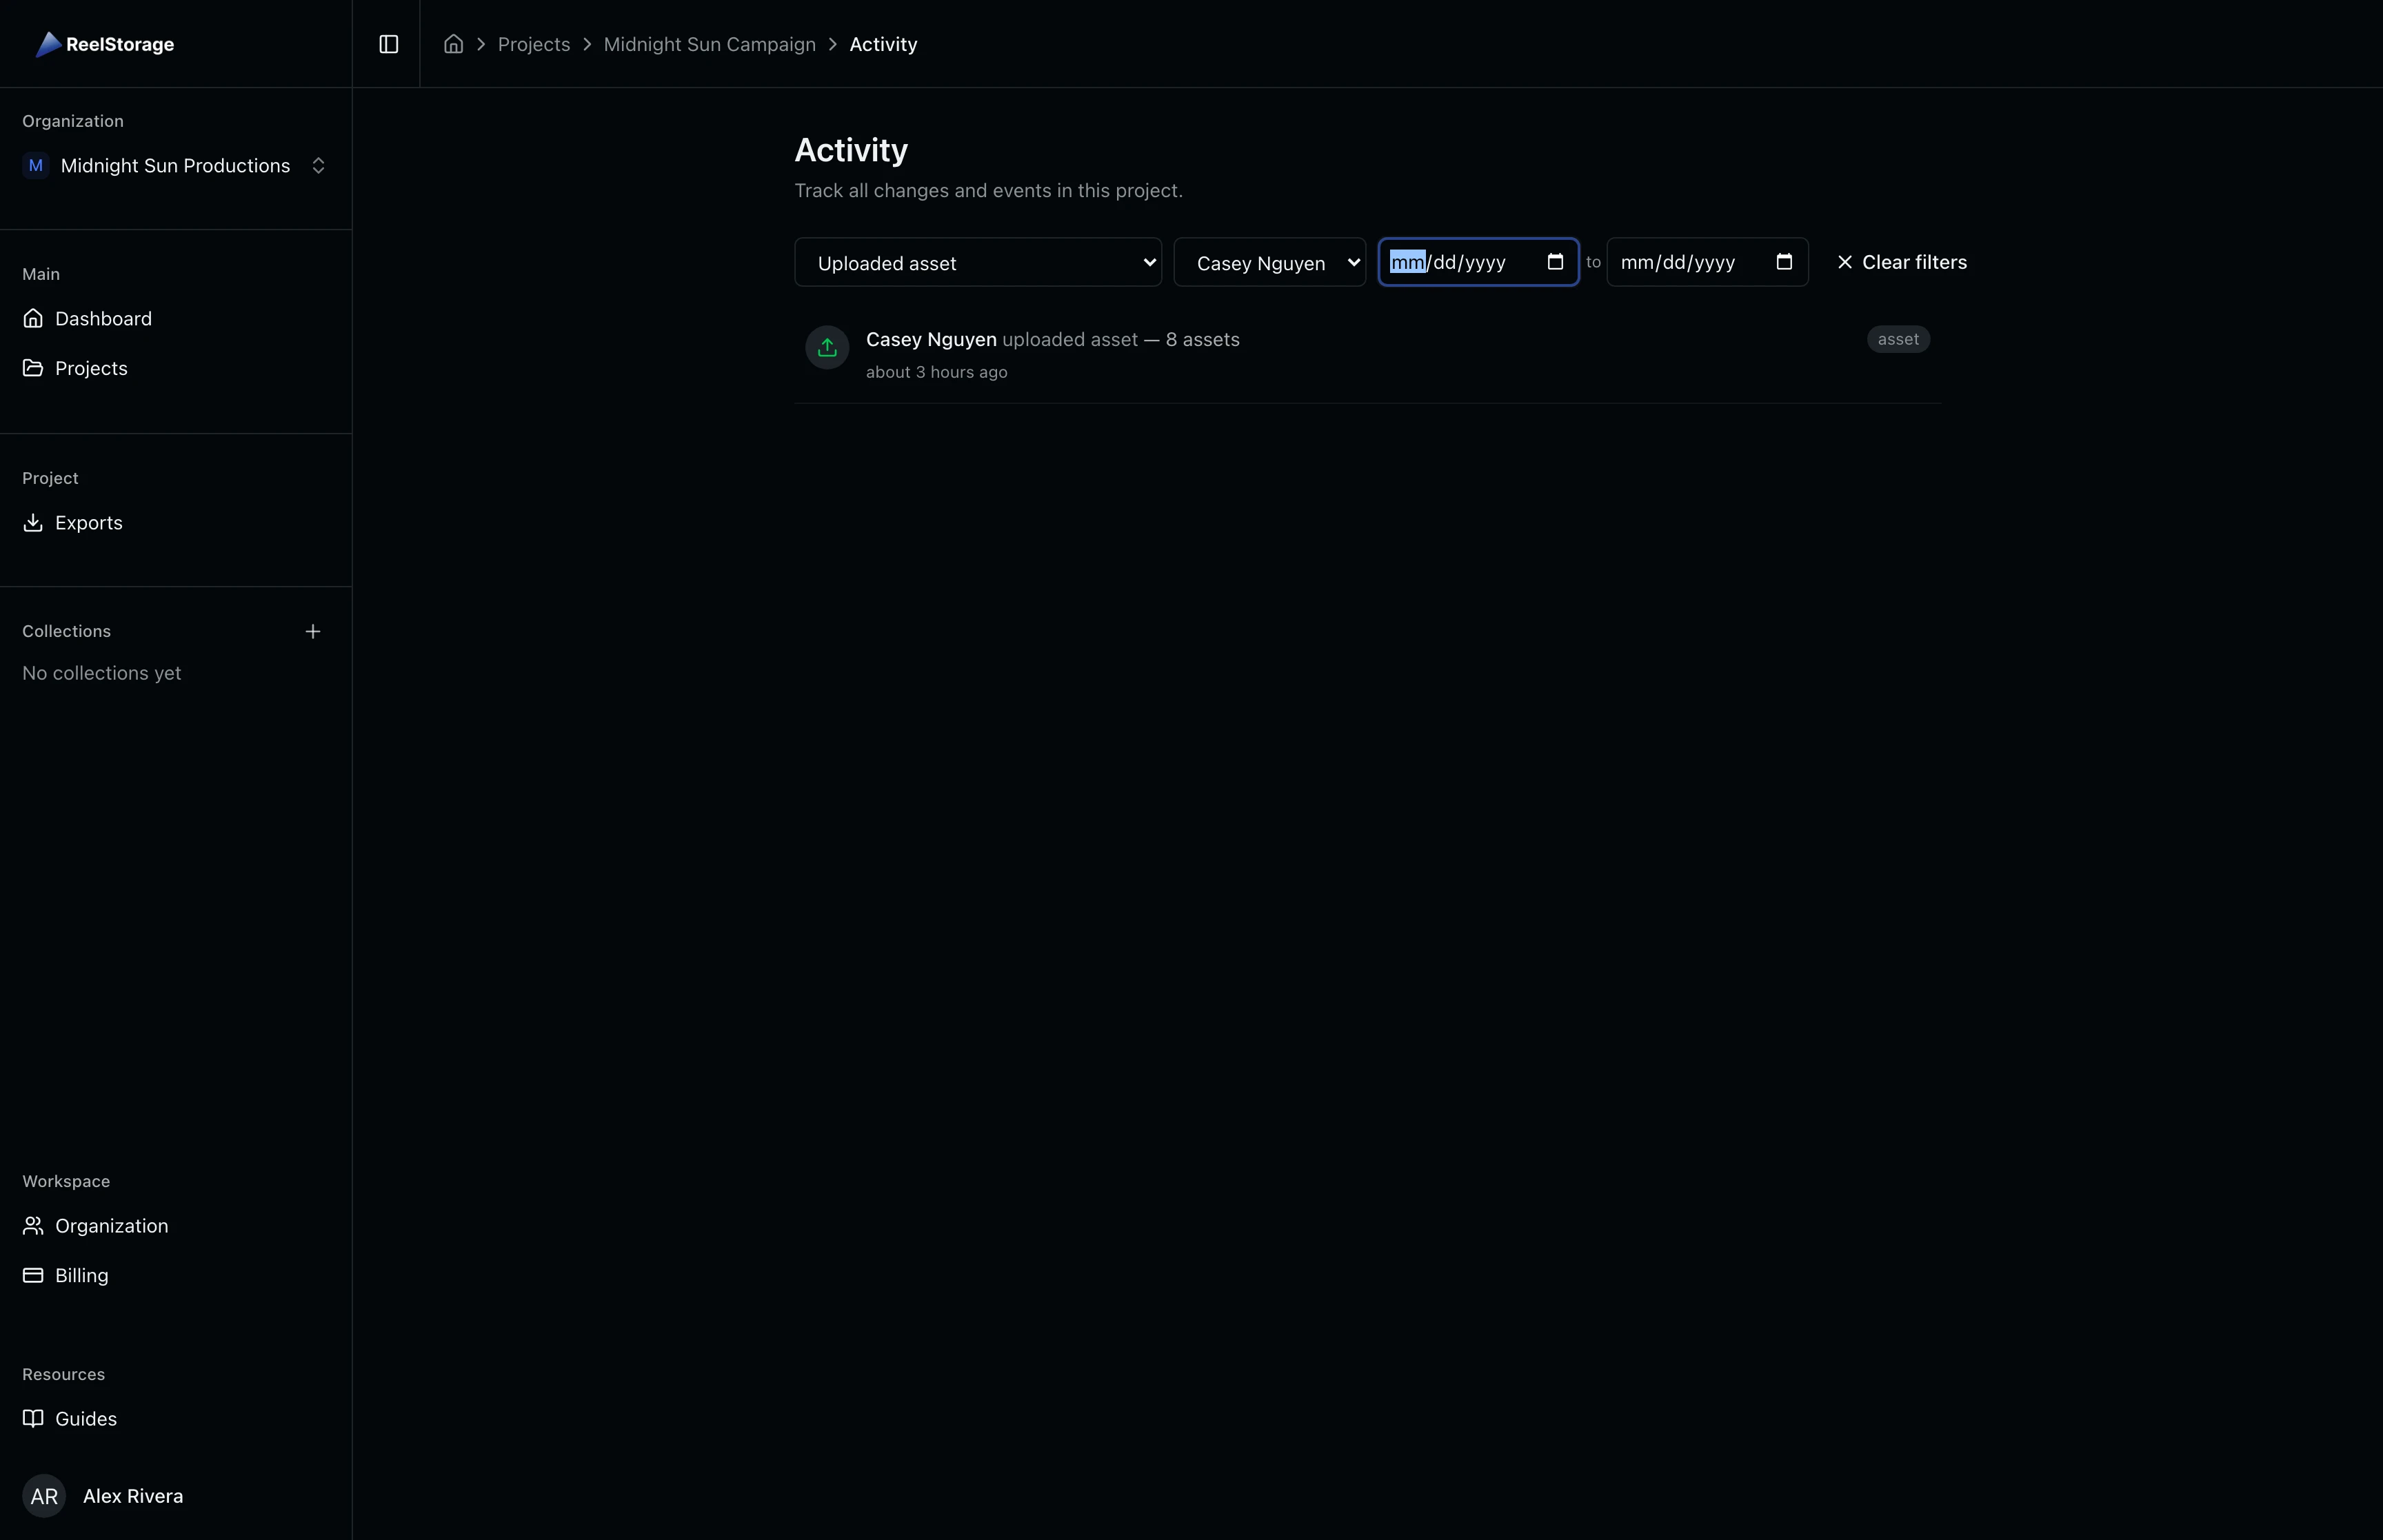
Combined filters are helpful for investigating specific events. If an asset went missing, filter by "Deleted asset" and narrow by date to find who removed it and when.
Step 6: Clear All Filters
When you have active filters, a Clear filters button with an X icon appears at the end of the filter bar. Click it to remove all filters at once and return to the full, unfiltered activity log.
Tips and Best Practices
- Check the log before client reviews. A quick scan shows what changed since the last review so you can brief your team on outstanding edits.
- Use action filters to investigate issues. If an asset is missing, filter by "Deleted asset" to find when and who removed it.
- Track onboarding progress. Filter by a new team member's name to confirm they uploaded to the correct project and folders.
- Audit specific time windows. Use the date range filter to review activity from a particular shoot day or production week.
Troubleshooting
Why does the activity log show "No activity yet"?
The log is empty because no tracked actions have been performed in this project. Upload assets, create folders, or send approvals to start generating activity entries.
Why don't I see the Activity tab?
You need the View Audit Logs permission for this project. Ask your studio manager or project owner to grant you access in the project member settings.
Why is a team member missing from the member filter?
The member dropdown only lists users who have been added to this specific project. If someone has organization access but hasn't been added as a project member, their name won't appear in the filter.
What's Next
- Sending Approvals to Talent: Learn how approval events appear in the activity log.
- Uploading Assets: Every upload, rename, and deletion is recorded here.
Related Guides
Uploading Assets
Learn how to upload photos and videos to your project using the upload window, monitor progress, and verify your files appear in the asset grid.
Using Tags and Metadata
Learn how to create, edit, and manage project tags to organize your assets by people, objects, and locations.
Sending Approvals to Talent
Create talent approvals, assign images for review, and track approval progress with detailed statistics and settings.