Creating Upload Links
Prerequisites
Create secure, time-limited upload links so external photographers, agencies, and collaborators can send files directly into your project without needing an account.
What You'll Learn
- How to view and manage upload links for a project
- How to create a new upload link with expiration and file limits
- How to track upload activity and manage active links
- How to copy, resend, or revoke an upload link
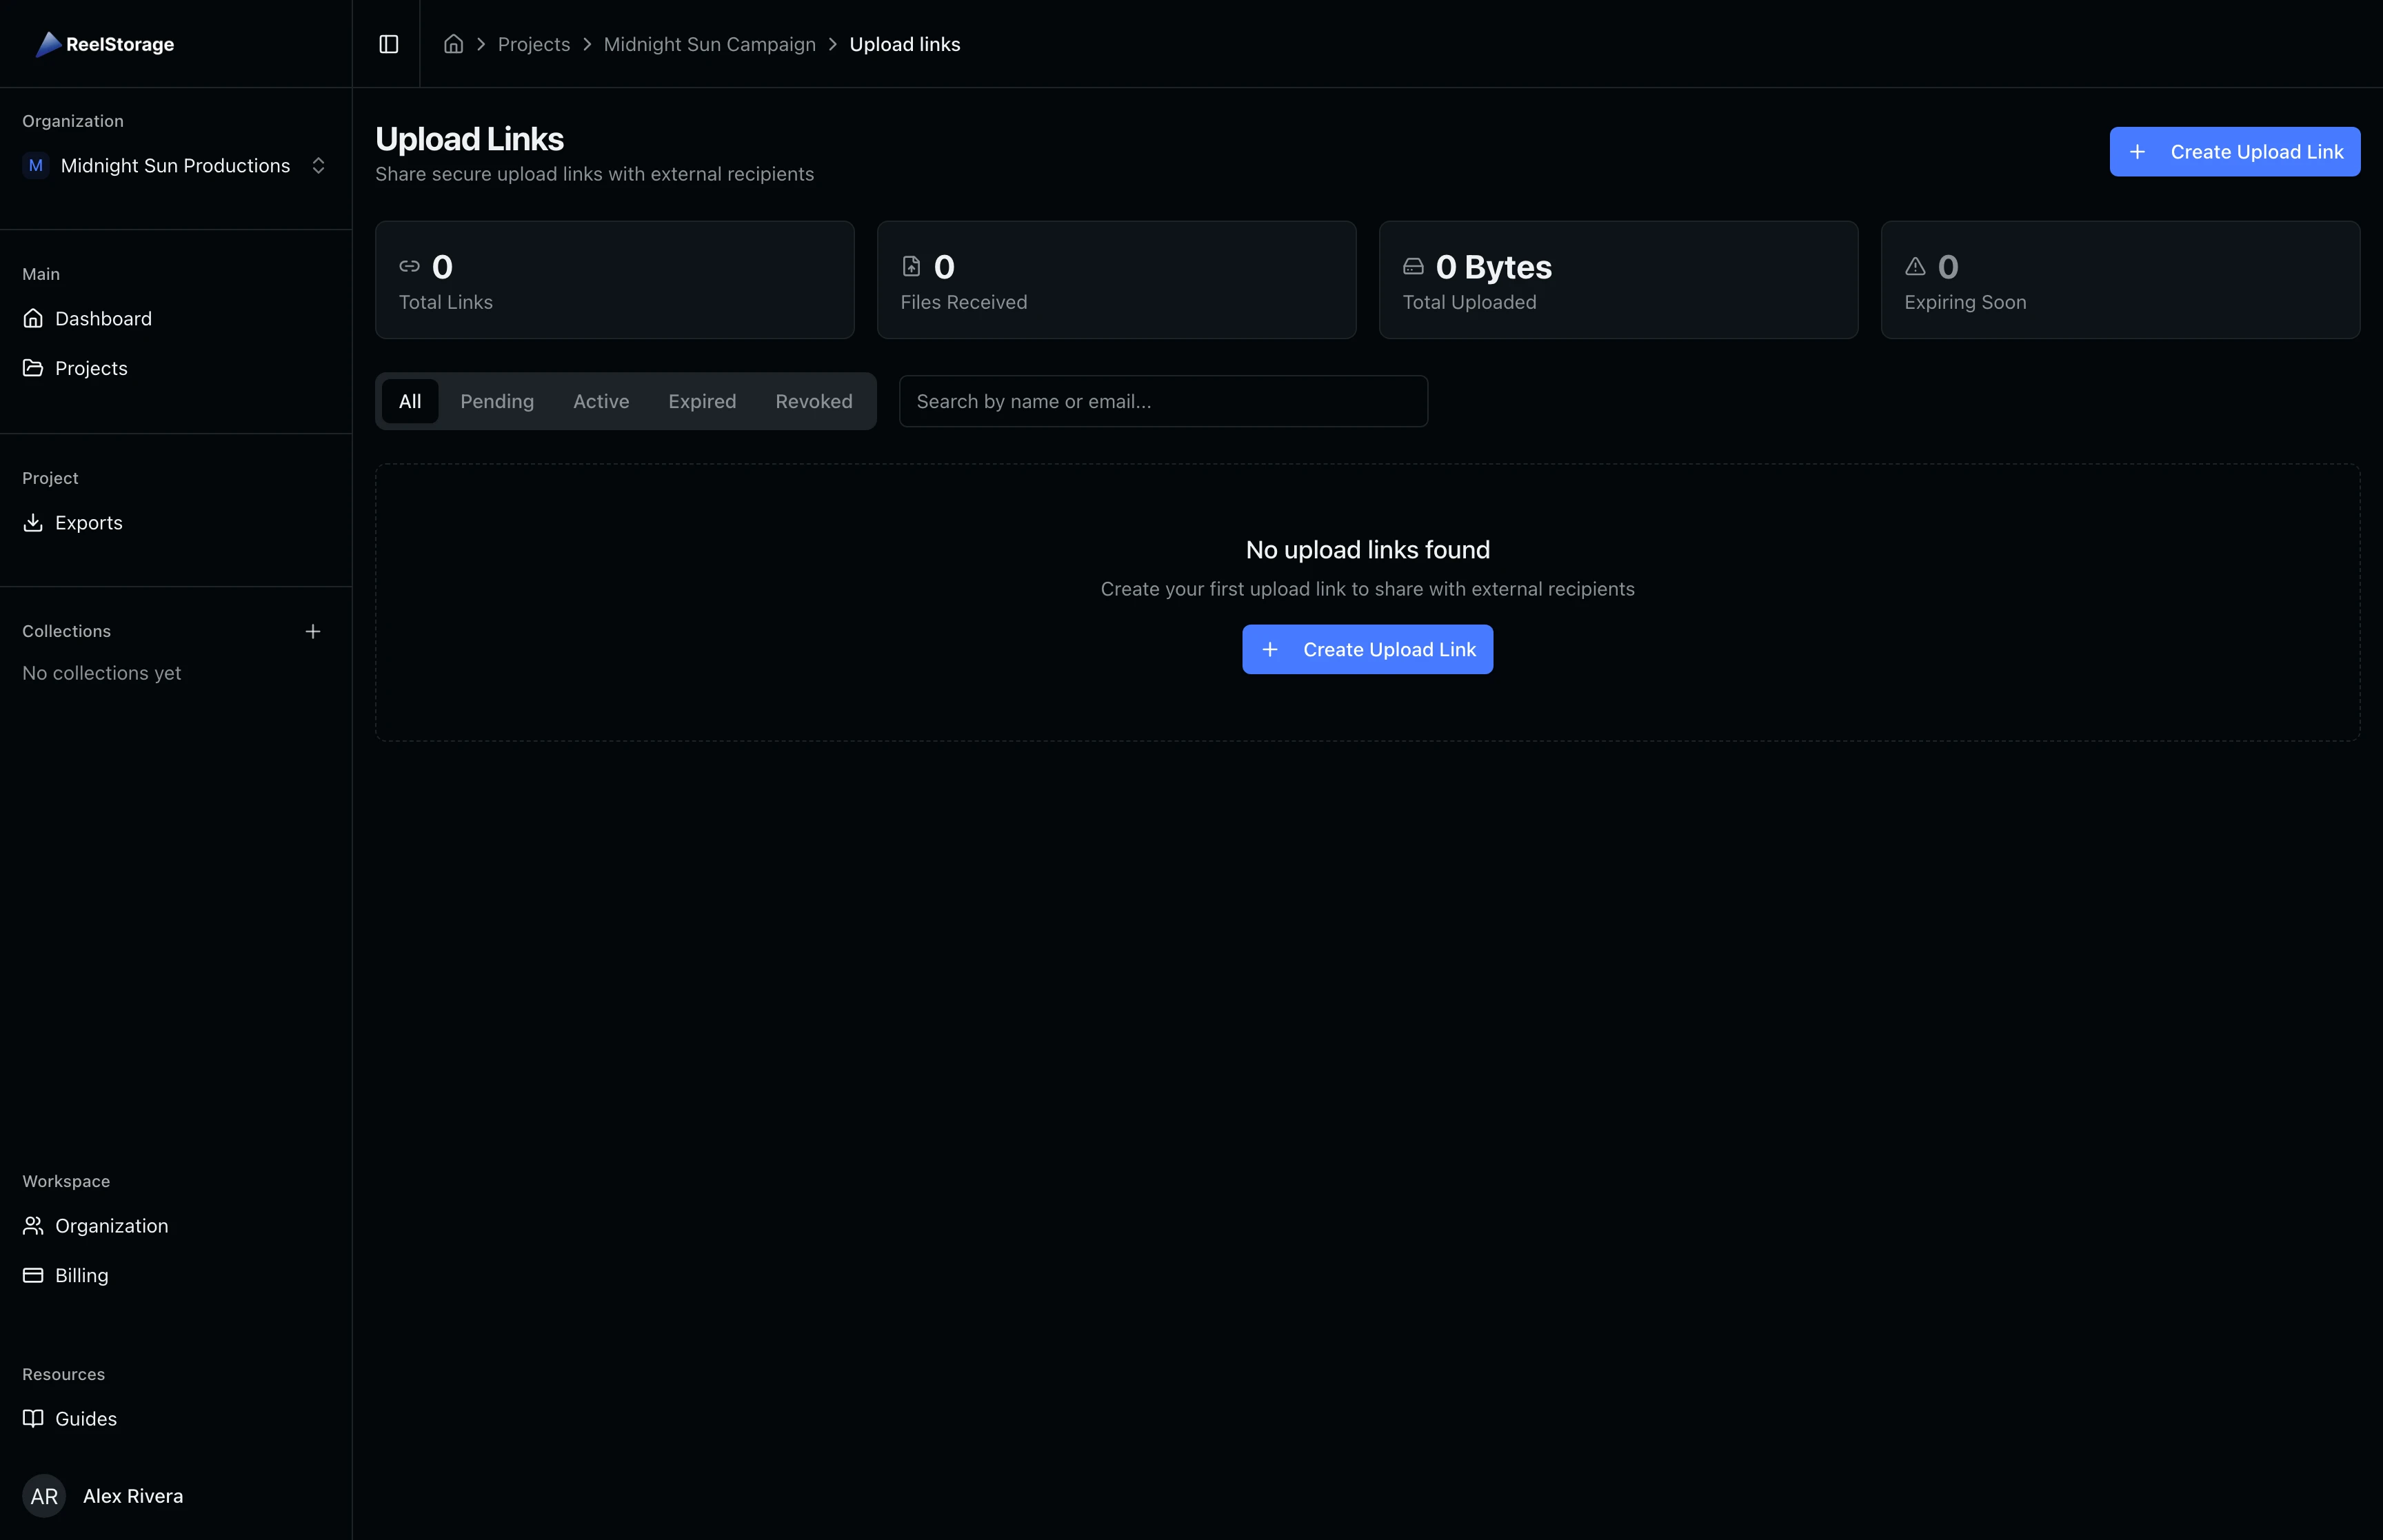
Step 1: Open the Upload Links Page
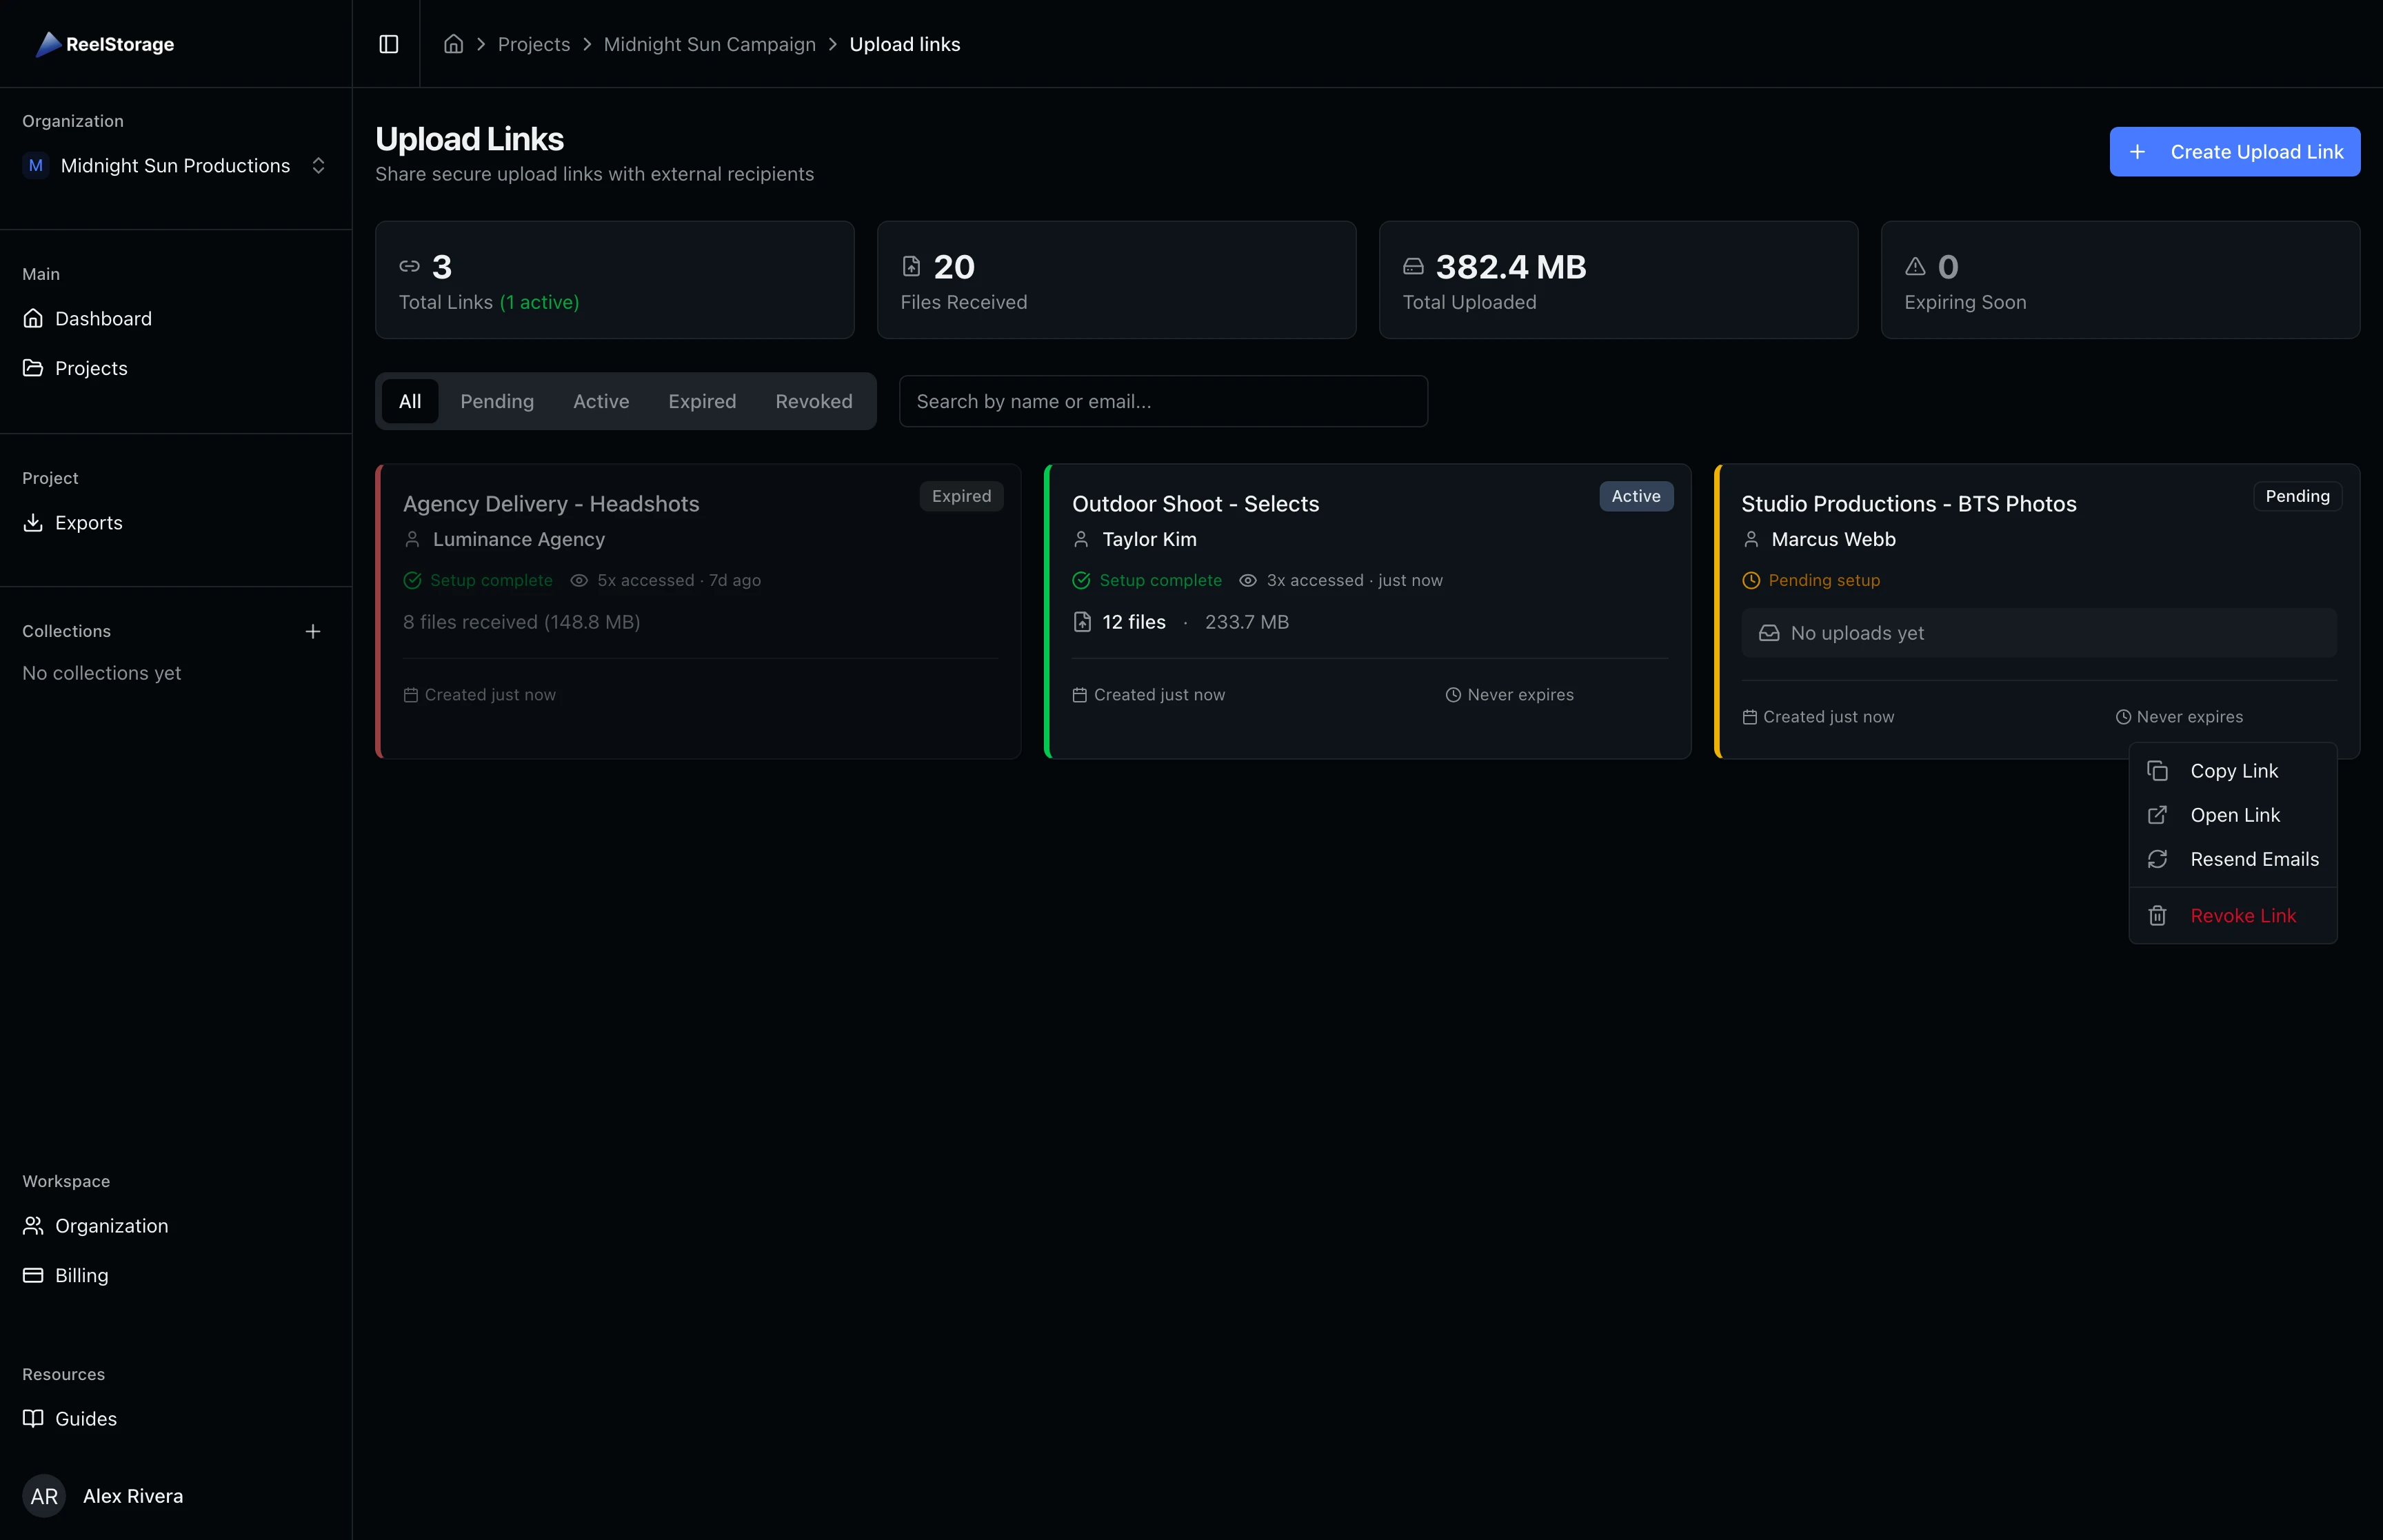
Go to your project and click Upload Links in the sidebar navigation. The page shows a summary bar with four stat cards: Total Links, Files Received, Total Uploaded, and Expiring Soon. Below the stats, filter tabs let you narrow the list by status, and a search field lets you find links by name or recipient email.
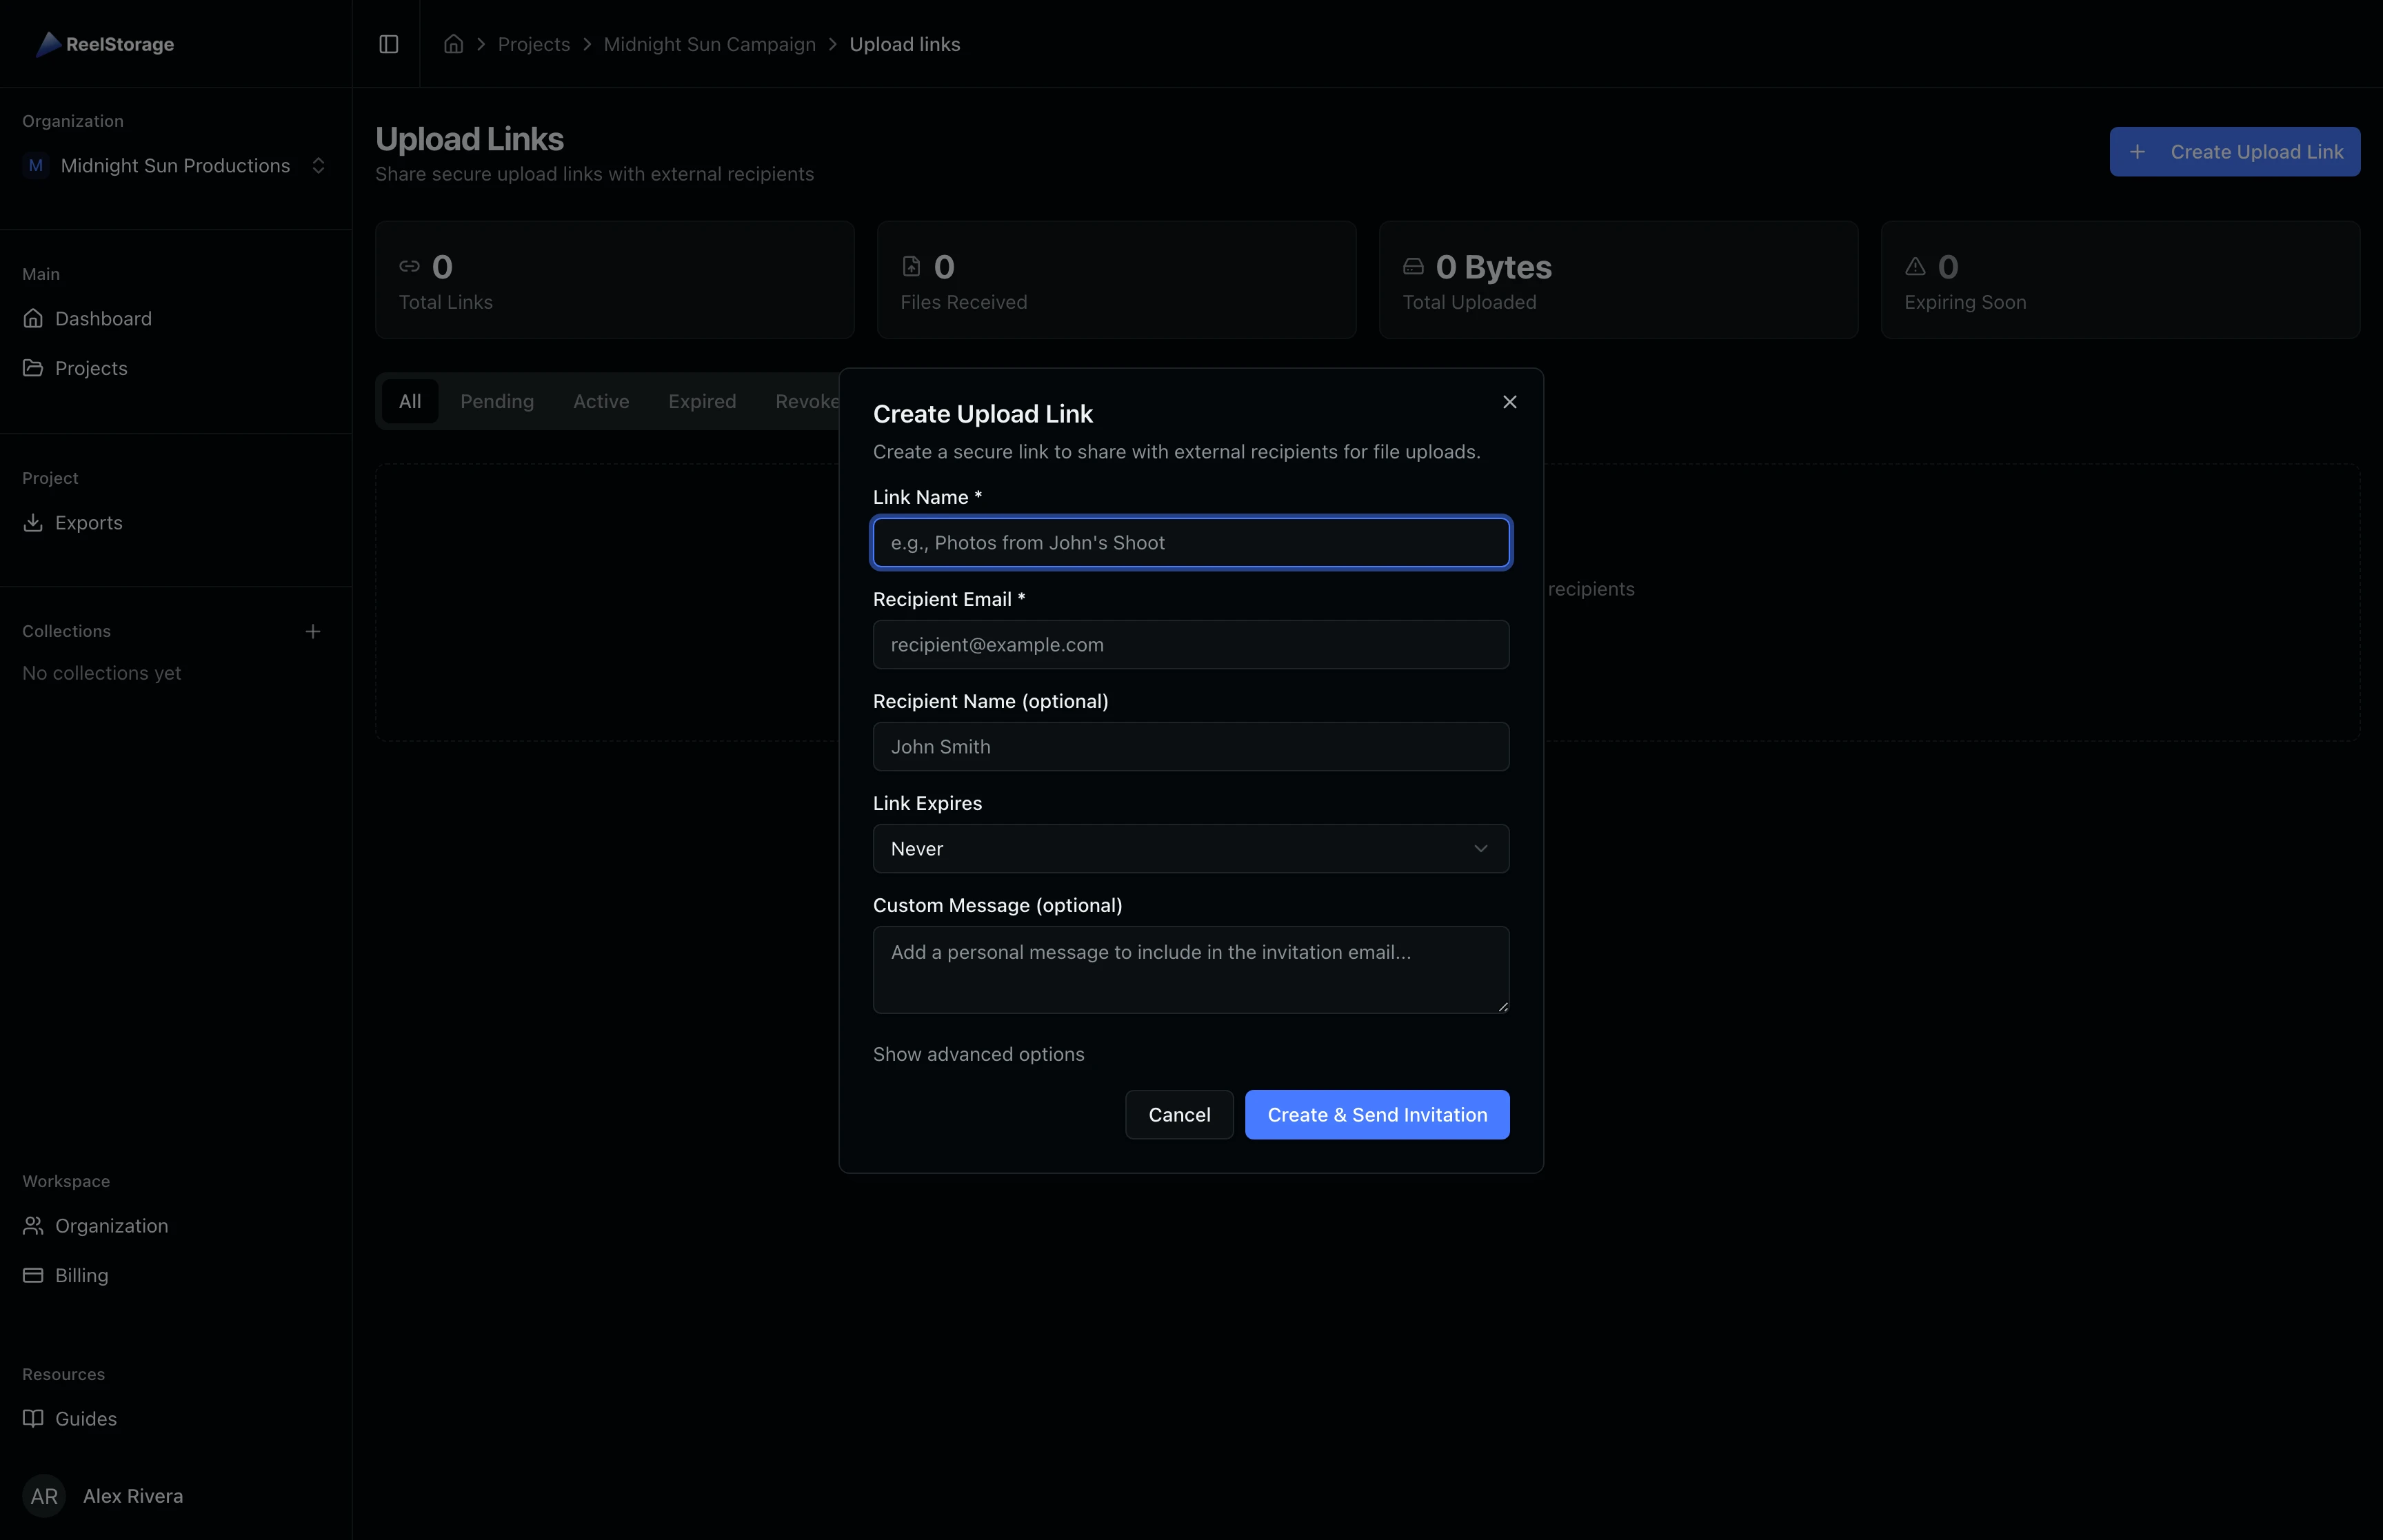
Step 2: Open the Create Upload Link Dialog
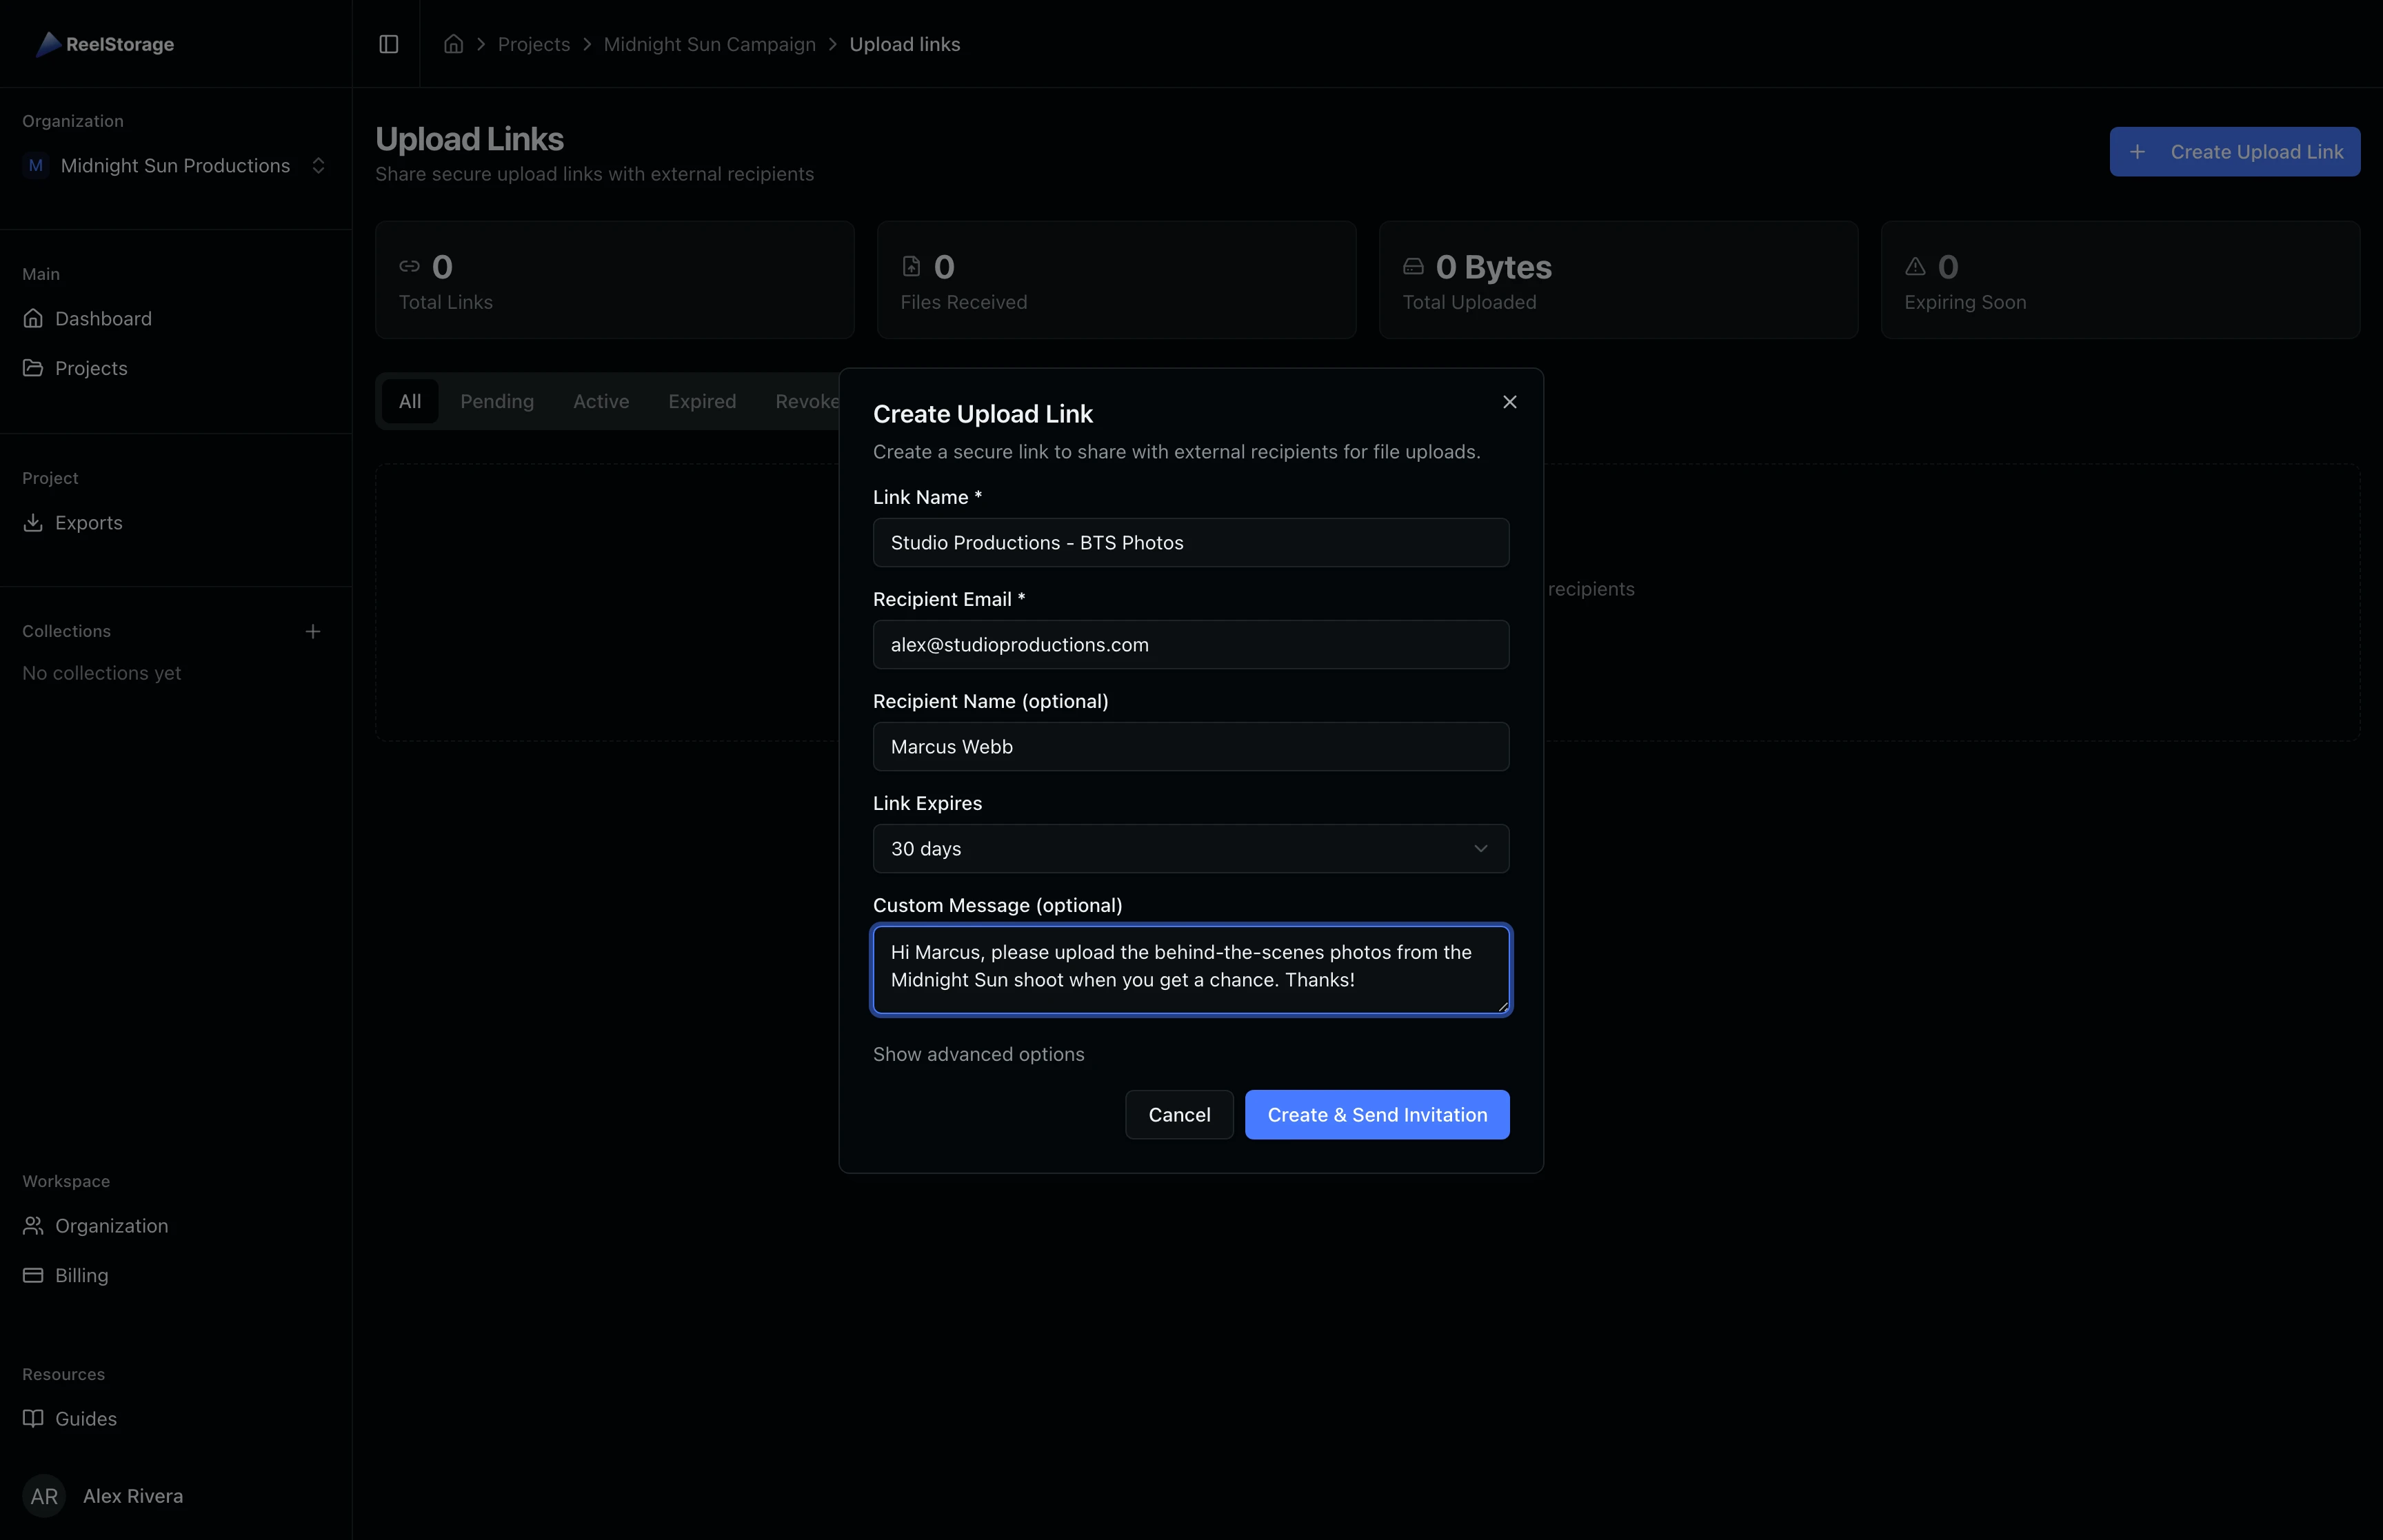
Click the Create Upload Link button in the top-right corner. A dialog opens with fields for the link name, recipient email, recipient name, expiration period, and an optional custom message. The link name helps you identify this link later when managing multiple active links.
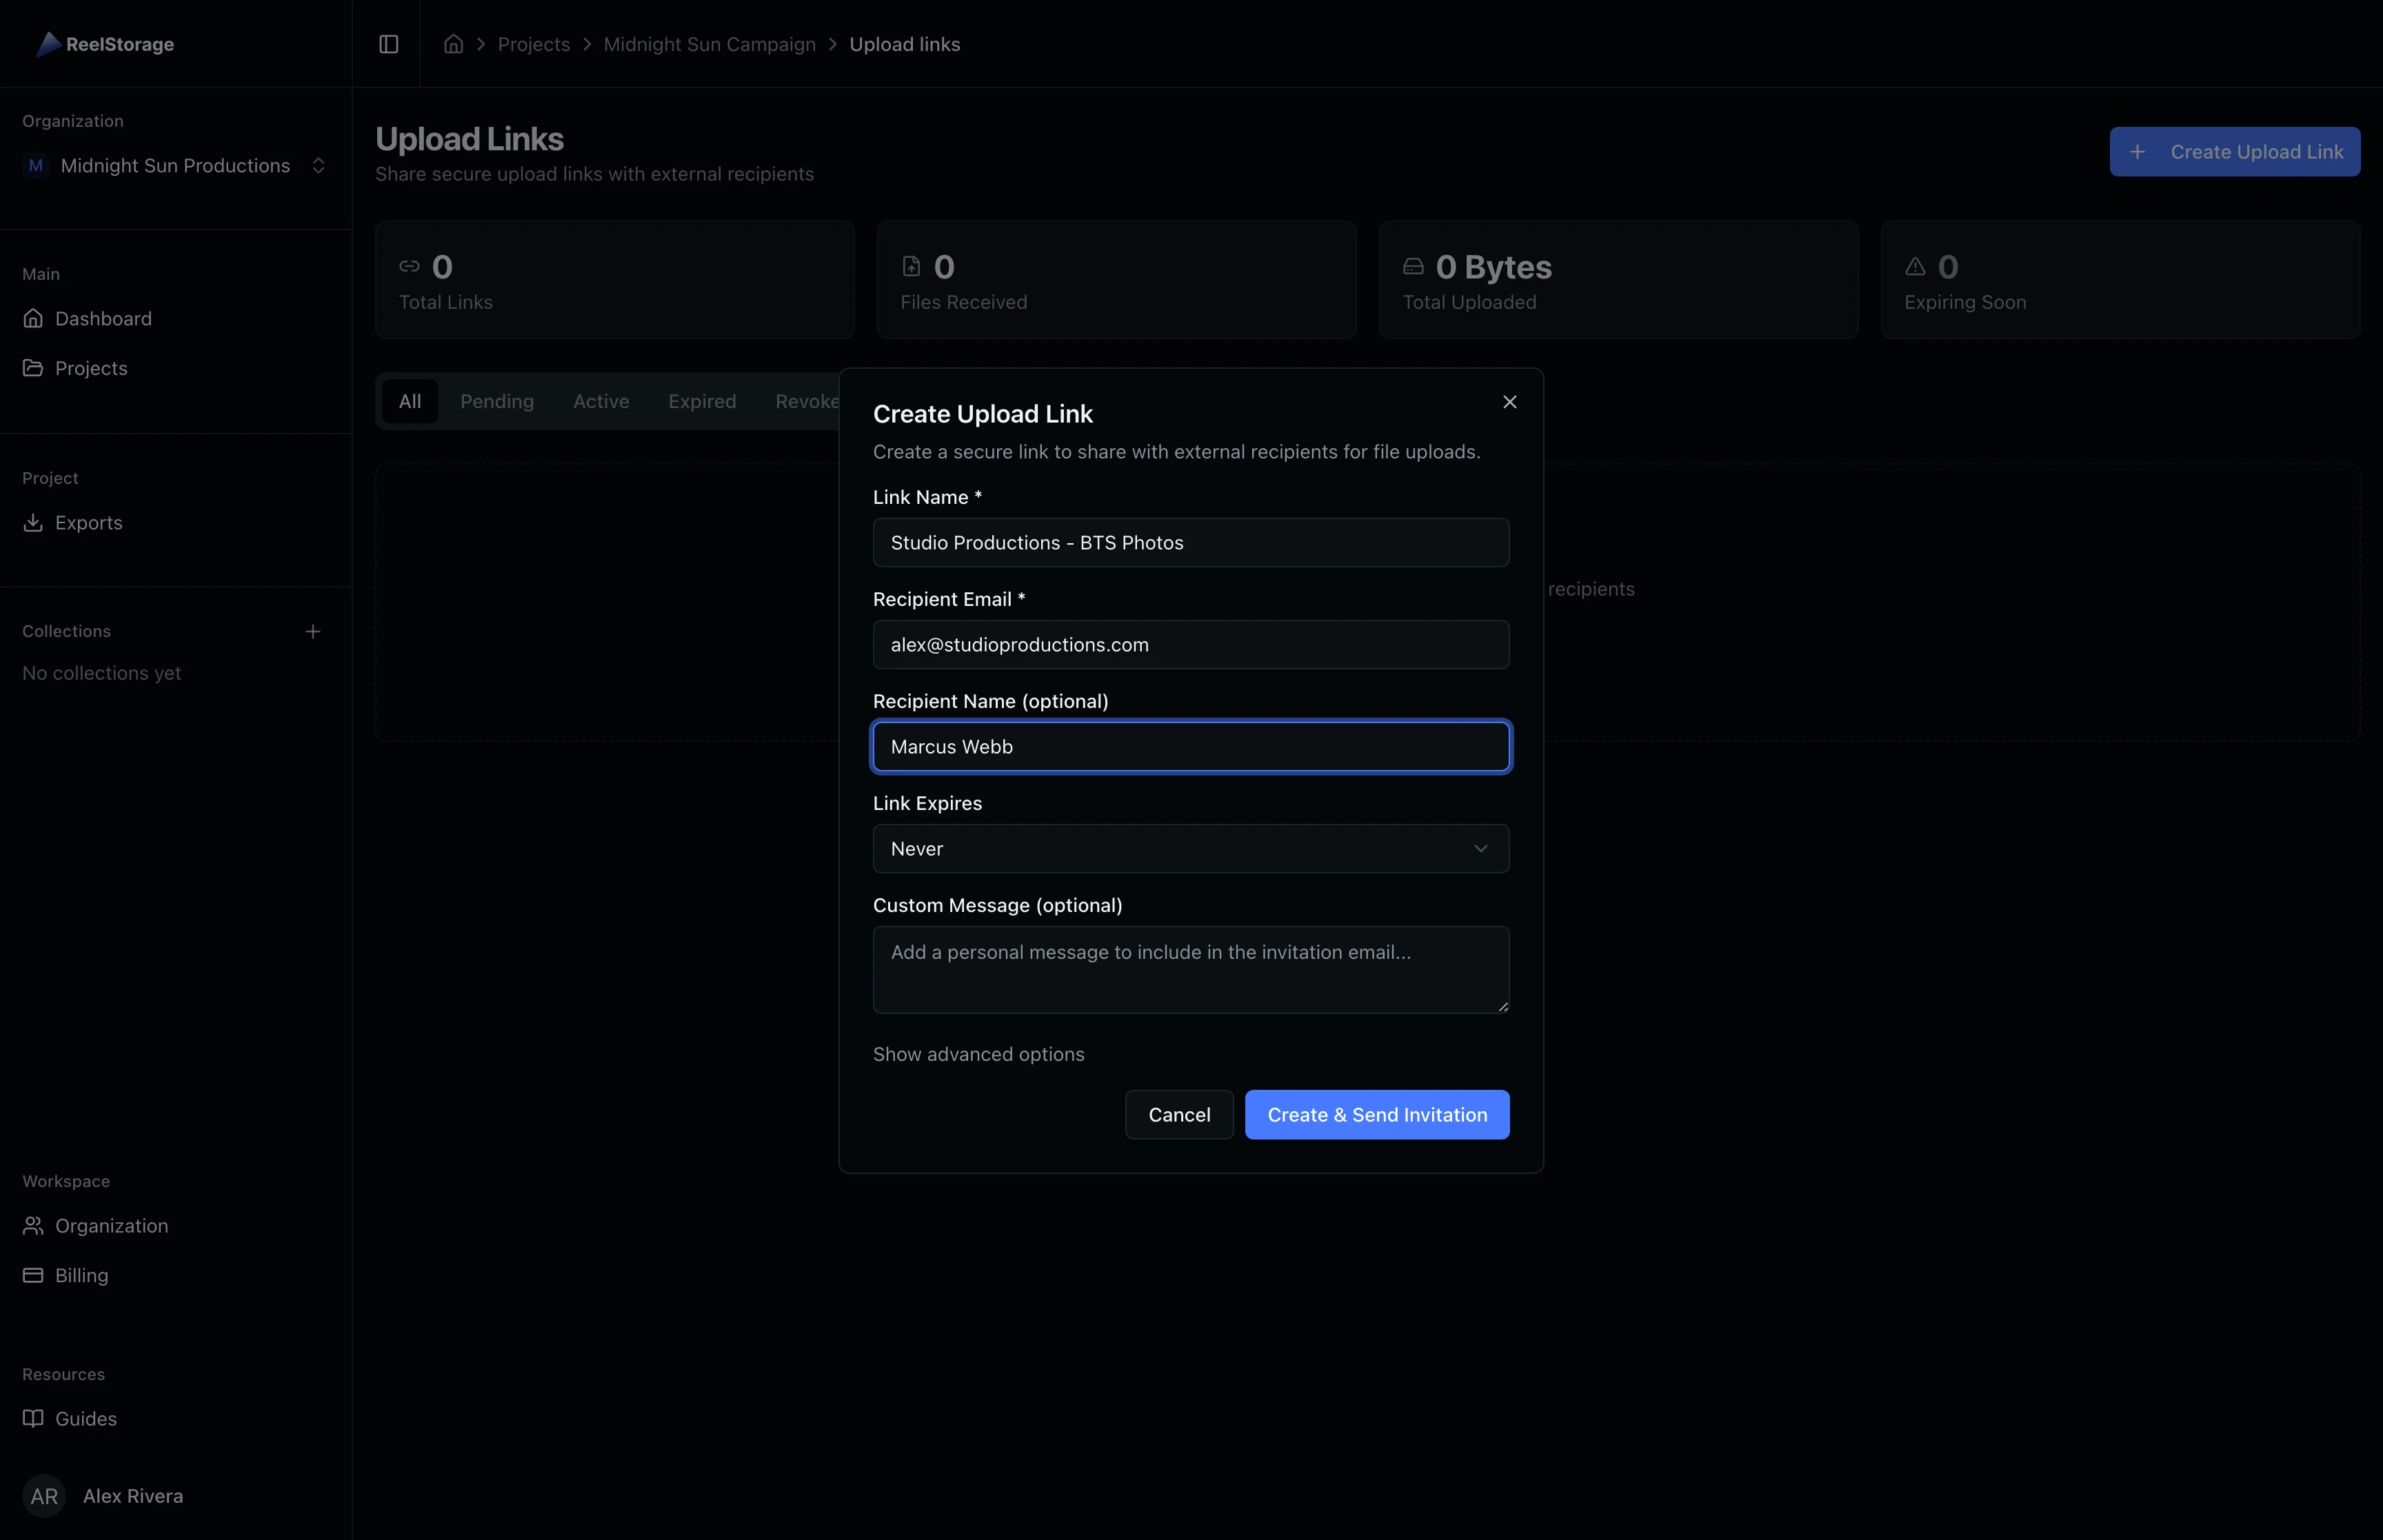
Step 3: Enter Link Details
Fill in the link name and recipient information. Use a descriptive name that includes the recipient or shoot name so you can identify it at a glance. The recipient email is where the upload URL and security passcode are sent.
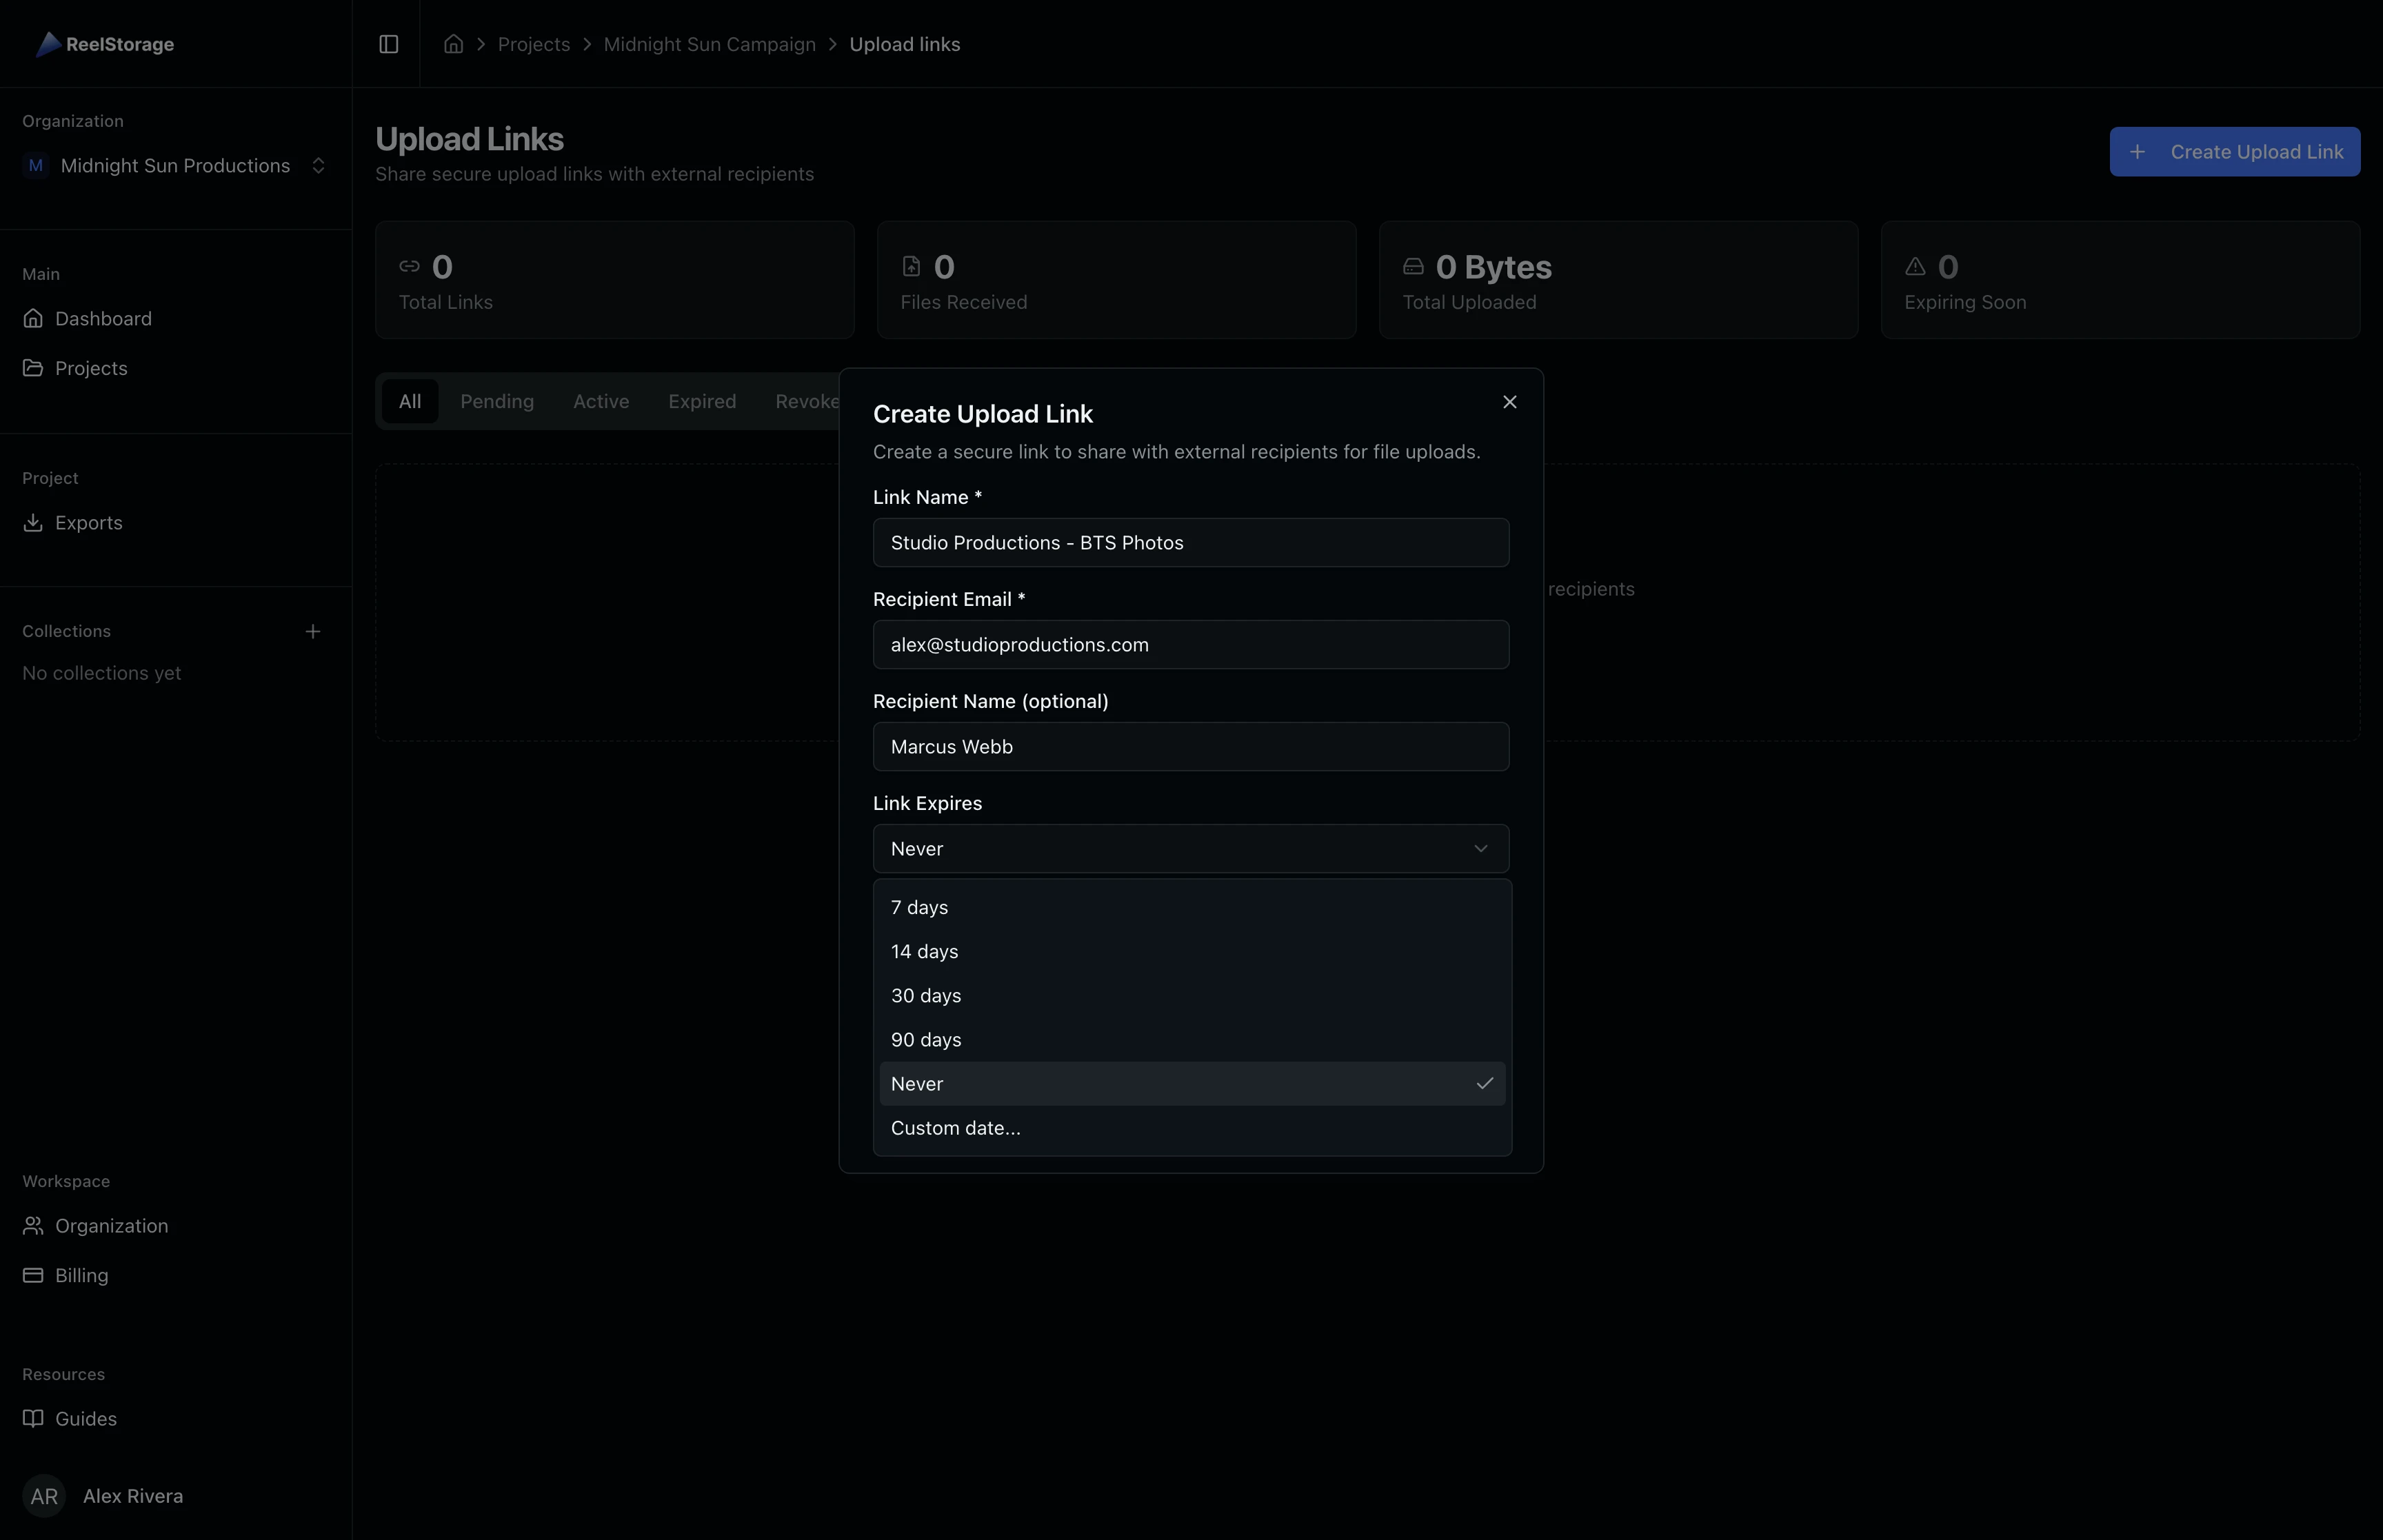
Step 4: Choose an Expiration Period
Click the Link Expires dropdown to see the available options: 7 days, 14 days, 30 days, 90 days, Never, or a custom date. Pick a timeframe that matches your delivery window. For one-off shoots, 14 or 30 days works well. For ongoing collaborations, choose "Never" and revoke the link manually when you no longer need it.
Add an optional custom message that appears in the invitation email. This is a good place to mention the shoot name, what files you need, or any naming conventions you want the recipient to follow.
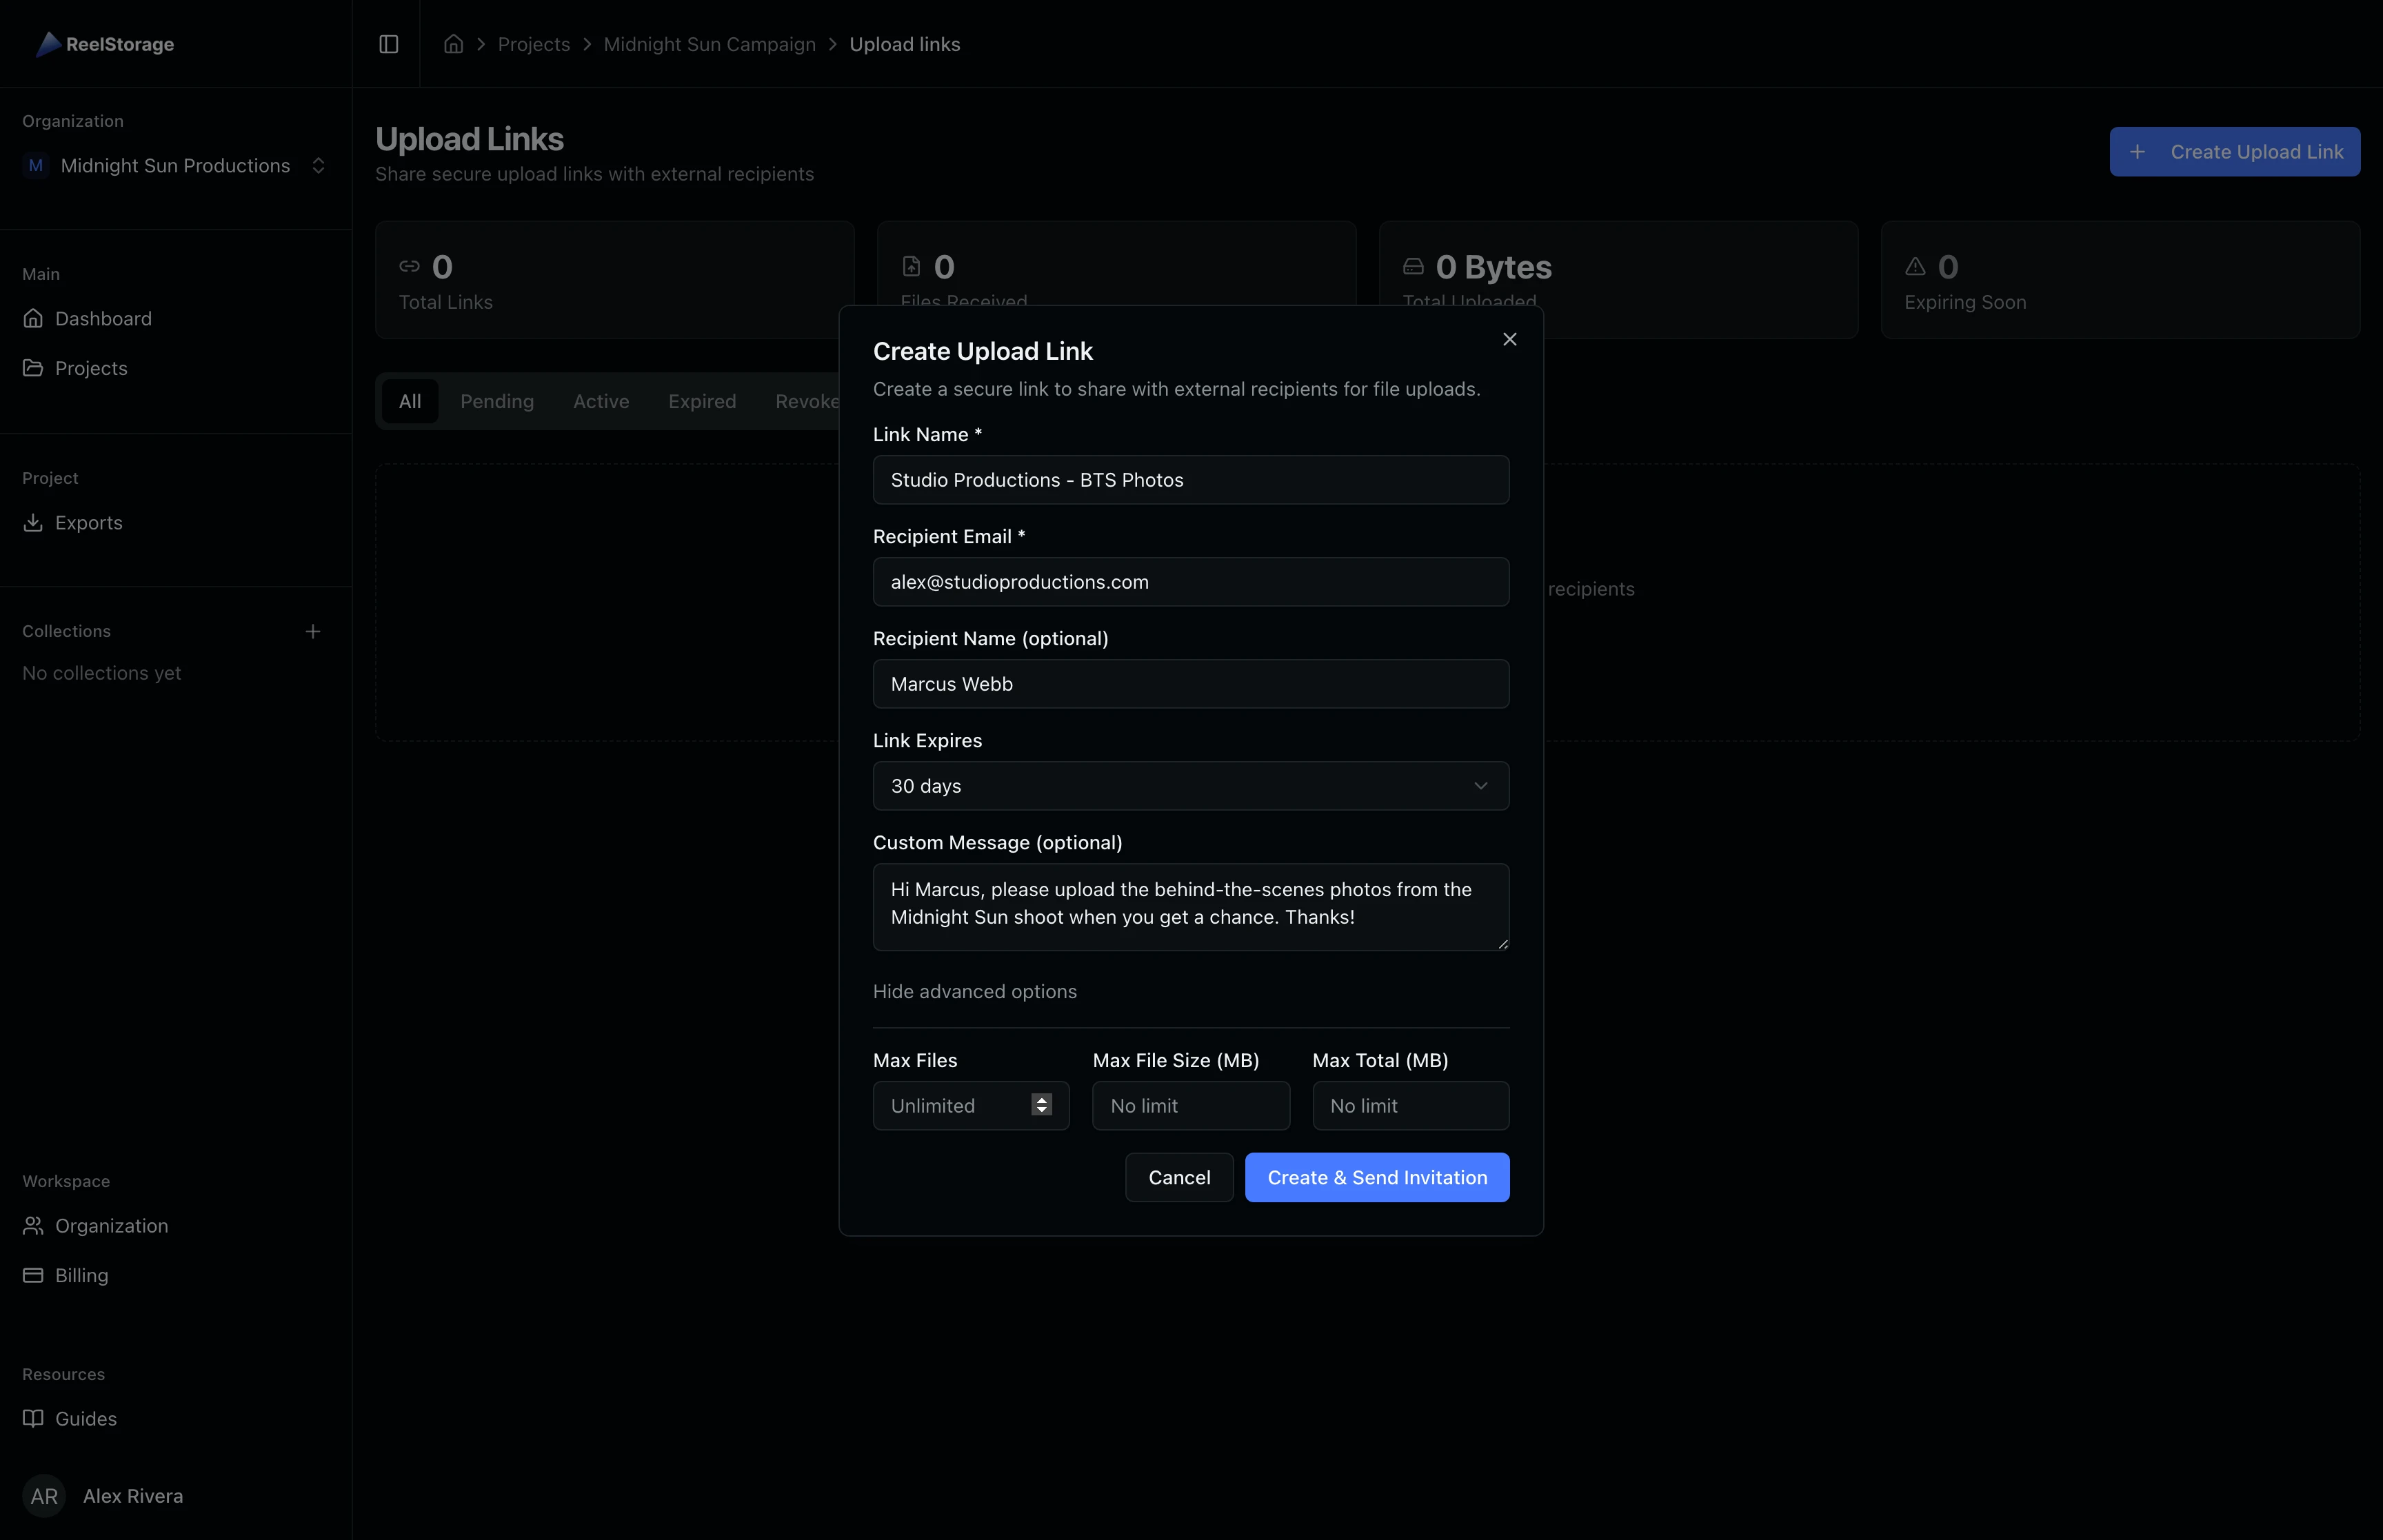
Step 5: Review Advanced Options
Click Show advanced options to reveal file constraint settings. You can set a maximum number of files, a per-file size limit (in MB), and a total upload size limit (in MB). These are optional and default to unlimited when left blank.
Use file limits when collecting from multiple external contributors. Setting a total upload cap prevents unexpected storage usage on your account.
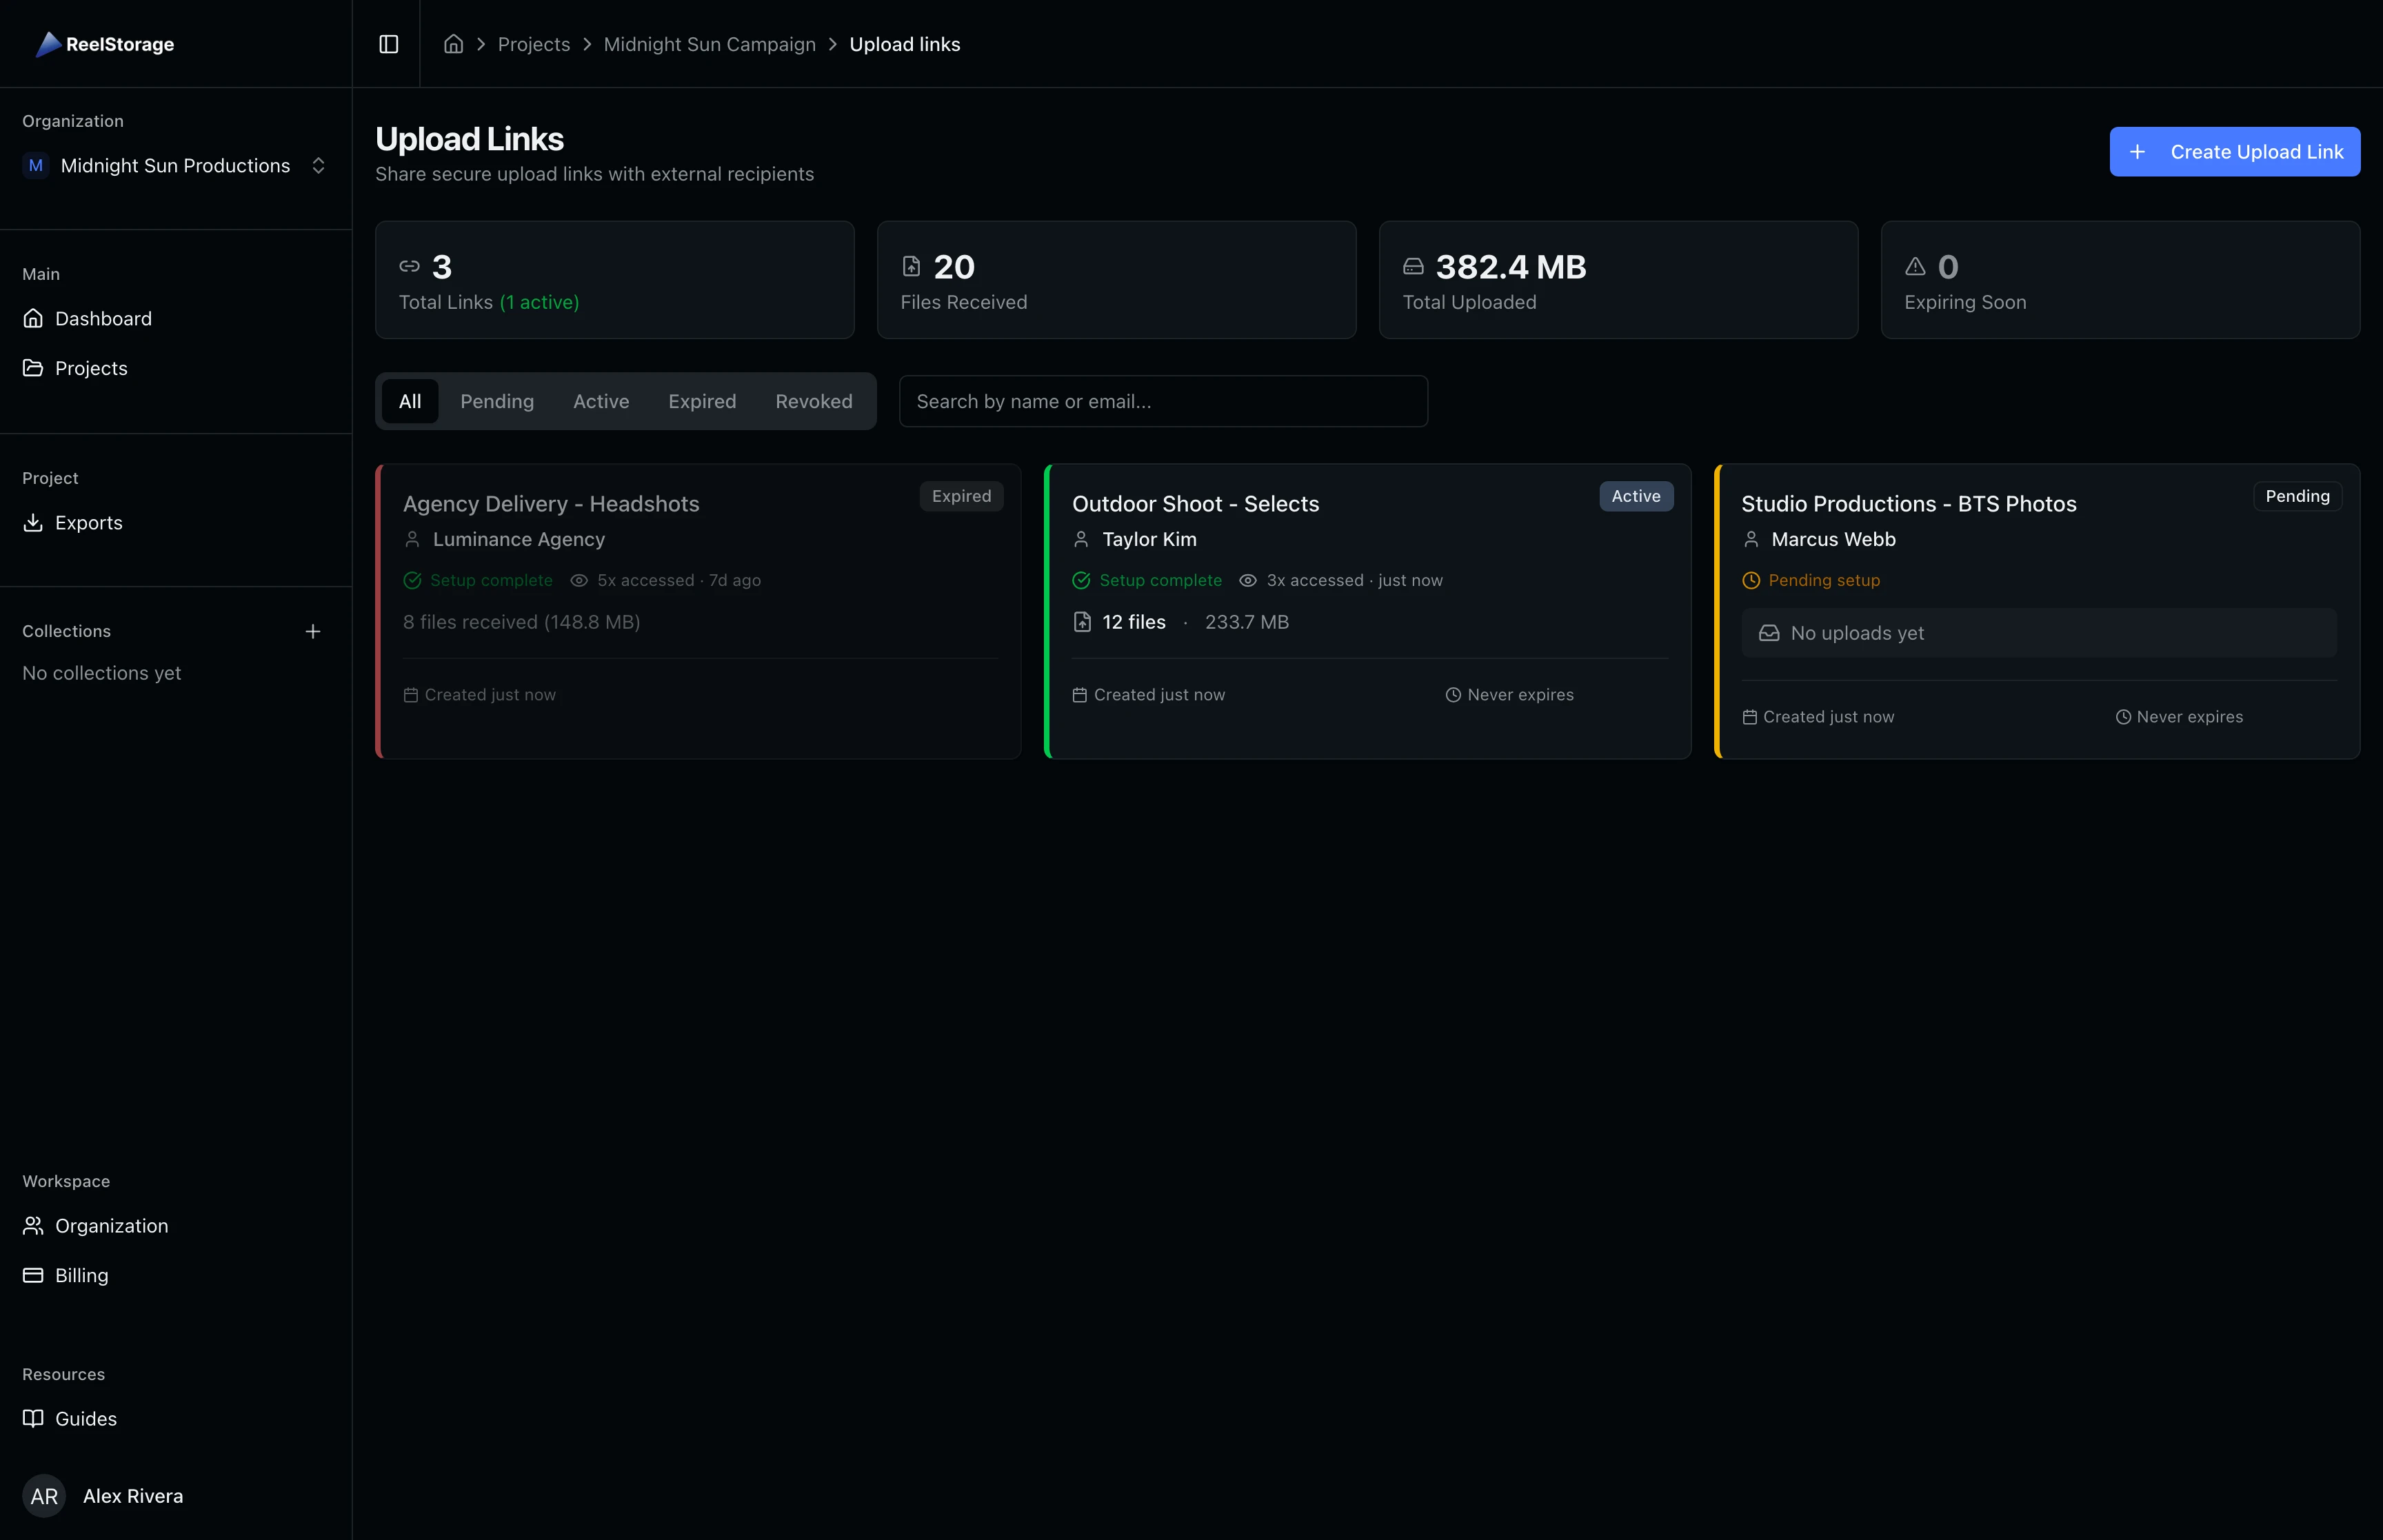
Step 6: View Your Upload Links
Click Create & Send Invitation to generate the link. The recipient receives two separate emails: one with the upload URL and another with a 6-digit passcode for security. The link card appears on the page with its current status and upload stats.
Each card displays the link status (Pending, Active, Expired, or Revoked), recipient name and email, upload count, total bytes uploaded, and expiration info. A green "Setup complete" badge confirms both emails were delivered.
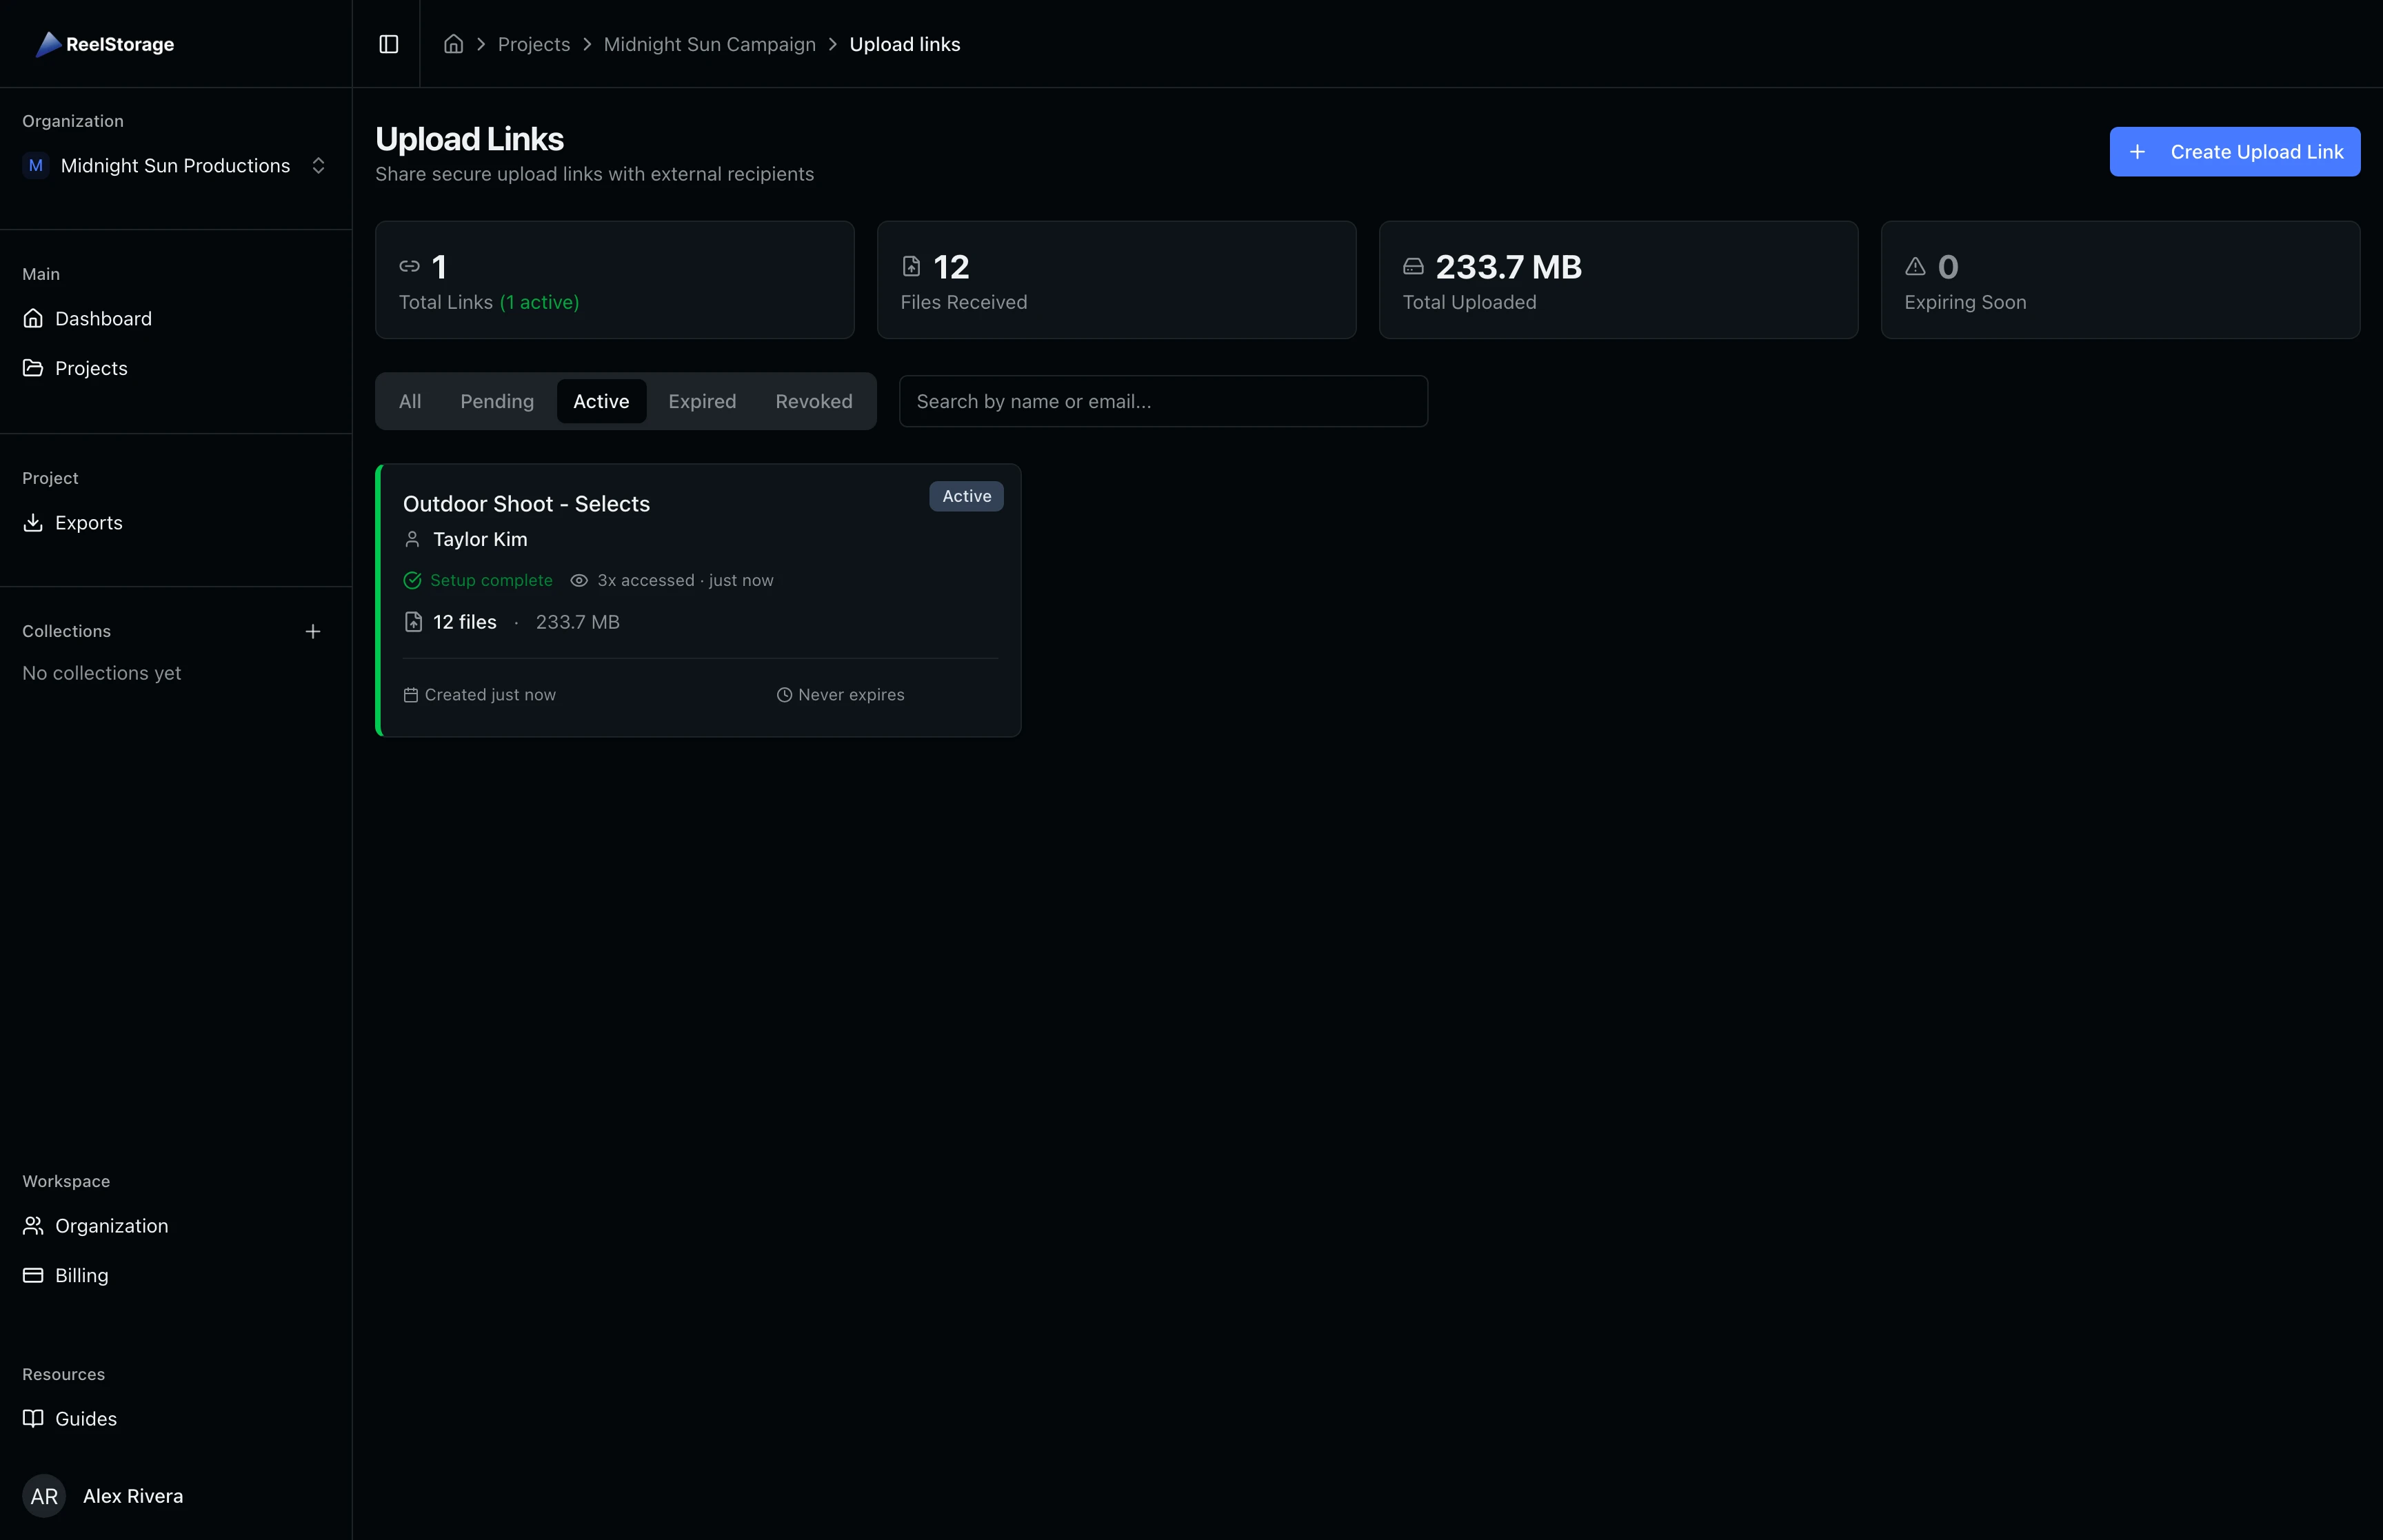
Step 7: Filter by Status
Use the status tabs at the top to narrow the list. Click Active to see only links that are ready for uploads, Pending for links awaiting email delivery, Expired for past-due links, or Revoked for links you have disabled. The stat cards update to reflect the filtered view.
Step 8: Manage Link Actions
Hover over a link card to reveal quick action buttons. Click the three-dot menu to open the full actions dropdown. From here you can copy the upload URL to share it through a different channel, open the link in a new tab to preview what the recipient sees, resend both invitation emails, or revoke the link to disable it permanently.
Revoking a link is permanent. The recipient can no longer upload files through that URL, and you cannot reactivate it. Create a new link if you need to resume file collection.
Tips and Best Practices
- Use descriptive link names: Include the recipient name or shoot name so you can tell links apart when managing several at once.
- Set expiration dates for one-off requests: For a single shoot, set the link to expire in 7 or 14 days. For ongoing collaborations, use "Never" and revoke manually when done.
- Use file limits for large teams: When collecting from multiple photographers, set per-file and total size limits to keep storage usage predictable.
- Check the Expiring Soon counter: The stat card highlights links expiring within 7 days so you can follow up with recipients before access ends.
Troubleshooting
The recipient says they did not receive the email
Click the three-dot menu on the link card and select Resend Emails. Both the upload link email and the passcode email are resent. Ask the recipient to check their spam or promotions folder.
Can I change the expiration after creating a link?
You cannot edit an existing link's expiration. Revoke the current link and create a new one with the updated settings.
What happens when a link expires?
The recipient can no longer upload files through that link. Any files already uploaded remain in your project. The link card shows an "Expired" status badge and its opacity is reduced in the list.
What is the passcode for?
Each upload link is protected by a 6-digit passcode sent in a separate email. The recipient must enter this passcode before they can upload files. This two-email approach prevents unauthorized uploads if the link URL is forwarded.
What's Next
- Sending Approvals to Talent: After collecting files, send approval links to talent for image review.
- Uploading Assets: Learn how to upload files to your project asset library.
Related Guides
Sending Approvals to Talent
Create talent approvals, assign images for review, and track approval progress with detailed statistics and settings.
Uploading Assets
Learn how to upload photos and videos to your project using the upload window, monitor progress, and verify your files appear in the asset grid.