Setting Up Your Organization
Prerequisites
After verifying your email, ReelStorage walks you through a four-step onboarding wizard. You will fill in your profile, name your studio, pick a plan, and optionally invite your team. The whole process takes about two minutes.
What You Will Learn
- How to complete your profile with your name and avatar
- How to name your studio (organization)
- How to choose a billing plan
- How to invite team members by email
Step 1: Complete Your Profile
The first screen asks for your First Name and Last Name. Your team sees these fields throughout ReelStorage, so use the name your colleagues know you by. Both fields are required before you can continue.
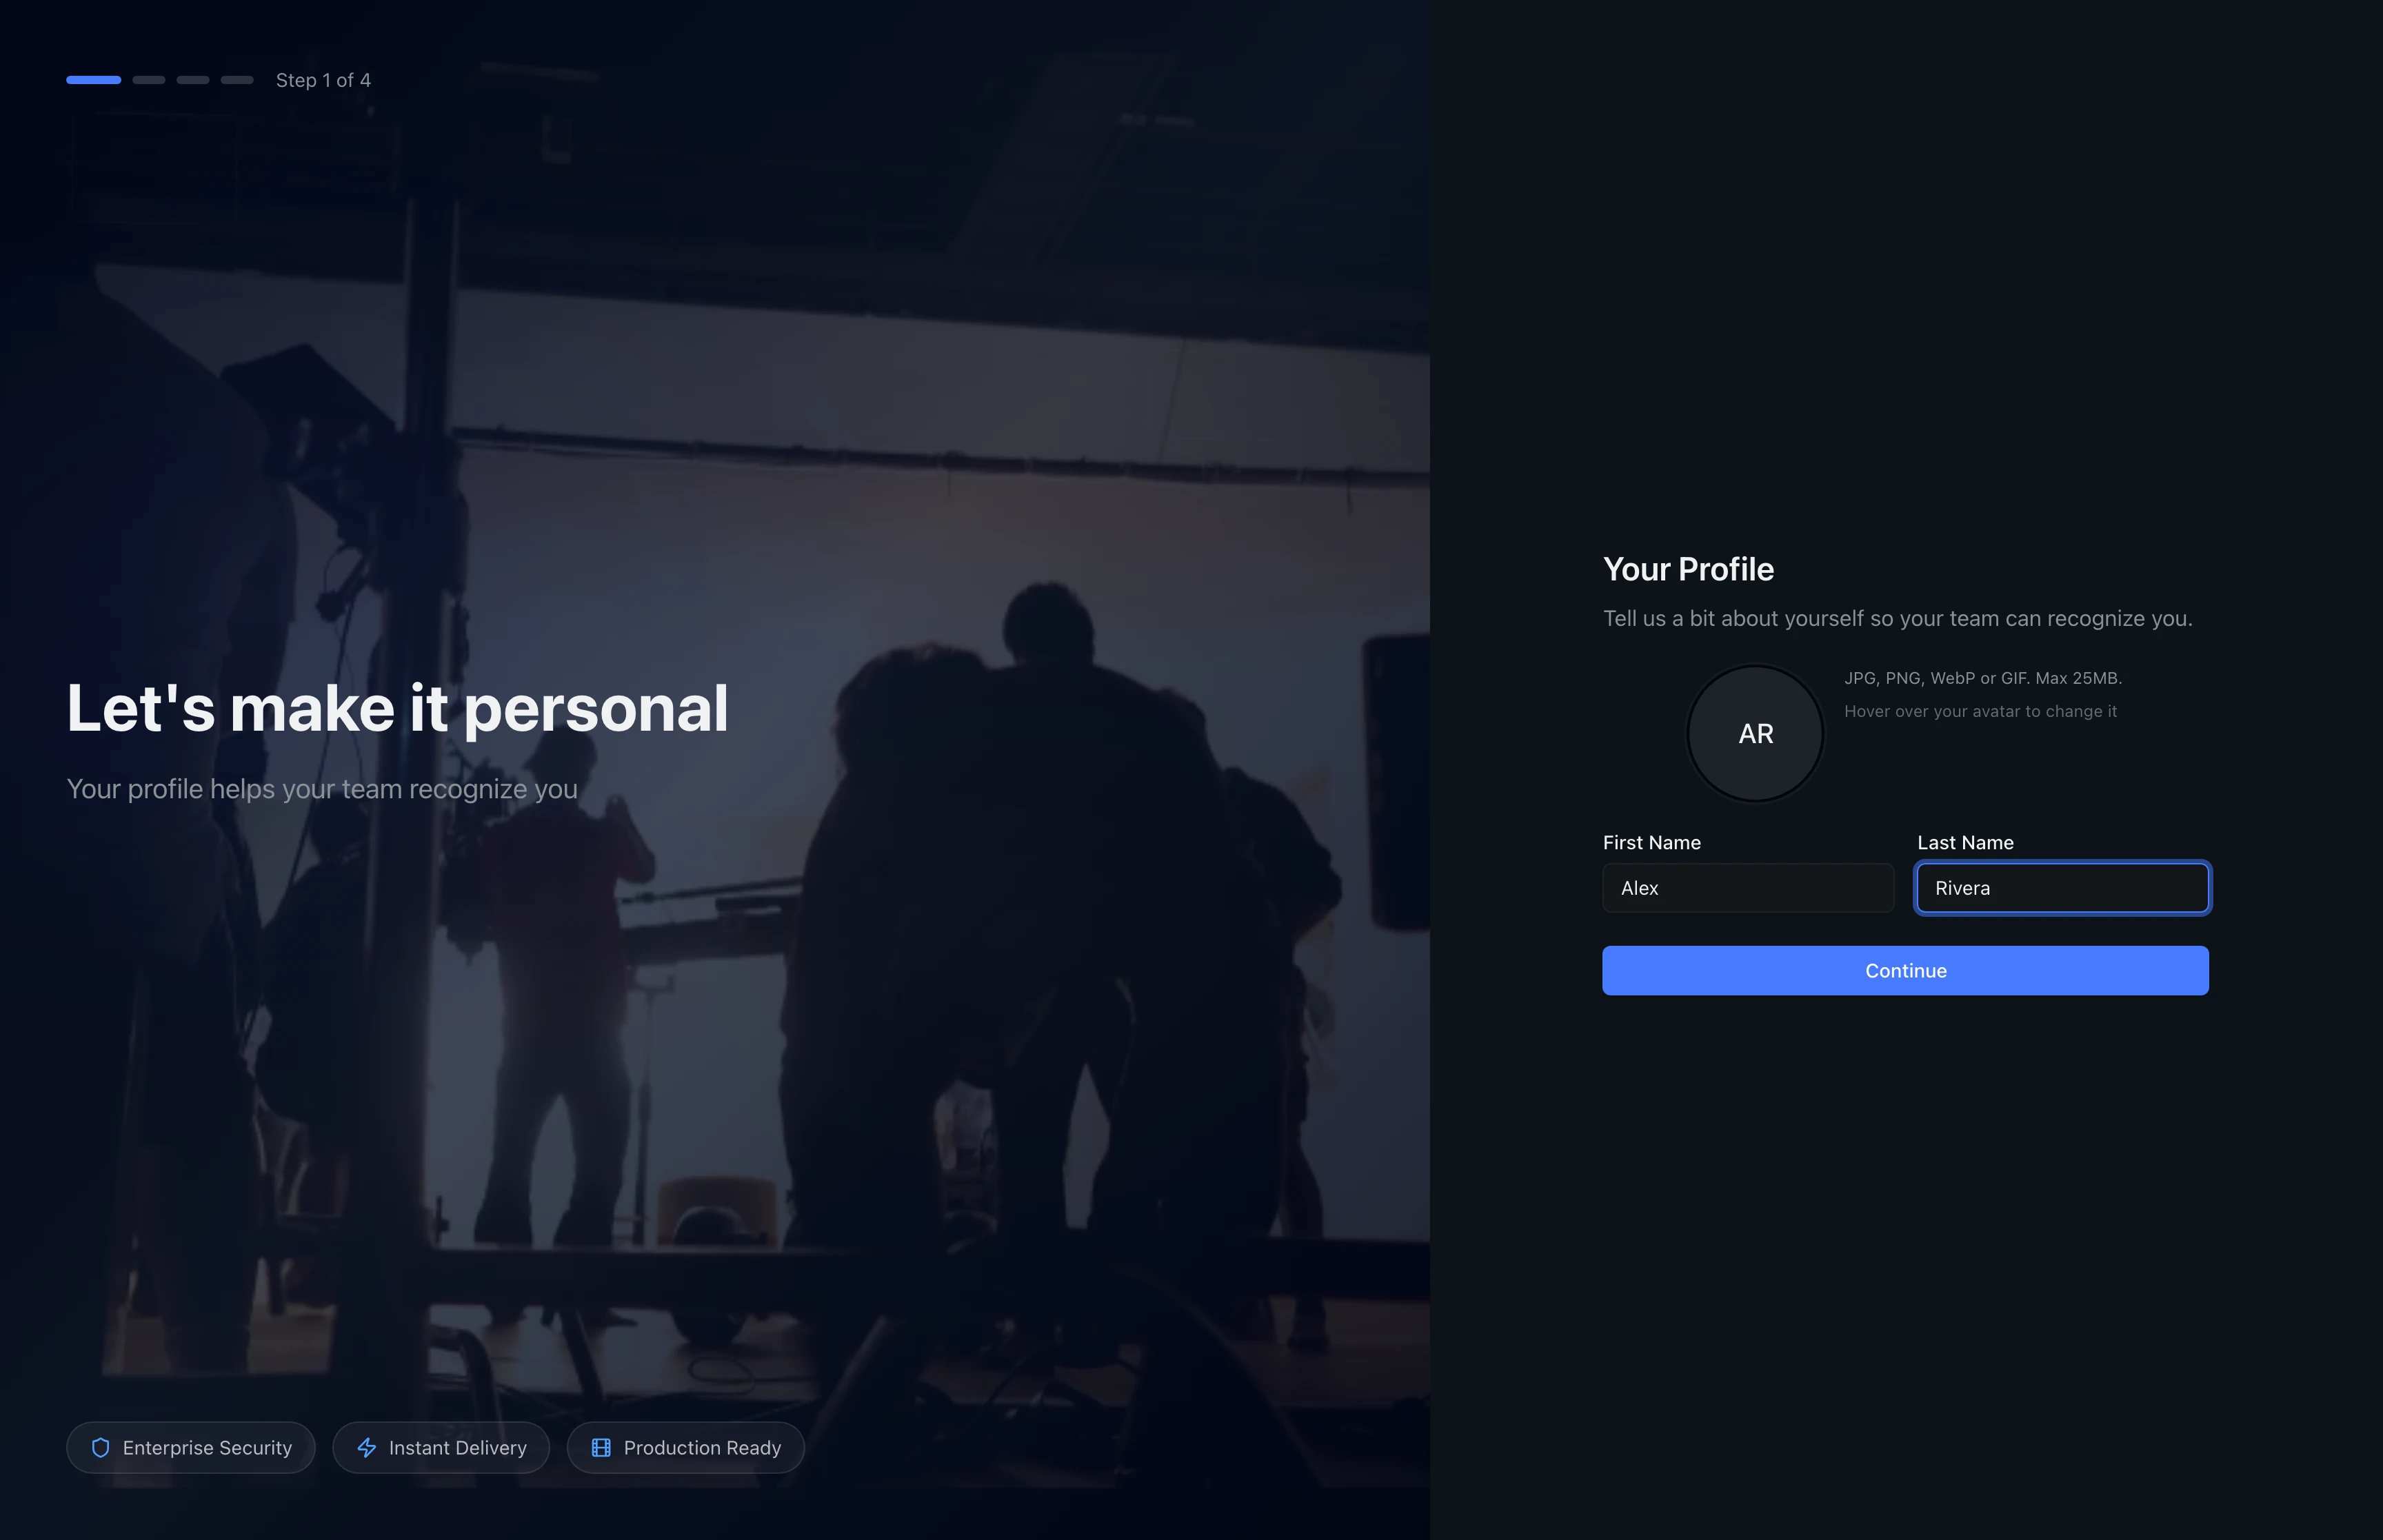
Click the avatar circle above the name fields to upload a profile photo. Supported formats are JPG, PNG, WebP, and GIF up to 2 MB. The photo appears next to your name in comments, approvals, and the team roster. You can skip the photo now and add one later in account settings.
Click Continue to save your profile and move to the next step.
Step 2: Name Your Studio
Enter a name for your studio in the Studio Name field. This is the organization name that appears in the sidebar, email invitations, and shared links. Use your company or production house name so team members recognize it when they receive their invitation.
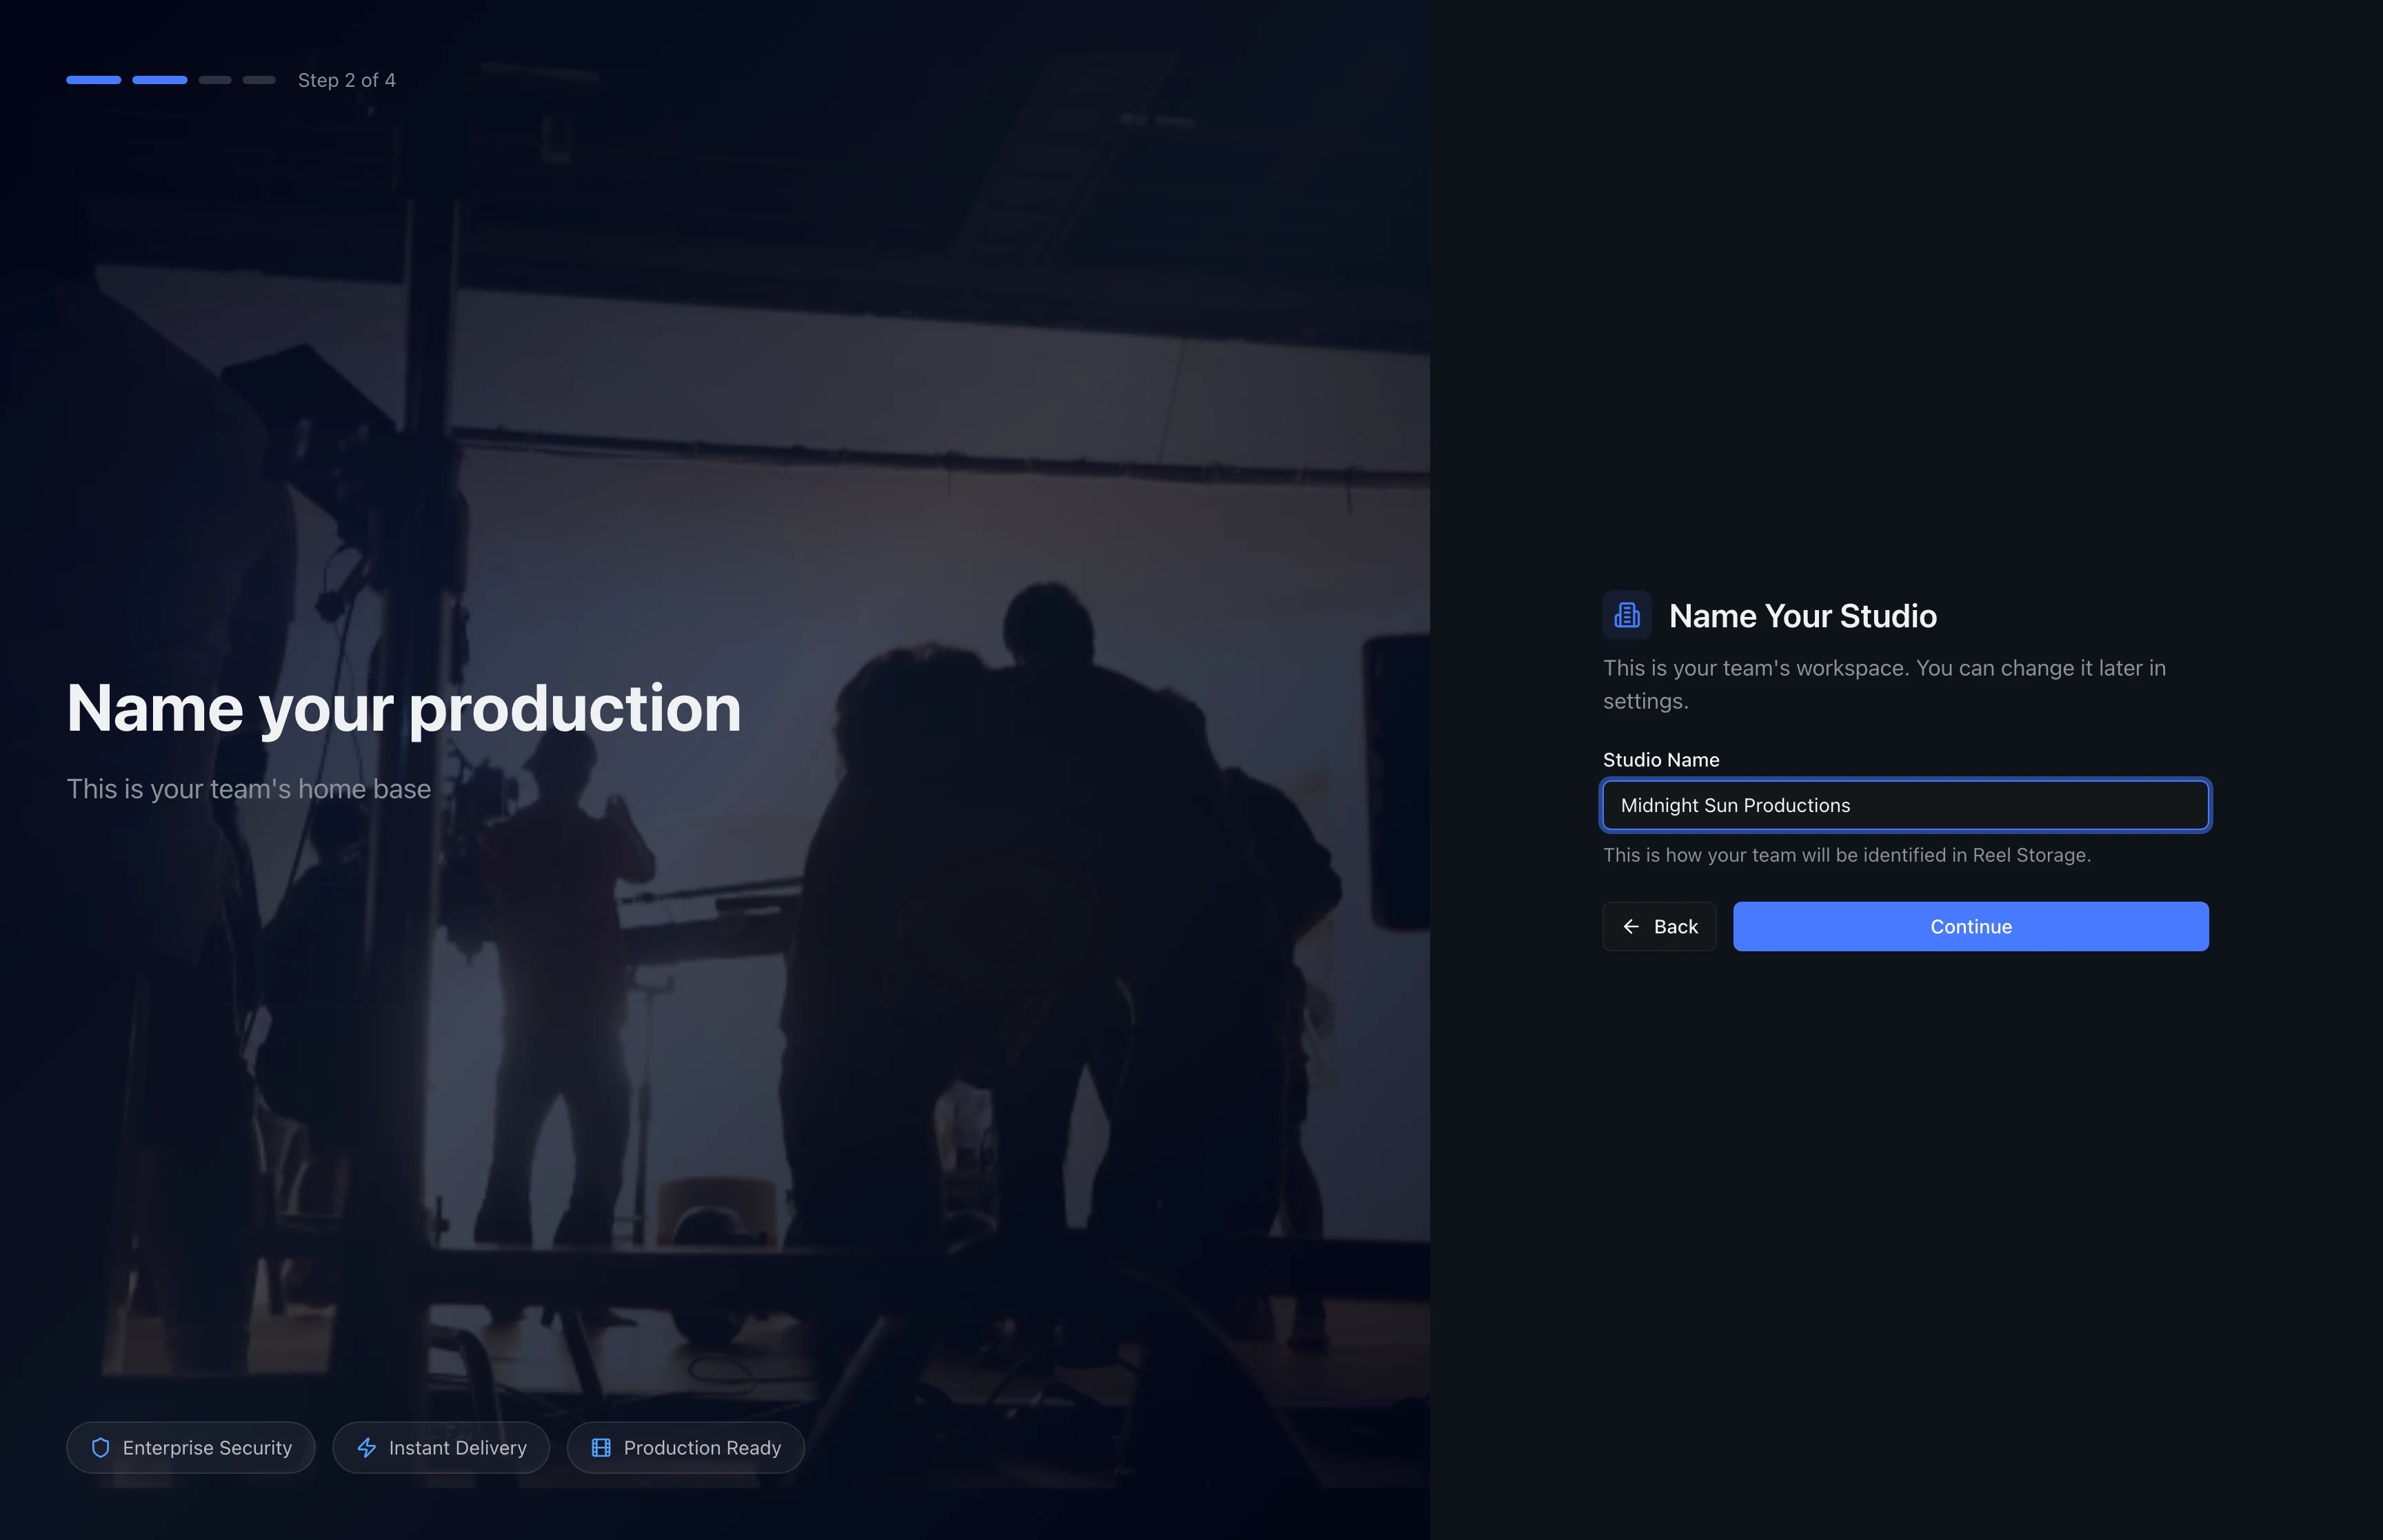
You can change the studio name at any time from Organization Settings > General. Click Continue when you are happy with the name.
If you work with multiple clients, name the studio after your company rather than a single project. You can create separate projects inside the studio for each client or campaign.
Step 3: Choose Your Plan
Select a billing plan for your studio. The Free plan is selected by default and includes 5 GB of storage, up to 5 projects, and basic support.
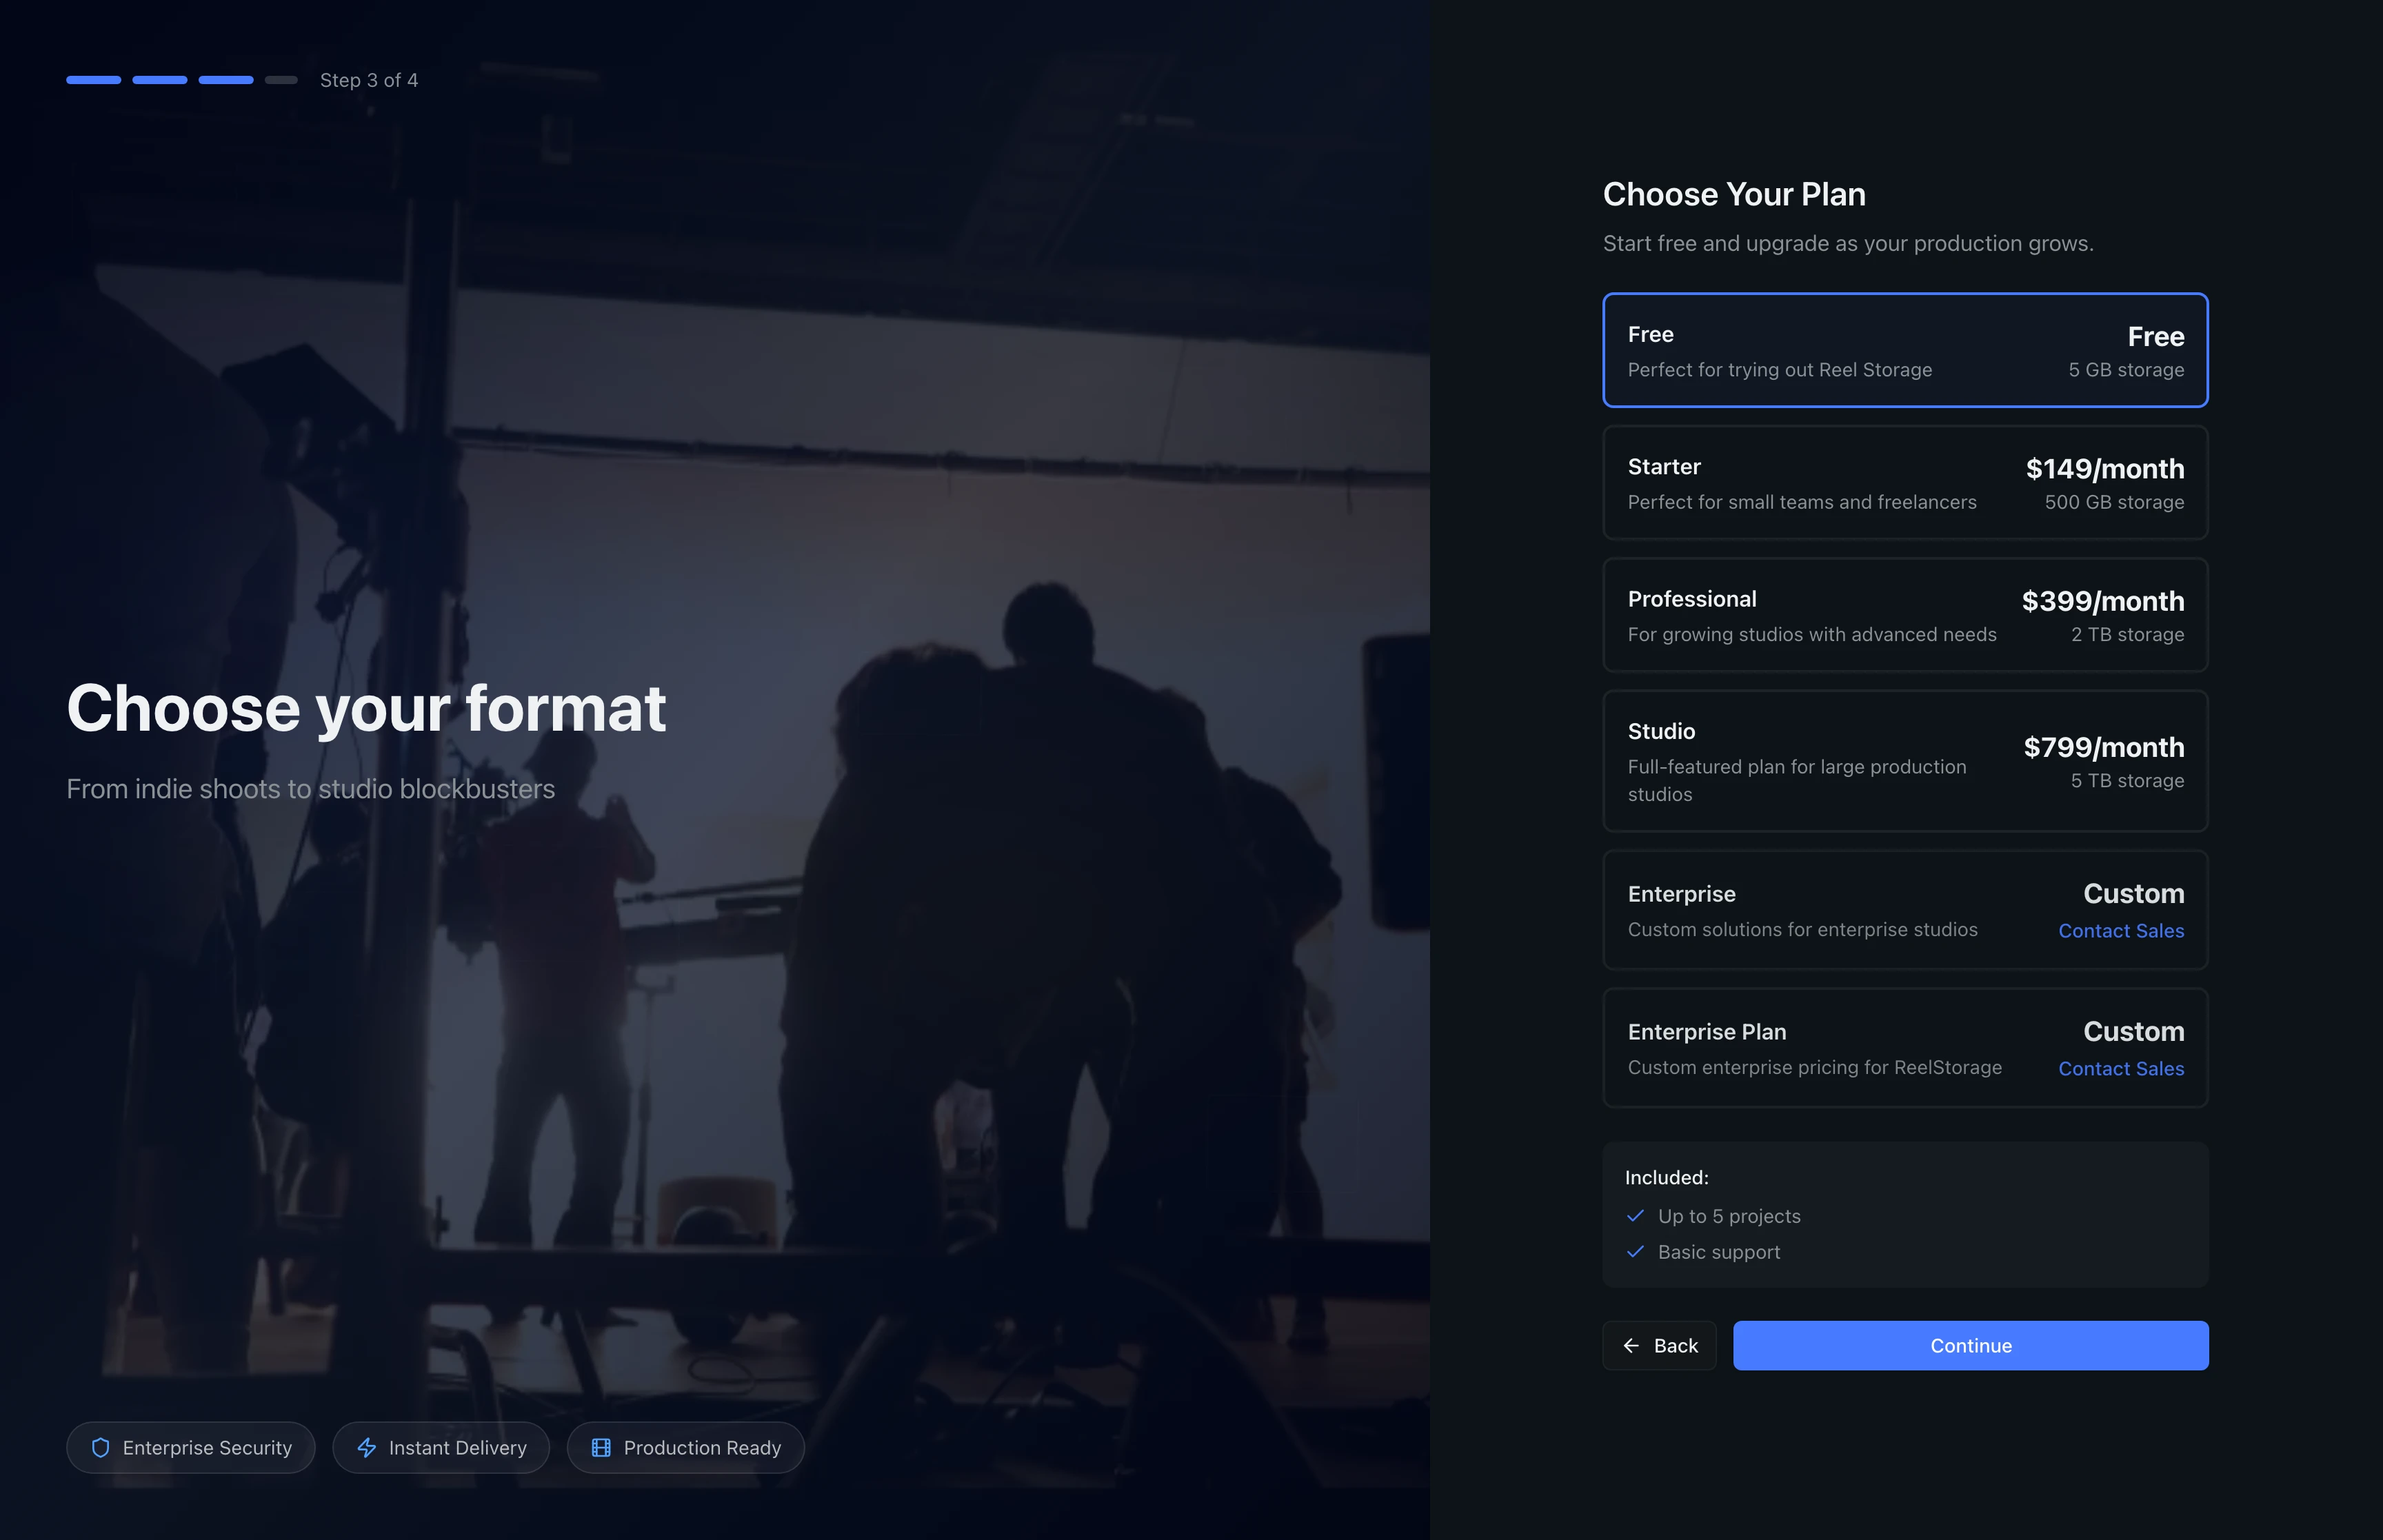
The "Included" section below the plan list updates to reflect the features of your selected plan. Click any paid plan to see its storage allocation, pricing, and feature list. Paid plans unlock more storage, priority support, and advanced features like custom branding.
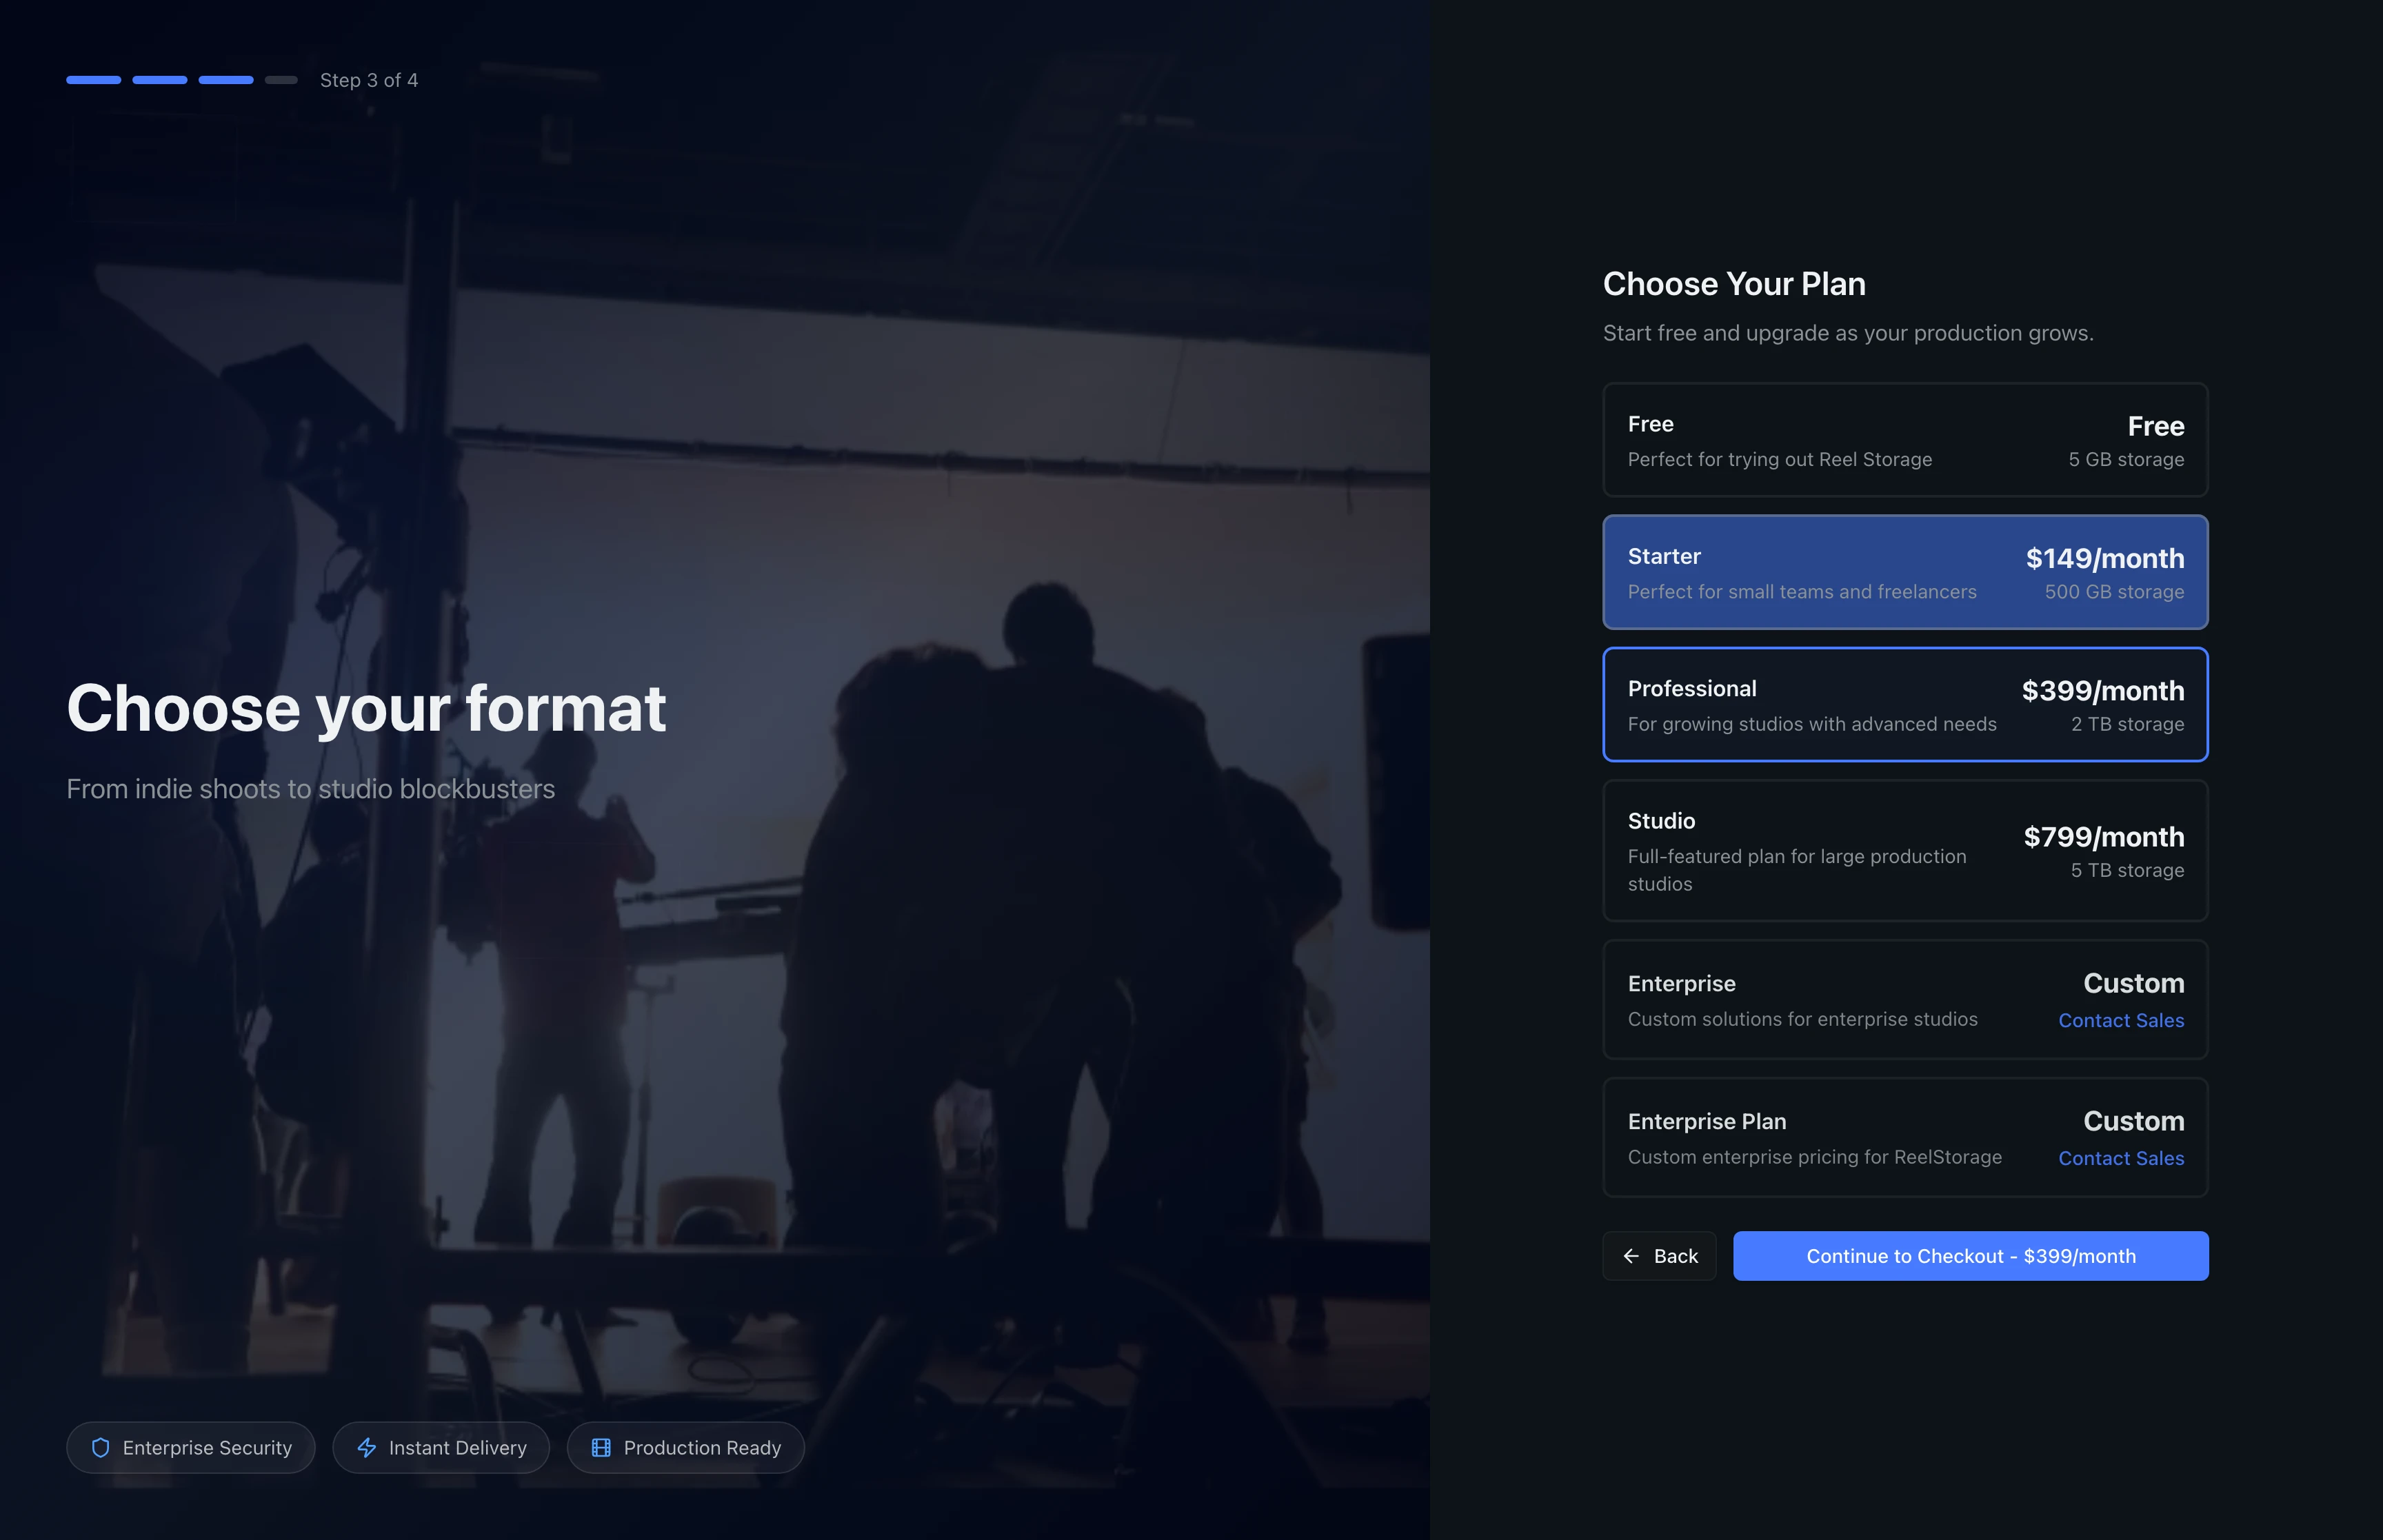
When you select a paid plan, the button changes to Continue to Checkout and shows the monthly price. You complete payment through a secure Stripe checkout after onboarding finishes. You can upgrade or downgrade at any time from the Billing page in your organization settings.
Click Continue to move to the final step.
Step 4: Invite Your Team
Add team members by entering their email addresses. Each person receives an invitation email with a link to join your studio. Type an email address into the first field to get started.
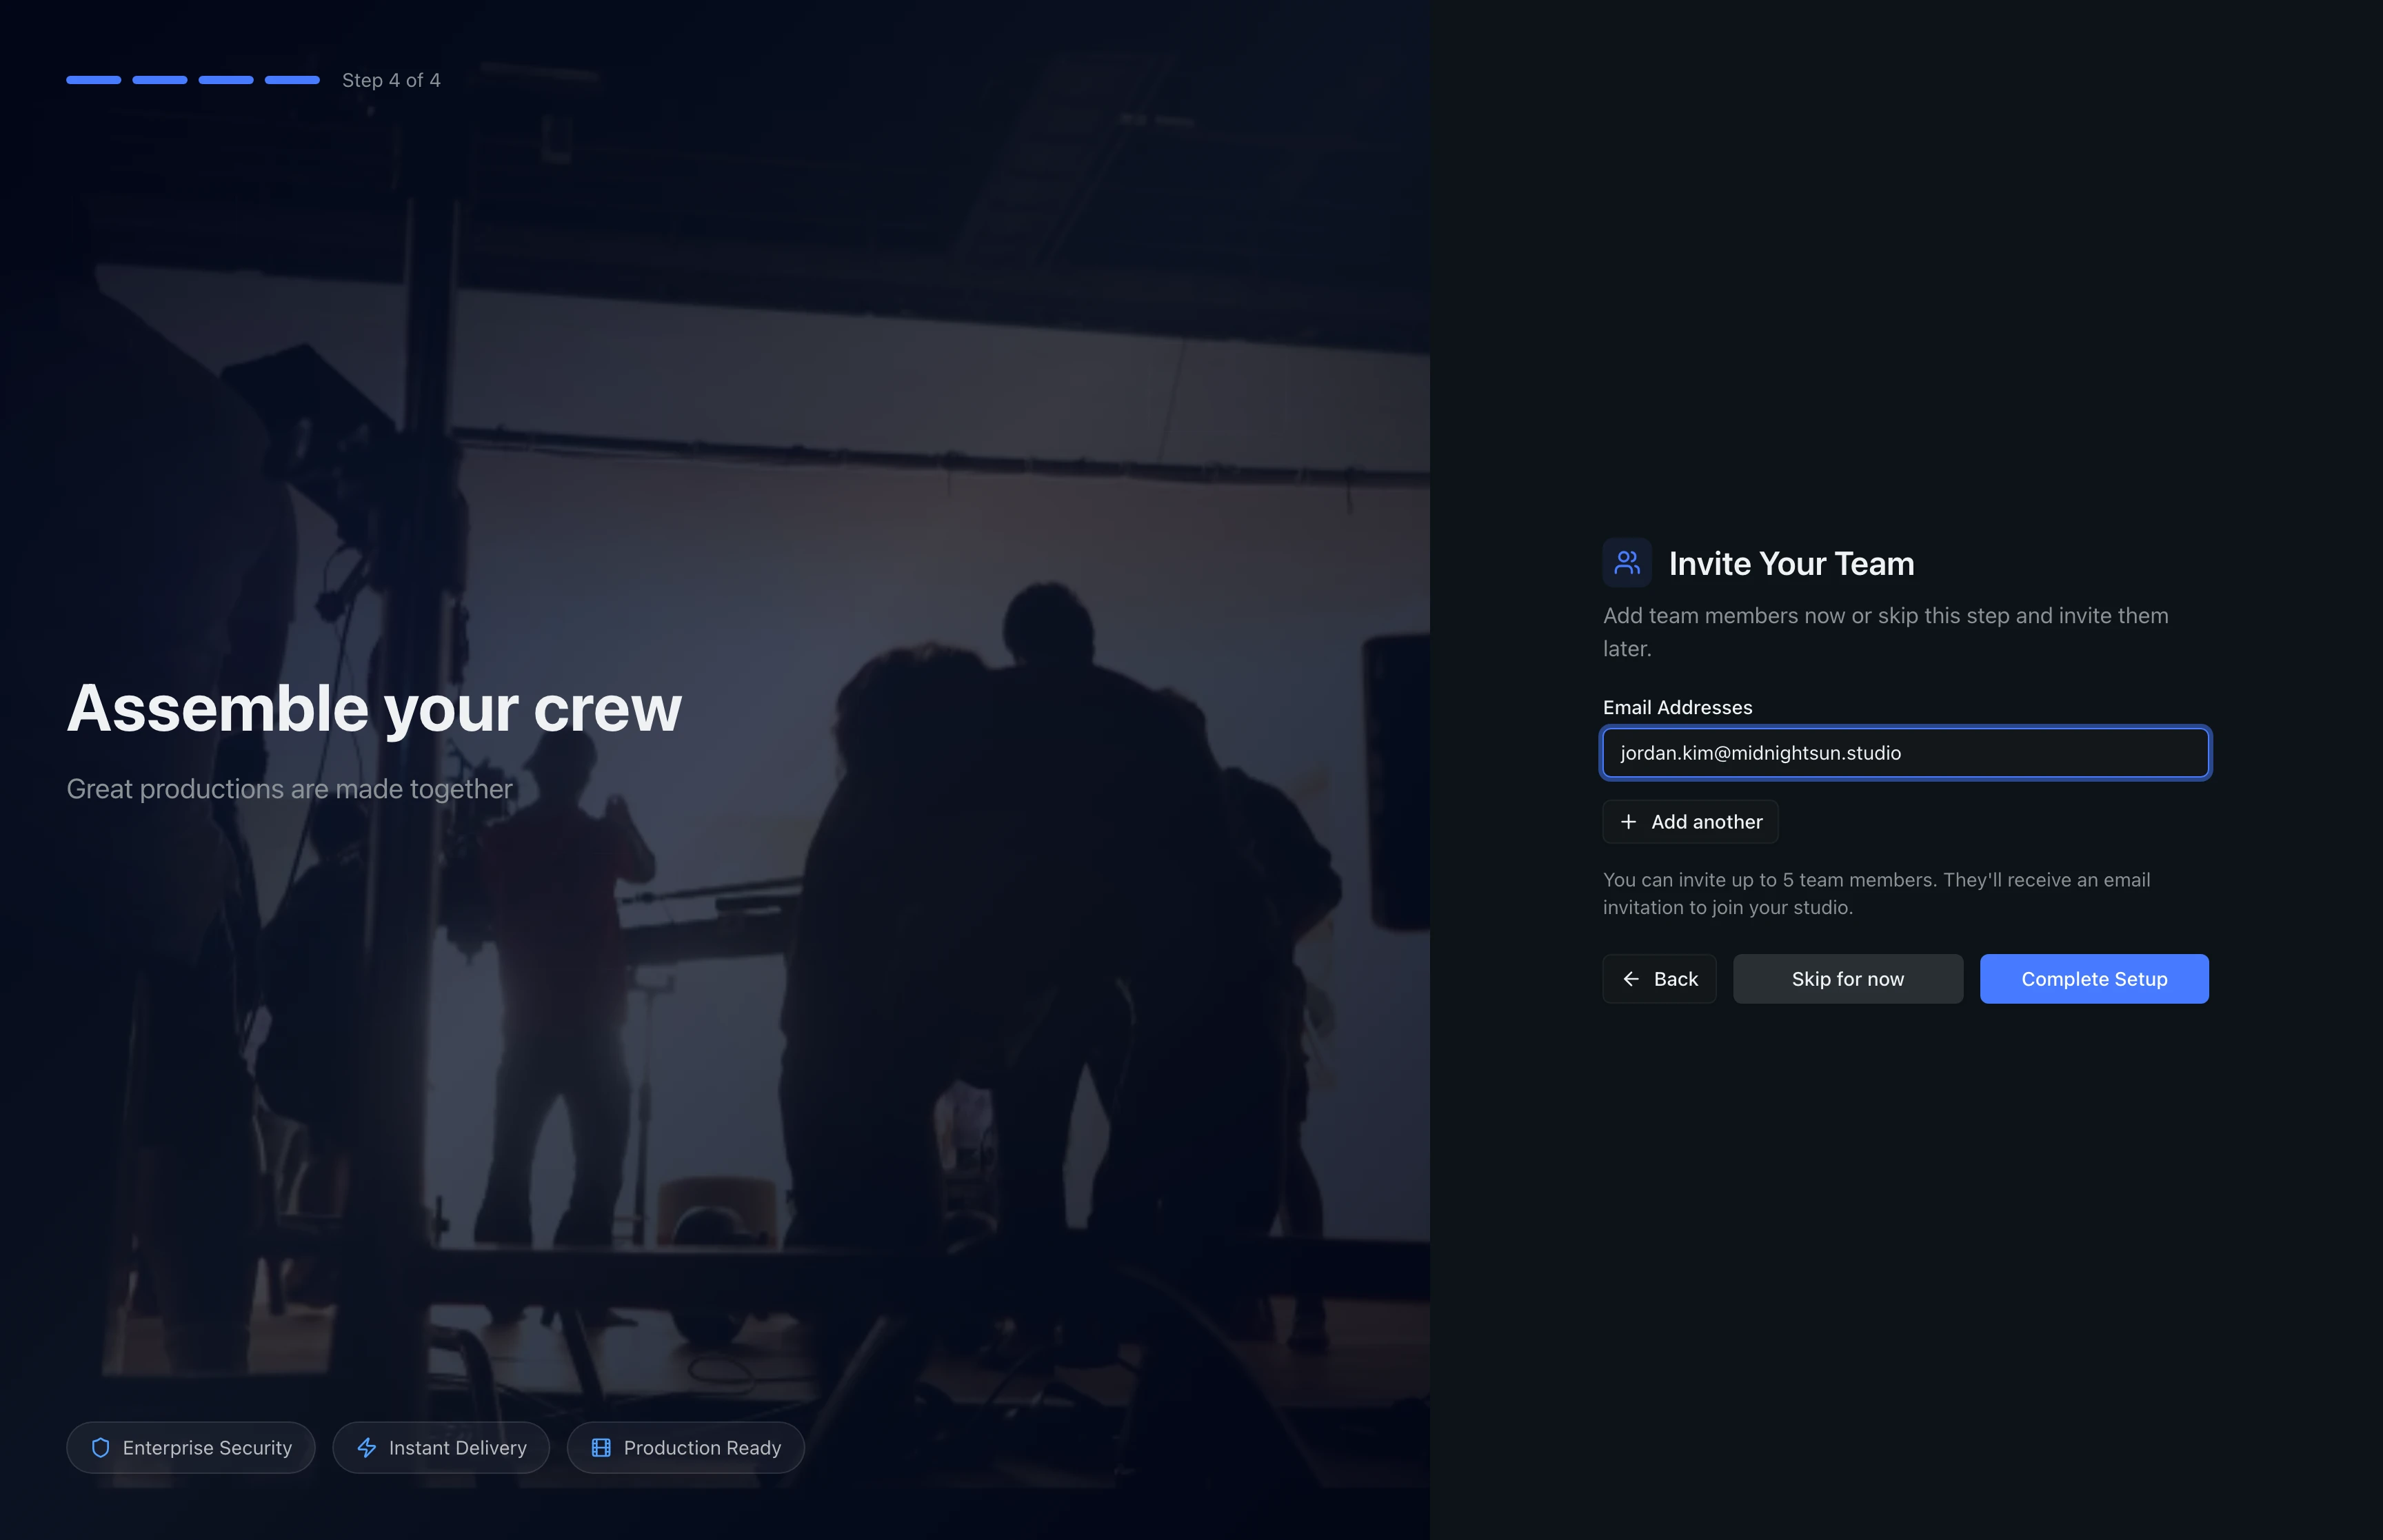
Click Add another to reveal additional email fields. You can invite up to five people during onboarding. Each invited member joins with a default "member" role, which you can change later from the organization members page.
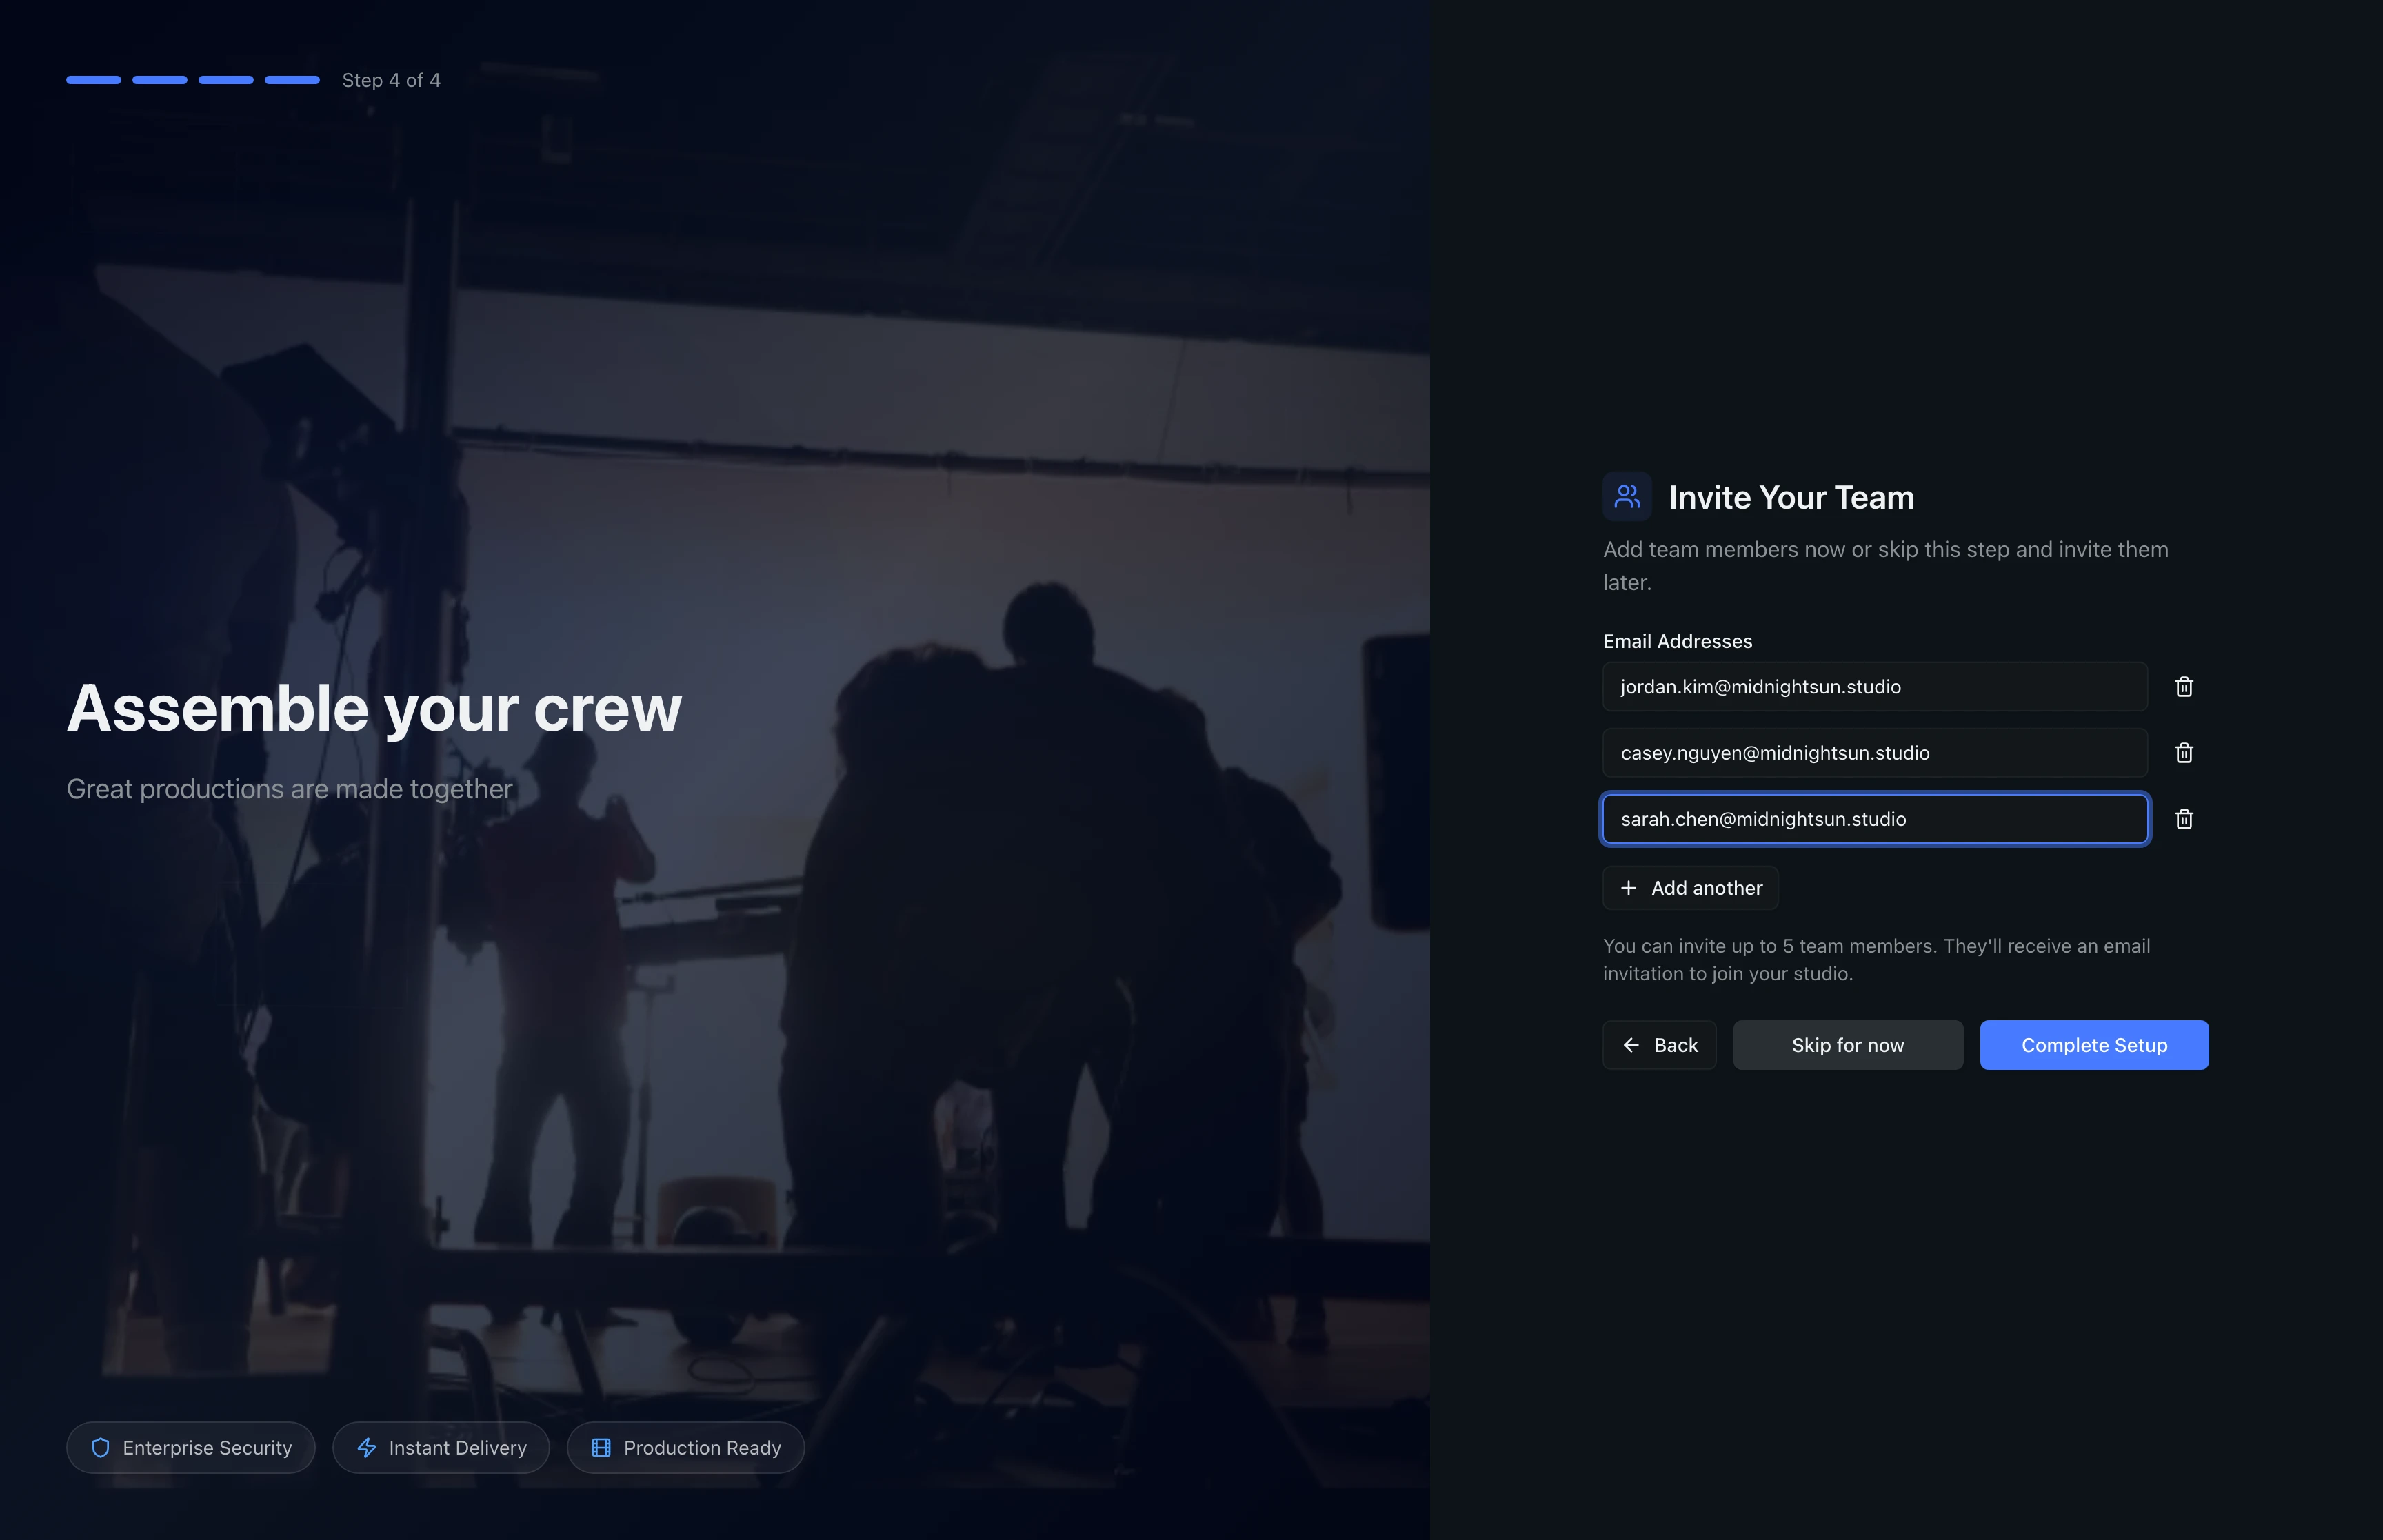
When you add multiple emails, a trash icon appears next to each field so you can remove individual entries. If you are not ready to invite anyone yet, click Skip for now. You can always invite members later from the organization settings page.
Click Complete Setup to finish onboarding and open your dashboard.
Invitations expire after 7 days. If a team member does not accept in time, resend the invitation from the organization members page.
Tips
- Use your company name for the studio, not a project name. You will create projects inside the studio for each campaign or shoot.
- Start with the Free plan to explore all core features. Upgrading later preserves all your data, projects, and team members.
- Invite your core team during onboarding so everyone can start uploading and organizing assets right away, rather than waiting for manual invitations later.
Troubleshooting
I accidentally skipped the team invitation step
Go to Organization Settings from the sidebar and open the Members tab to send invitations at any time.
Can I change my studio name after onboarding?
Yes. Open Organization Settings and update the name in the General section. The change takes effect immediately for all team members.
I chose the wrong plan
Switch plans from the Billing page in your organization settings. Upgrades take effect immediately. Downgrades apply at the end of your current billing period.
What's Next
- Using the Dashboard: Explore your new dashboard, view stats, and create your first project.
- Creating Your Account: If you have not signed up yet, start here.
Related Guides
Creating Your Account
Create your ReelStorage account with a secure password and verify your email to get started with the platform.
Using the Dashboard
Get an overview of your studio with the dashboard, including project stats, recent activity, approvals, collections insights, and quick actions.